List properties
Besides the basic functionality of creating ordered and unordered lists, CKEditor 5 offers formatting tools that let you control the lists. You can enable features such as customizing list markers with additional styles, setting the start index, or reversing the list order separately or all at once. Check out the individual demos below or see all list properties working together in the feature-rich editor example.
The list style feature introduces more styles for the list item markers. When enabled, it adds three styles for unordered lists and six styles for ordered lists to choose from. The user will be able to set or change the list style via the dropdown. It opens when you click the arrow next to the appropriate list button in the toolbar.
In the editor below, use the ordered or unordered list dropdown to choose the desired marker type for each list.
Historical and modern manned spacecraft
- Soyuz (Soviet/Russian)
- The 7K early line (all retired)
- 7K-OK
- 7KT-OK
- 7K-T
- 7K-TM
- Soyuz T (retired)
- Soyuz TM and further modifications (retired)
- Soyuz MS
- STS orbiter (American; all retired)
- Columbia
- Challenger
- Discovery
- Atlantis
- Endeavour
- SpaceX Crew Dragon (American)
- Shenzhou (Chinese)
The list start index feature allows the user to choose the starting point of an ordered list. By default, this would be 1 (or A, or I – see the list styles section). Sometimes you may want to start a list with some other digit or letter, though.
When this feature is enabled, an extra dropdown option is available in the ordered list toolbar button. Thanks to it, the user may set or change the starting marker.
In the editor below, notice how the ordering continues in the second list. To achieve continuous numbering of all spaceships from the example, go to the first item of the last list. Then use the ordered list dropdown input field to set the start index.
A list of human spacecraft
Soviet and Russian spaceships:
- Vostok
- Voskhod
- Soyuz
- Progress (cargo)
American spaceships:
- Mercury
- Gemini
- Apollo
- space shuttle
- Dragon
Chinese spaceships:
- Shenzhou
- Tianzhou (cargo)
The reversed list feature lets the user reverse the numbering order of a list, changing it from ascending to descending. This is useful in countdowns and things-to-do lists that need to reproduce steps in a reversed order (for example, in disassembly instructions).
When this feature is enabled, an extra dropdown switch is available in the ordered list toolbar button. Thanks to it, the user may reverse the order of a list with a single click.
Click the second list and use the ordered list dropdown switch to choose whether to reverse the numbering order.
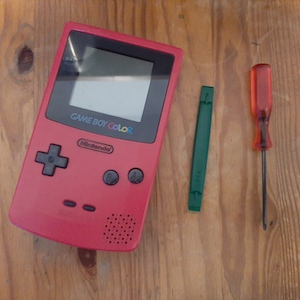
Replacing the screen of your Nintendo Game Boy

Disassembling the console
- Remove the game cartridge from the slot. Open the battery compartment and remove the batteries.
- Remove the six triwing (Y-type screwdriver needed) screws located at the top and middle of the back case and inside the battery compartment.
- Separate the front and back case halves. Be extra careful not to pull the cable ribbon that connects both parts. Detach the ribbon carefully.
- Remove the ten Philips screws holding the mainboard to the front case. Carefully take the mainboard out of the case.
- Detach three plastic clips on the backside of the board and remove two Philips screws on the front, below the screen.
- Desolder the display connectors from the mainboard.
Reassembling the console
- Solder the display connector to the mainboard.
- Fasten the two screws below the screen and reattach three plastic clips on the backside of the mainboard
- Put the mainboard carefully inside the front case and screw in ten Philips screws holding the mainboard.
- Reattach the main cable ribbon to the back casing and put the case halves together.
- Fasten the six triwing screws inside the battery compartment and on the back of the case.
- Reload three AA-size batteries, close the compartment cover, and insert your favorite game cartridge to play!
You can see all the list properties together in action in the Feature-rich editor and Document editor examples.
The list item marker formatting feature automatically applies text formatting to list item markers when the entire content of the list item shares the same formatting. It integrates with the font feature and basic styles feature, supporting the following formatting options:
- Bold and italic (from basic styles),
- Font color, font size, and font family (from font).
When this feature is enabled, if the whole list item content is consistently styled using any of the supported formats, the bullet or number marker will reflect the same style automatically. For example, if a list item is entirely bold, its marker will appear bold as well.
Select the entire content of a list item and apply a format like bold, italic, or a font style. If the whole item is formatted, the list marker will automatically update to match.
- Font family
- Font size
- Font color
- Bold
- Italic
This feature is enabled by default. To disable it, use the following configuration:
import { ClassicEditor, List, Bold } from 'ckeditor5';

ClassicEditor
	.create( document.querySelector( '#editor' ), {
		licenseKey: '<YOUR_LICENSE_KEY>', // Or 'GPL'.
		plugins: [ List, Bold, /* ... */ ],
		toolbar: [ 'bulletedList', 'numberedList', 'bold', /* ... */ ]
		list: {
			enableListItemMarkerFormatting: false
		}
	} )
	.then( /* ... */ )
	.catch( /* ... */ );