


CKFinder Integration
The aim of this article is to explain how to integrate CKEditor 4 with CKFinder, a powerful and easy to use Ajax file manager and uploader. See the demo for a live demonstration.
CKFinder is a commercial application that was designed with CKEditor compatibility in mind. It is currently available as version 3.x for PHP, ASP.NET and Java and version 2.x for ASP and ColdFusion.
#CKFinder 3
CKFinder 3 is available for PHP, ASP.NET and Java.
The integration with CKFinder 3 can be conducted in two ways:
- Using the
CKFinder.setupCKEditor()method. - Manually, by passing additional configuration settings to the CKEditor instance.
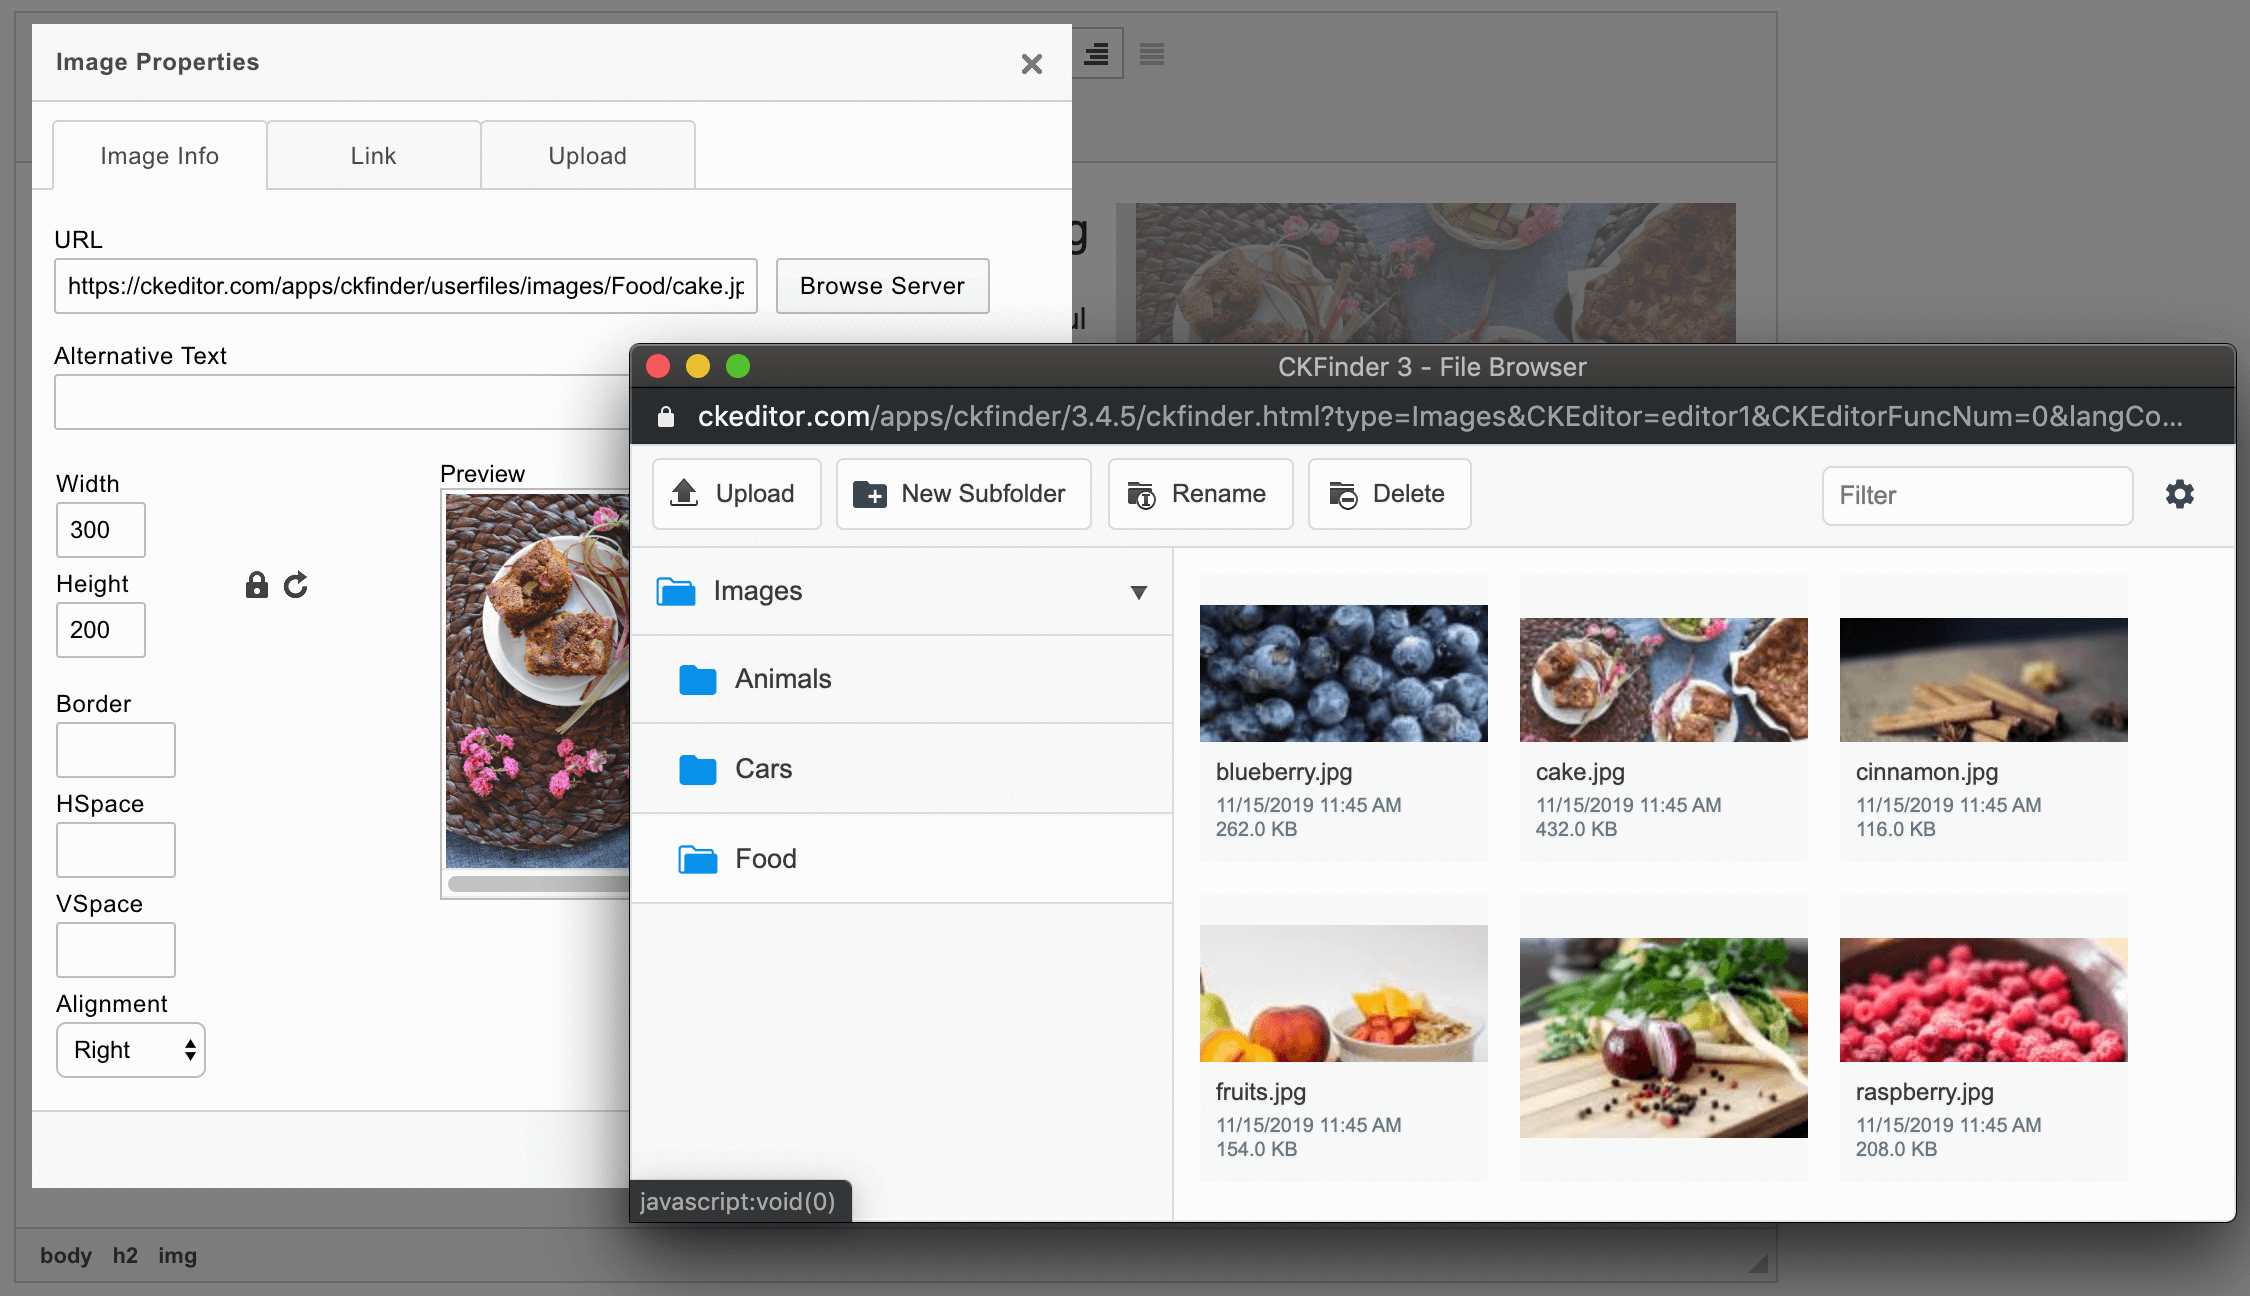
The image below shows CKFinder 3 integrated with CKEditor 4, with the file manager being opened from the editor Image Properties dialog window.
#Using CKFinder.setupCKEditor()
The simplest way to integrate CKFinder 3 with CKEditor 4 is using the CKFinder.setupCKEditor() method.
This method takes the CKEditor instance which will be set up as the first argument (editor). If no argument is passed or the editor argument is null, CKFinder will integrate with all CKEditor 4 instances.
var editor = CKEDITOR.replace( 'editor1' );
CKFinder.setupCKEditor( editor );
Please check the samples/ckeditor.html sample distributed with CKFinder 3 to see the full working example of this integration method.
Refer to the CKFinder 3 documentation for more details and examples of:
- Integrating CKFinder with a selected CKEditor 4 instance.
- Integrating CKFinder with all existing and future CKEditor 4 instances.
- Passing CKFinder configuration options while integrating with CKEditor 4.
#Manual Integration with Configuration Settings
In order to manually configure CKEditor 4 to use CKFinder, you need to pass additional configuration settings to the CKEditor instance.
For example, to enable CKFinder in a CKEditor instance using the same settings for all editor dialog windows:
CKEDITOR.replace( 'editor1', {
    filebrowserBrowseUrl: '/ckfinder/ckfinder.html',
    filebrowserUploadUrl: '/ckfinder/core/connector/php/connector.php?command=QuickUpload&type=Files',
    filebrowserWindowWidth: '1000',
    filebrowserWindowHeight: '700'
} );
See the CKFinder 3 documentation for more details and examples of:
- Setting the
config.filebrowserBrowseUrlandconfig.filebrowserUploadUrloptions. - Setting available resource types.
- Changing the file manager window size.
- Setting target resource type and target folder for quick uploads.
- Providing different configuration for selected CKEditor 4 dialog windows.
#CKFinder 2
The integration with CKFinder 2 may be conducted in two ways:
- By using the
CKFinder.setupCKEditor()method available in the CKFinder 2 API. - Manually, by setting CKEditor 4 configuration options.
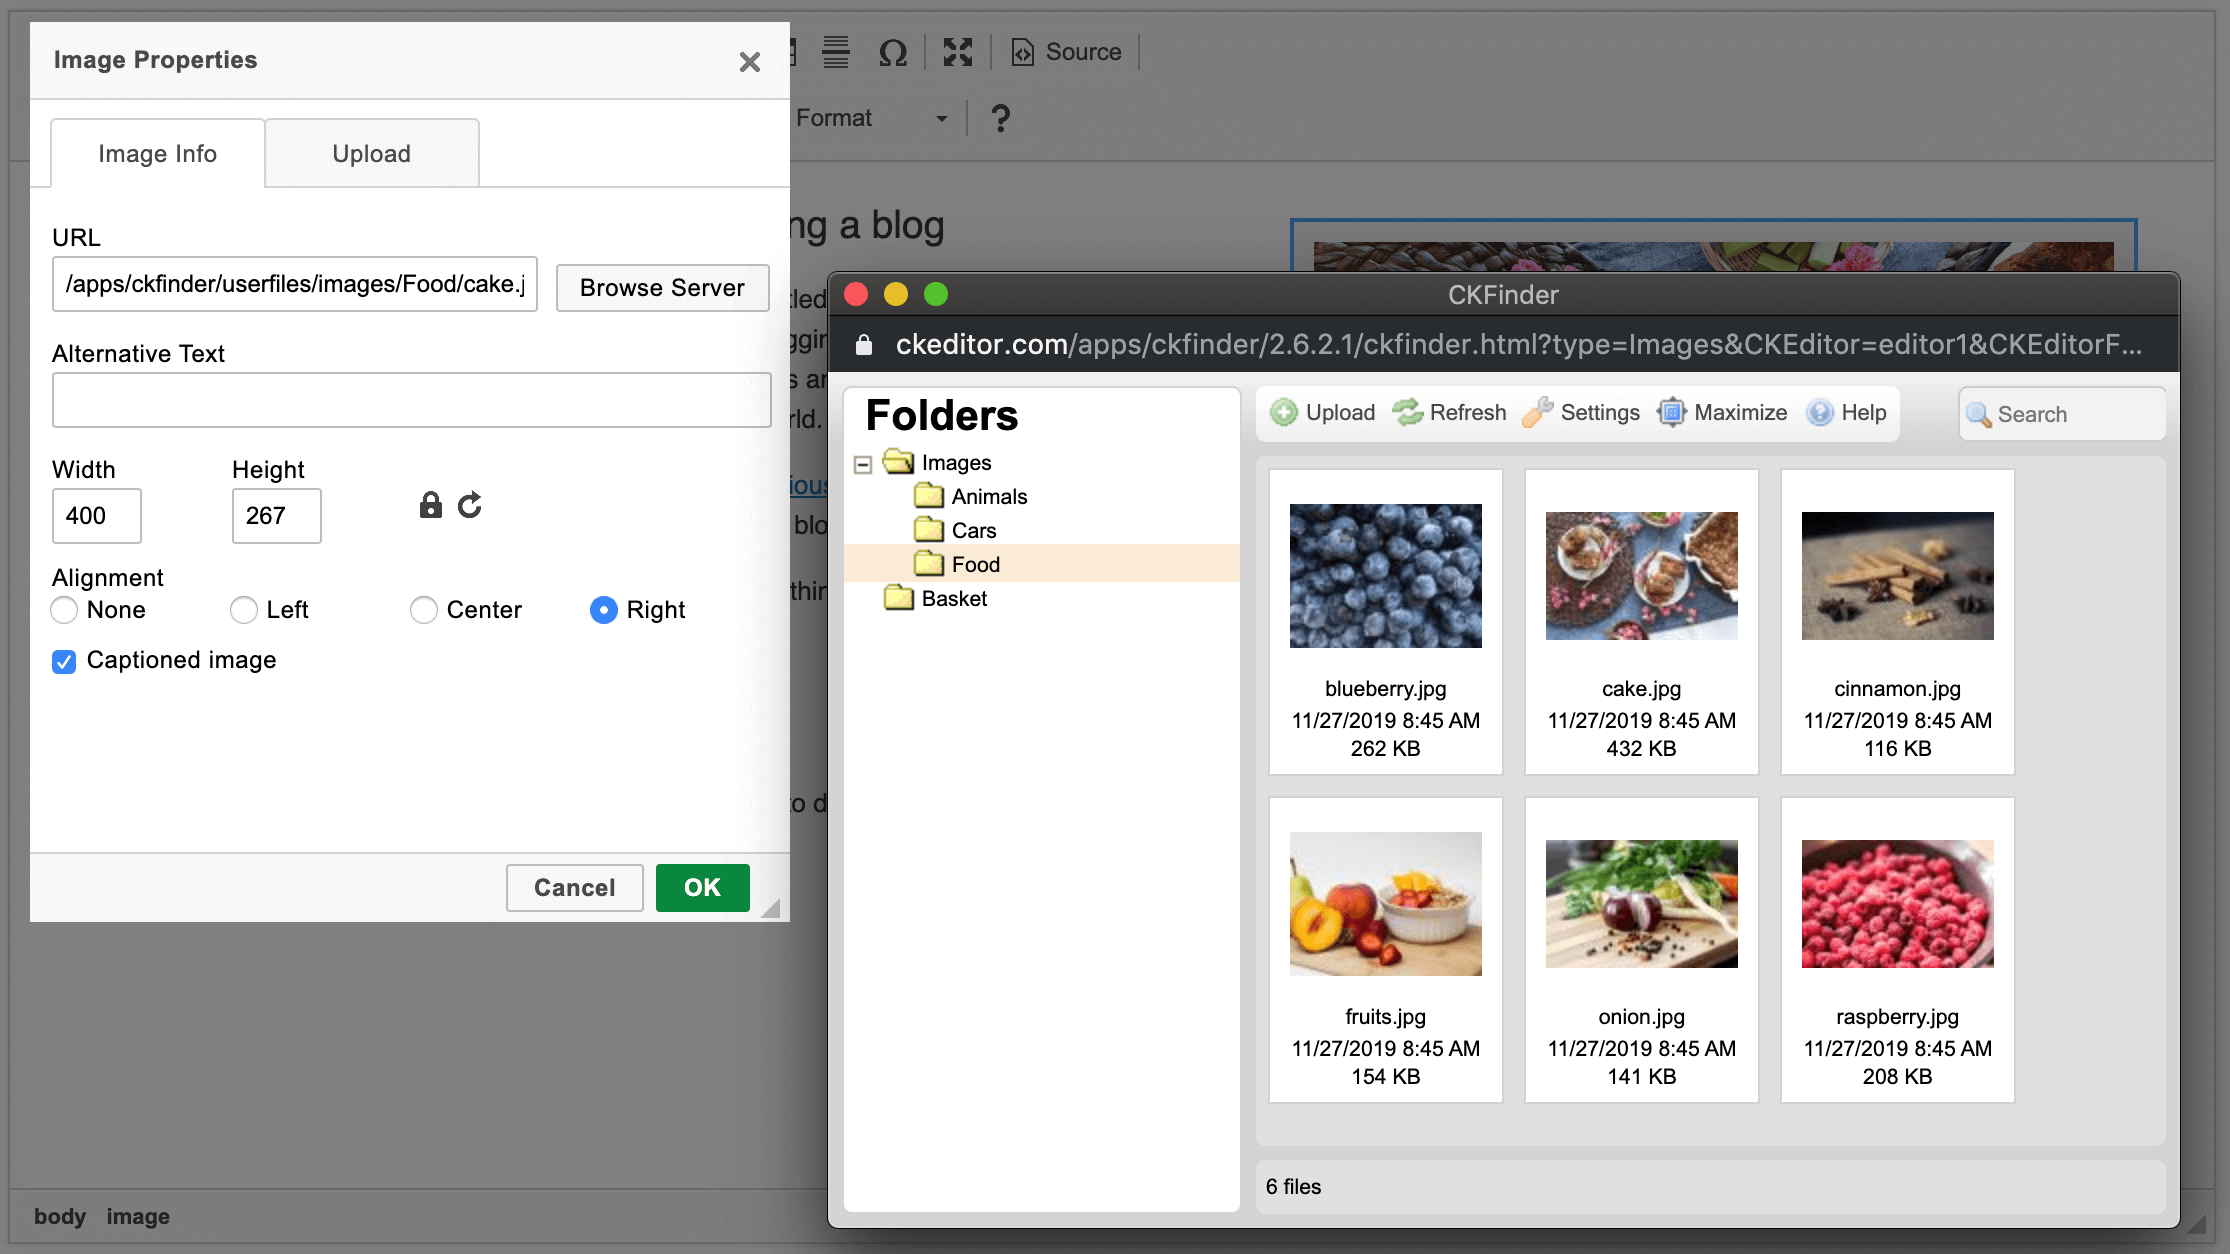
The image below shows CKFinder 2 integrated with CKEditor, with the file manager being opened from the editor Image Properties dialog window.
#Using CKFinder.setupCKEditor()
The example below shows the use of the CKFinder.setupCKEditor() method to insert a CKEditor 4 instance with CKFinder 2 integrated.
This method takes the CKEditor instance which will be set up as the first argument (editor). If no argument is passed or the editor argument is null, CKFinder will integrate with all CKEditor instances.
The second parameter of the CKFinder.setupCKEditor() method is the file manager configuration which may be just the path to the CKFinder installation.
var editor = CKEDITOR.replace( 'editor1' );
CKFinder.setupCKEditor( editor, '/ckfinder/' );
Please check the _samples/ckeditor.html sample distributed with CKFinder 2 to see the full working example of this integration method.
Refer to the appropriate “CKEditor Integration” article of the CKFinder 2 Developer’s Guide for more details and examples of:
- Integrating CKFinder with a selected CKEditor 4 instance.
- Integrating CKFinder with all existing and future CKEditor 4 instances.
- Passing CKFinder configuration options while integrating with CKEditor 4.
#Manual Integration with Configuration Settings
In order to manually configure CKEditor 4 to use CKFinder, you need to pass additional configuration settings to the CKEditor instance.
The sample below shows the configuration code that can be used to insert a CKEditor instance with CKFinder integrated. The browse and upload paths for images are configured separately from CKFinder default paths. The file manager window size was also set.
CKEDITOR.replace( 'editor1', {
    filebrowserBrowseUrl: '/ckfinder/ckfinder.html',
    filebrowserImageBrowseUrl: '/ckfinder/ckfinder.html?Type=Images',
    filebrowserUploadUrl: '/ckfinder/core/connector/php/connector.php?command=QuickUpload&type=Files',
    filebrowserImageUploadUrl: '/ckfinder/core/connector/php/connector.php?command=QuickUpload&type=Images',
    filebrowserWindowWidth : '1000',
    filebrowserWindowHeight : '700'
});
The example above is valid for the PHP environment. Note that /ckfinder/ is a base path to the CKFinder 2 installation directory.
If you are using CKFinder 2 for ASP, ASP.NET, Java, or ColdFusion, remember to change php above to the correct extension:
asp– CKFinder for ASPaspx– CKFinder for ASP.NETcfm– CKFinder for ColdFusionjava– CKFinder for Javaphp– CKFinder for PHP
#Further Reading
For more information on integrating CKEditor 4 with a file manager refer to the following articles: