Notifications
This feature was introduced in CKEditor 4.5. It is provided through optional plugins that are not included in the CKEditor 4 presets available from the Download site and need to be added to your custom build with online builder.
The optional Notification and Notification Aggregator plugins introduced in CKEditor 4.5 make it possible to show the user information about the status of selected operations directly in the editor.
The new notification system lets you display all sorts of information in a consistent way because all plugins using the notification API will show information in the same way. This API also allows you to integrate the editor’s notifications with your website (your CMS for example). Note that notifications do not work with dialog windows so no dialog should be displayed when the notification is to be shown.
There are four types of notifications available:
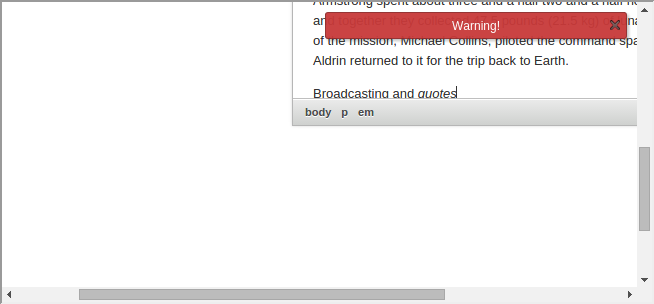
info(default) – Information for the user (e.g. “File is uploading.”, “ACF modified content.”).warning– A warning or an error message (e.g. “This type of file is not supported.”, “You cannot paste the script.”),success– Information about an operation that finished successfully (e.g. “File uploaded.”, “Data imported.”).progress– Information about the progress of an operation. When the operation is done, the notification type should be changed tosuccess.
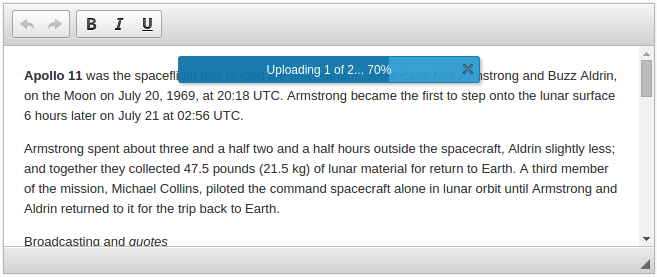
The image below shows an example of a success and a progress notification.

# Showing a Notification
To show a simple notification you need to create a notification instance and call the show method or you can use the showNotification shortcut:
// The editor needs the "notification" plugin.
var editor = CKEDITOR.replace( 'editor1', {
    extraPlugins: 'notification'
} );

editor.once( 'instanceReady', function() {
    // Create and show the notification.
    var notification1 = new CKEDITOR.plugins.notification( editor, {
        message: 'Error occurred',
        type: 'warning'
    } );
    notification1.show();

    // Use shortcut - it has the same result as above.
    var notification2 = editor.showNotification( 'Error occurred', 'warning' );
} );
Note that the showNotification method is available even without the Notification plugin. In such case an alert will be shown instead of the notification.
Once you create a notification you can update its state and even change its type:
var notification = editor.showNotification( 'Uploading...', 'progress', 0.25 );

// ...

notification.update( { progress: 0.75 } );

// ...

notification.update( { type: 'success', message: 'File uploaded.' } );
Note that a developer may implement the notification interface in a custom way, for example to show the notification with a slide-in animation. In such case updating one notification is not the same as hiding one and showing another. One notification should show the status of one process, so it is better to update it to the success type instead of creating a new one every time the status changes.
To learn more about the notification API, check the notification documentation.
# Notification Interface
By default notifications are displayed at the top center of the editable area. However, they try to be visible as long as possible without leaving the editable area. It means that notifications will move if a part of the editable will be out of the viewport, so you can edit a very long document and the notification will still be visible. The notifications also move below the toolbar if you are using the floating user interface, but they will not be visible at all if the editor is not visible at all.

Notifications can also hide after a timeout.
- By default,
infoandsuccessnotifications hide after 5 seconds — this can be changed using thenotification_durationoption. The notification duration can also be changed on an instance basis. - The
warningnotifications need to be hidden manually. - The
progressnotifications are also not hidden automatically. They wait for the next progress update and to be finally changed tosuccessorwarning.
The user can always hide notifications manually by using the X button or the Esc key.
If you want to make sure that a notification will be shown after an update, that update needs to be marked as
important. This matters also with regard to accessibility — important updates will be read by screen readers while the rest of the updates will not, because we do not want to spam the user with tons of messages if a notification is updated very often.
# Notification Integration
If you want to replace the standard notification interface with a custom one or you want to integrate editor notifications with your website or CMS, you can do it by listening to notification events: notificationShow, notificationUpdate and notificationHide.
To prevent notifications from being shown it is not enough to prevent event-notificationShow, but you need to cancel event-notificationUpdate too, otherwise important updates will display the notification.
editor.on( 'notificationShow', function( evt ) {
    alert( evt.data.notification.message );

    // Do not show the default notification.
    evt.cancel();
} );

editor.on( 'notificationUpdate', function( evt ) {
    // Do not show the notification even if the update was important.
    evt.cancel();
} );
Note that if you cancel the event-notificationUpdate event, it only means that the notification will not be shown even if the update was important. The notification object will be updated anyway, including the element property, so you do not need to do it manually. The event is fired before updating the notification object, so it is possible to compare old and new values:
editor.on( 'notificationUpdate', function( evt ) {
    if( evt.data.options && evt.data.options.message != evt.data.notification.message ) {
        alert( 'Message changed!');
    }
} );
If you cancel the event-notificationHide event, the notification will not be hidden. In this case it will not matter whether the defined notification duration passed or the user pressed the X button or Esc.
# Notification Aggregator
If you want to show one notification aggregating many small tasks, you can use the notification aggregator.

// The editor needs the "notificationaggregator" plugin.
var editor = CKEDITOR.replace( 'editor1', {
    extraPlugins: 'notificationaggregator'
} );

editor.once( 'instanceReady', function() {
    // Create a notification aggregator with the description template.
    var aggregator = new CKEDITOR.plugins.notificationAggregator( editor, 'Uploading {current} of {max}... {percentage}%' );

    // Create two tasks with different weights and add them to the aggregator.
    var task1 = aggregator.createTask( { weight: 60 } ),
        task2 = aggregator.createTask( { weight: 40 } );

    // Finish the first task (100% done of the first task and 60% (=60/(60+40)) of the total).
    task1.done();

    // Update the second task (25% (10/40) done of the second task and 70% (=(60+10)/(60+40)) of the total).
    task2.update( 10 );
} );
It is also possible to create a separate template for a single item message, so that it would not look strange if the aggregator was handling only one task (for example: Loading file. instead of Loading files 1 of 1.).
To learn more about the notification aggregator check notificationAggregator and task.


