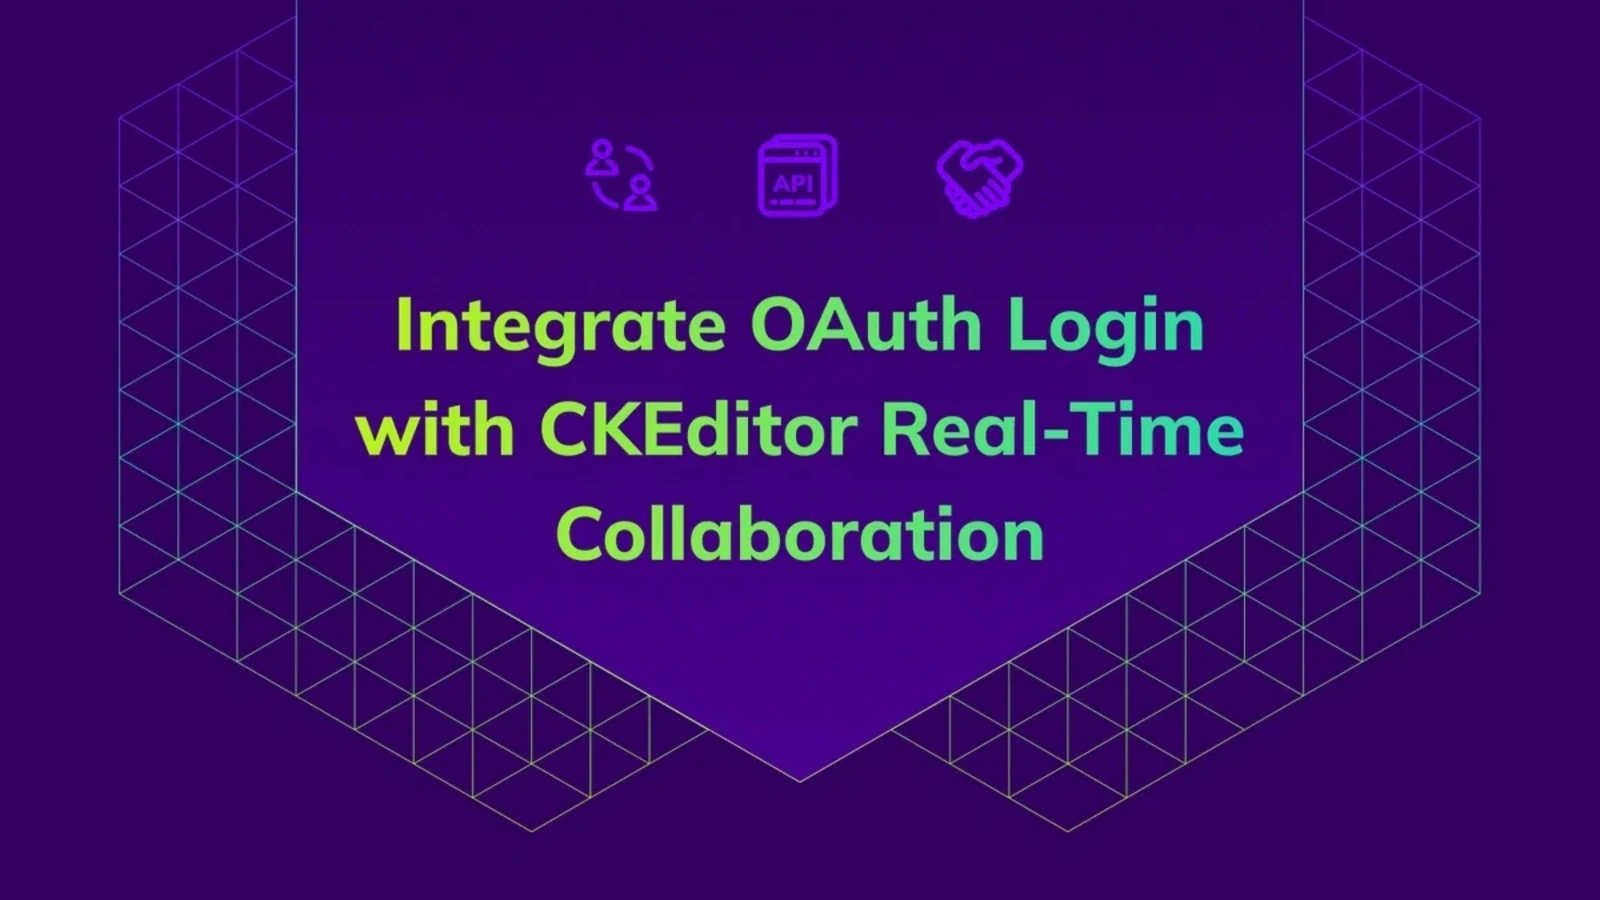
Integrate OAuth Login with CKEditor Real-Time Collaboration
How to Integrate OAuth Login with CKEditor’s Real-Time Collaboration Authentication
OAuth can seem overwhelming to grasp when you just want to implement "log in via Google” or via another provider. And when you need to integrate OAuth with another solution like real-time collaboration, things get tricky fast, even in this AI-assisted development world. In this guide, I’ll walk you through the core OAuth concepts and show you how to connect them to CKEditor’s collaboration features. Once you understand this, you’ll never see “Anonymous Octopus” or some random UUID instead of your actual user profile again.
While Google serves as the primary example, the patterns apply to any OAuth 2.0 provider – Microsoft, GitHub, Auth0, or any OpenID Connect compliant service. The concepts are extensible, and you can reuse the OAuth identity data not just for CKEditor, but anywhere in your application.
What is real-time collaboration?
Real-time collaboration (RTC) means multiple users editing the same document simultaneously (via WebSockets in case of CKEditor RTC). CKEditor Cloud Services handles conflict resolution, user presence, and comment and suggestion storage. For details, see the Real-time collaboration overview.
If you would like to try these features out, go ahead and sign up for a free 14-day trial.
Key features that are being used on the user side are: Collaborative editing, Comments, Track Changes, Revision History, and Presence list. If you want to know more about them, what they look like, and how they work, see my previous article Collaboration Features Decomposed.
Why CKEditor Cloud Services Needs Tokens
CKEditor Cloud Services relies on your application to identify users via JSON Web Tokens a.k.a. JWT. Each token tells Cloud Services who the user is, what they can do, and which environment they belong to. Without tokens, users can’t be tracked and comments become anonymous. See the Token endpoint documentation for the full specification.
{
  aud: "your-environment-id",     // Environment ID from Customer Portal
  sub: "provider-user-id",        // Unique user ID from OAuth provider
  iat: 1707750000,                // Issued at timestamp
  user: {
    name: "John Doe",             // Shown in presence list & comments
    id: "provider-user-id",       // Same as sub
    avatar: "https://..."         // Optional: profile picture URL
  },
  auth: {                         // Permission setup
    collaboration: {              // For demo purposes
      '*': { role: 'writer' }     // Writer access to all documents
    }
  }
}
OAuth 2.0 Authorization Code Flow
In this article, we focus on the Authorization Code Flow because it keeps the client secret server-side and never exposes tokens to the browser. This flow works almost identically across providers: Google, Microsoft, GitHub, or any OAuth 2.0 compliant service. For the full specification, see RFC 6749.

How to bind the user identification from OAuth provider to CKEditor Cloud Services
Here's the key insight: the Provider ID becomes CKEditor User ID. No matter which login service you use,every OAuth provider returns a stable, unique user ID. That ID becomes your CKEditor user ID.
// Generic OAuth callback - works with any provider
async (accessToken, refreshToken, profile, done) => {
  // Map provider profile to user object
  const user = {
    id: profile.id,                    // Stable ID → becomes CKEditor user.id
    email: profile.emails?.[0]?.value,
    name: profile.displayName,         // → becomes CKEditor user.name
    avatar: profile.photos?.[0]?.value,
  };
  return done(null, user);
}
Provider | User ID Field | Display Name | Avatar |
|
|
| |
Microsoft |
|
|
|
GitHub |
|
|
|
Auth0 |
|
|
|
If your app supports multiple providers, prefix the user ID to prevent collisions: google_123..., github_456....
Data bubbling: the multi-layer reality
Say, we wanted profile pictures to appear in the presence list. But here’s a gotcha: We extracted the avatar URL from the provider (Google), and nothing happened. Still showing initials and NOT the avatar.
The problem? Data doesn’t magically flow from OAuth to CKEditor. It must be passed through the layers of the application to send the avatar URL from the server to the client. The exact flow is highly dependent on the application structure and framework you are using. You can see the concept and the example flow in the sample implementation that was used to write the article in the following diagram:

// 1. OAuth Callback - Extract from provider
const user = {
  id: profile.id,
  name: profile.displayName,
  avatar: profile.photos?.[0]?.value,  // ← Extract here
};

// 2. Session Token - Store in JWT
generateSessionToken(user) {
  const payload = {
    userId: user.id,
    name: user.name,
    avatar: user.avatar,  // ← Store here
  };
}

// 3. Auth Status - Return to frontend
res.json({
  user: {
    id: decoded.userId,
    name: decoded.name,
    avatar: decoded.avatar,  // ← Return here
  },
});

// 4. CKEditor Token - Include in JWT
user: {
  name: user.name,
  id: user.id,
  avatar: user.avatar,  // ← CKEditor reads this
}
Think of it as a relay race: each runner must pass the baton. Drop it anywhere, and your avatar never reaches the finish line.
This pattern applies to any user data you want in CKEditor: avatar, email, custom permissions, or organization info. If you need it in CKEditor, you need to pack them to the CKEditor token.
How can you restrict who can use or log in to your collaborative editor?
You have two layers of control: provider-side and application-side.
The examples below illustrate common patterns, but they’re not exhaustive: your OAuth provider and application architecture will determine what’s possible. Think of these as starting points you can adapt to your specific requirements.
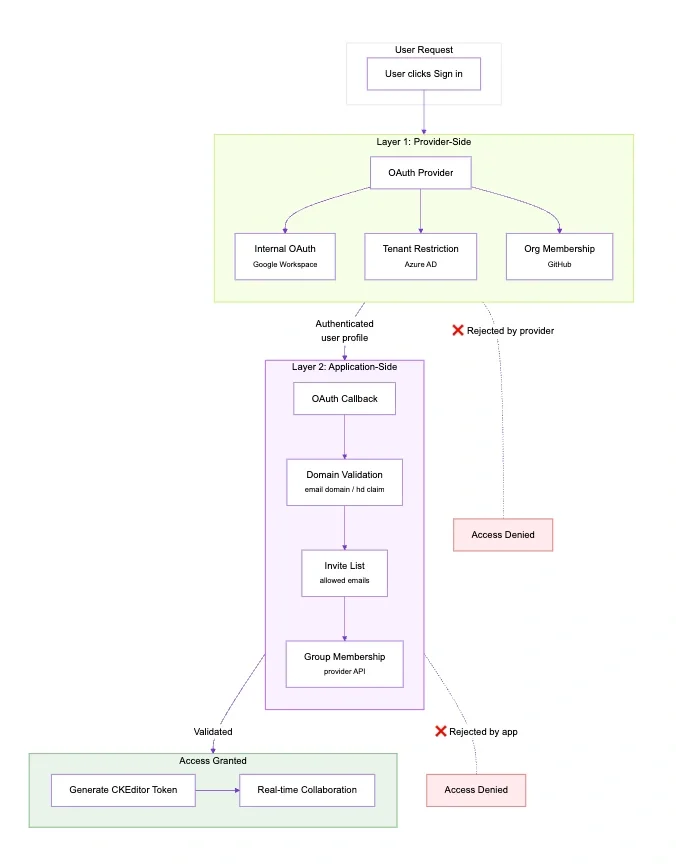
Provider-side options
Option | Provider | Best For |
Internal OAuth | Single Google Workspace org | |
Tenant restriction | Microsoft Azure AD | Single Microsoft tenant |
Organization membership | GitHub | GitHub-based teams |
These options let the provider handle access control with zero code on your end. See Google’s OAuth consent screen docs or your provider’s equivalent.
Application-side options
Option | How | Best For |
Domain validation | Check email domain or hd claim | Multiple organizations |
Invite list | Check against allowed emails | Private beta |
Group membership | Check provider groups via API | Fine-grained control |
Both mechanisms integrate into the OAuth callback. The domain is checked first, then invite status if enabled.
You can combine provider-side and application-side for layered security.
// Domain validation - provider-agnostic
validateDomain(profile, email) {
  // Google Workspace provides hd claim
  const domain = profile._json?.hd || email.split('@')[1];

  if (allowedDomains.length === 0) {
    return true; // No restriction
  }

  return allowedDomains.includes(domain);
}
Token generation
Your server generates CKEditor tokens for authenticated users. These are JWTs that CKEditor Cloud Services uses to identify users and authorize their actions.
A few key concepts first:
-
Environment ID (aud field): When you create a CKEditor Cloud Services account, you get an environment: a container for your documents, users, and configuration. The Environment ID identifies which environment the token is valid for. Find yours in the CKEditor Cloud Services dashboard.
-
Access Key: A secret key used to sign tokens. CKEditor Cloud Services verifies the signature to ensure tokens weren’t tampered with and actually came from your server. Never expose this key to the frontend.
-
Permissions (auth field): Define what the user can do such as collaboration roles (writer, reader), CKBox access, and AI feature usage. See the token payload documentation for all available permissions.
Why sign tokens? The signature (HMAC-SHA256) proves authenticity. Without it, anyone could forge tokens and impersonate users. CKEditor Cloud Services rejects tokens with invalid signatures.
// Token generation - works with any OAuth provider
function generateCKEditorToken(user) {
  const payload = {
    aud: process.env.ENVIRONMENT_ID,
    sub: user.id,           // Provider ID for stable identity
    user: {
      name: user.name,      // Real name from provider
      id: user.id,
      avatar: user.avatar   // Optional: profile picture
    },
    auth: {
      collaboration: { '*': { role: 'writer' } }
    }
  };

  return jwt.sign(payload, process.env.ACCESS_KEY, {
    algorithm: 'HS256',
    expiresIn: '1h'
  });
}
Configure Cloud Services on the Frontend
To configure the CKEditor to fetch tokens from your authenticated endpoint, you define the tokenUrl callback in the configuration which uses the session cookie in the request. Check out the CloudServicesConfig docs for all options.
cloudServices: {
  webSocketUrl: 'wss://your-org.cke-cs.com/ws',
  tokenUrl: async () => {
    try {
      const response = await fetch('/api/token', {
        credentials: 'include'  // Send session cookie
      });
      if (!response.ok) throw new Error('Auth required');
      return response.text();
    } catch (error) {
      console.error('Auth failed', error);
      throw error;
    }
  }
}
Preserving state through OAuth redirects
OAuth redirects can interrupt your application flow. Any state in the URL, such as query parameters or hash fragments can get lost when the user bounces through the provider’s login page and back. This affects shared links (?documentId=abc123), deep links, referral codes, or any data you need after login.
Several approaches exist to preserve state:
Approach | Where Stored | Pros | Cons |
localStorage | Browser | Simple, no server changes | Browser-specific, not cross-device |
OAuth state parameter | URL | Standard OAuth mechanism, cross-device | Size limits (~2KB), requires server handling |
Server session | Database/Redis | Works cross-device, secure | Requires session infrastructure |
URL fragment | Hash | No storage needed | Often stripped by providers |
For most single-page applications, localStorage is the simplest approach. It requires no server changes and works reliably within the same browser. See the OAuth 2.0 Security Best Practices for considerations on the state parameter approach.
User identification differences across OAuth providers
The patterns in this article work with any OAuth 2.0 provider. Here are provider-specific notes:
-
Microsoft / Azure AD: Use
profile.oidas the user ID (which will remain stable across sessions). Avatar requires a separate Graph API call. Tenant restriction is available for enterprise scenarios. -
GitHub: Use
profile.id(numeric, stable). For access control, check organization membership via the GitHub API: there’s nohdclaim equivalent. -
Auth0 / Okta: These identity aggregators can connect multiple upstream providers (Google, Microsoft, etc.) and provide a unified user ID via the
subclaim. They simplify multi-provider support. -
OpenID Connect: Any OIDC-compliant provider works if it provides stable
subclaim,nameclaim, and optionallypictureclaim.
Security Checklist when integrating OAuth and CKEditor Cloud services
-
Session cookies:
httpOnly,secure,sameSite: 'lax'. -
Token expiration: 1 hour for both session and CKEditor tokens.
-
Rate limiting on auth endpoints.
-
CORS restricted to known origins.
What OAuth brings to real-time collaboration?
Without OAuth (or any authentication mechanism) | With OAuth |
Random UUID each session | Stable provider ID |
Random names | Real names from provider |
No history tracking | Consistent authorship |
Wrapping up
You’ve seen how OAuth integrates with CKEditor real-time collaboration: OAuth tokens authenticate users, CKEditor tokens authorize collaboration, and the provider’s stable ID bridges both systems for consistent identity. The pattern works with Google, Microsoft, GitHub, Auth0, or any OAuth 2.0 provider: just pick what fits your stack.
If you want to use a different OAuth flow or would like to dive deeper into real-time collaboration, don’t hesitate to contact us.
No more “Anonymous Octopus”!