Workspaces
CKBox Workspaces provide a convenient solution for achieving data isolation and user separation within CKBox. With workspaces, you can easily create separate storage and data spaces, giving you precise control over assigning specific users, user groups, or tenants to each workspace.
This guide offers general instructions on configuring individual CKBox instances, that can be tailored to meet the requirements of storage and data management.
Managing workspaces in CKBox is only available for users granted the superadmin role. When creating the JWT token for authorization, please make sure the proper user role is set in the auth.ckbox.role field:
{
    "aud": "NQoFK1NLVelFWOBQtQ8A",
    "sub": "example-user-id",
    "iat": 1511963669,
    "auth": {
        "ckbox": {
            "role": "superadmin"
        }
    }
}
Workspaces can also be easily managed – created, deleted, or renamed – directly from the administration panel. To access these settings, the user needs the superadmin role.
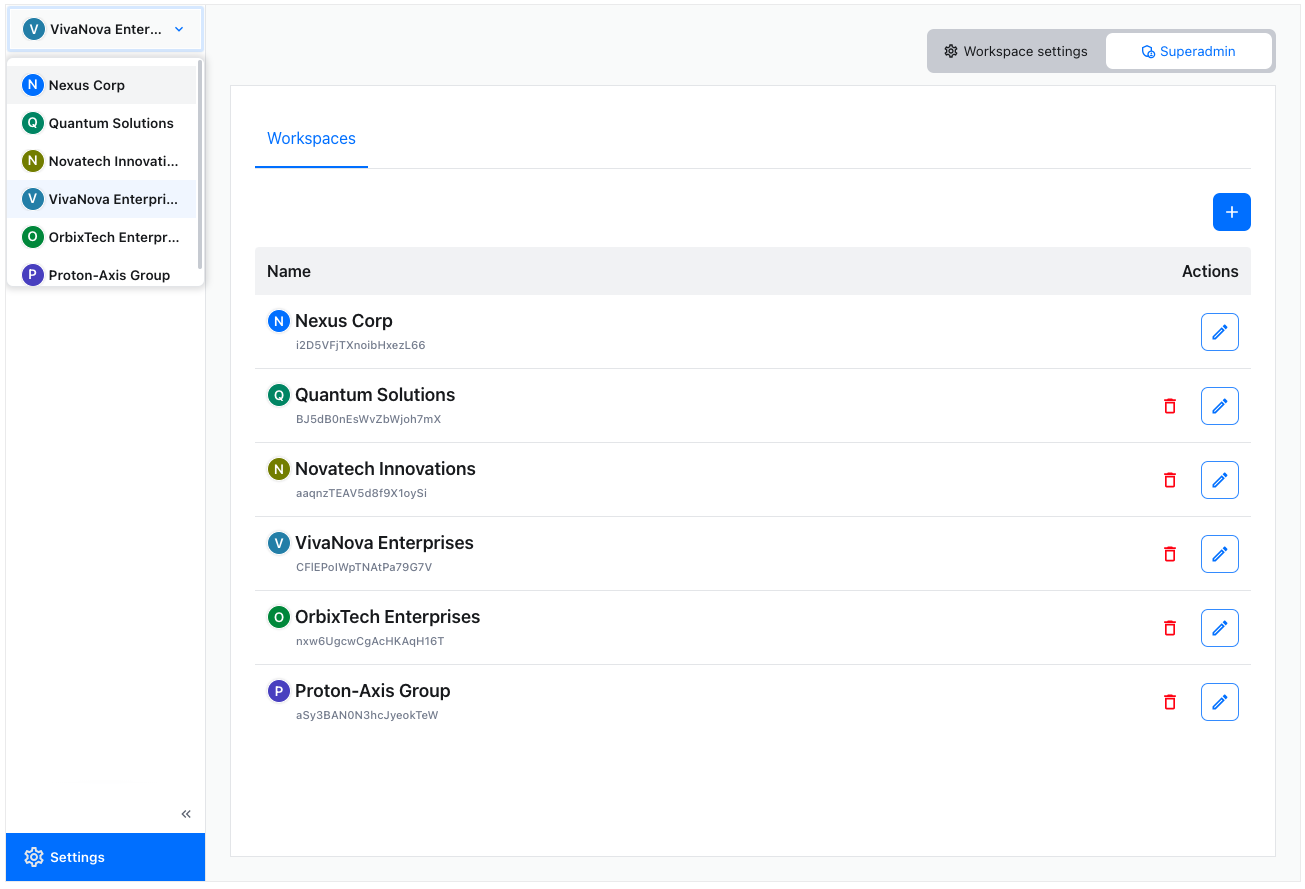
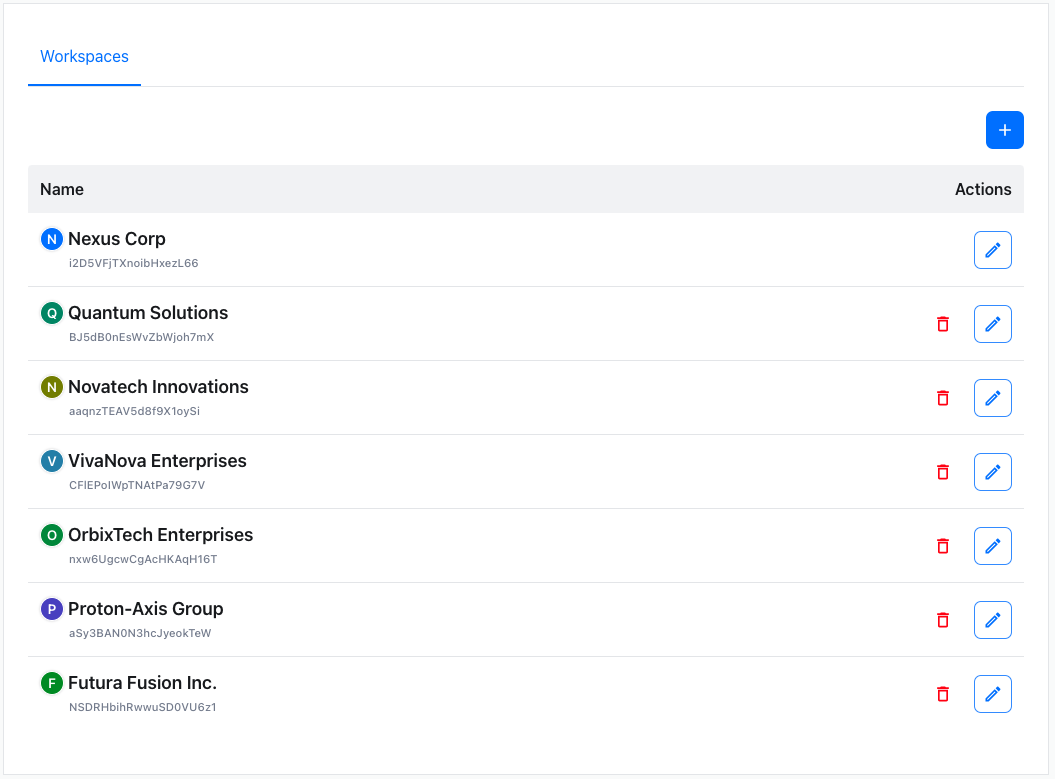
The top-left workspaces dropdown lets the admin choose the workspace to manage and set up. The top-right Superadmin button lets the user manage workspaces. Entering this area will display a full list of currently available workspaces with tools to add, remove, or rename them.
You can search for workspaces by entering their name or by pasting their workspace ID into the search field. The search starts after at least 2 characters have been entered.
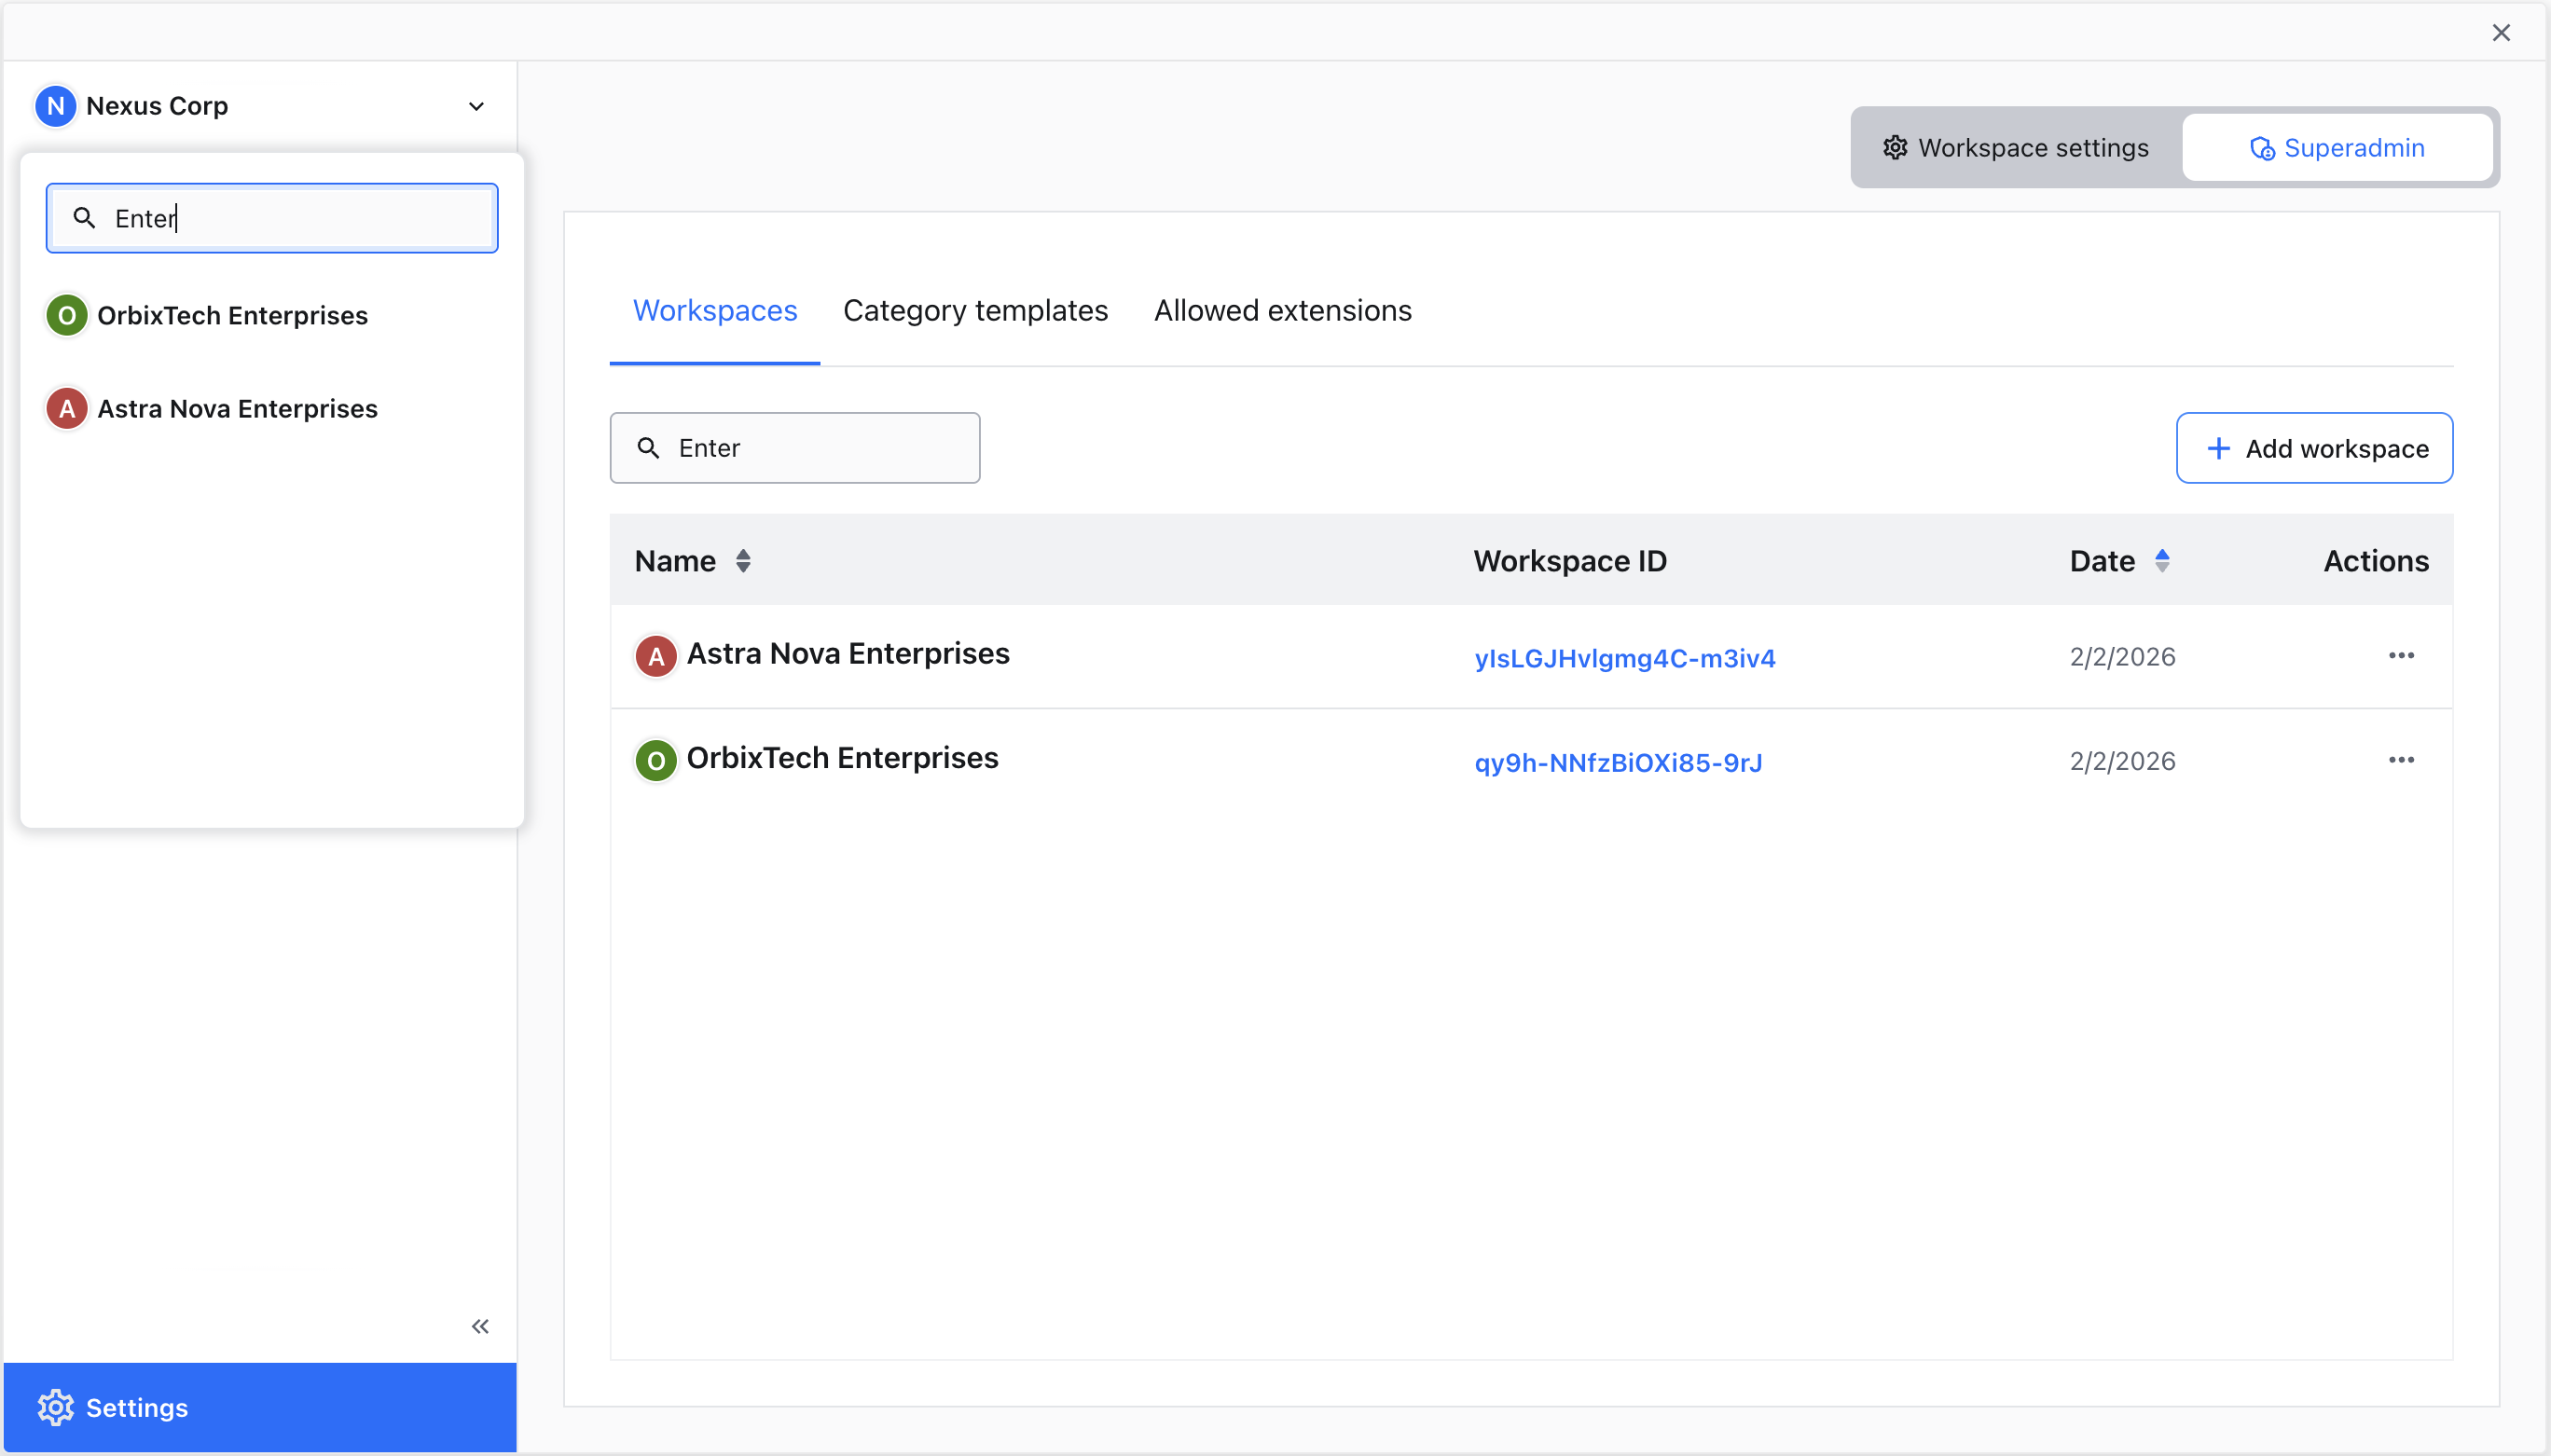
The search field filters workspaces by their name, displaying matching results in the sidebar.
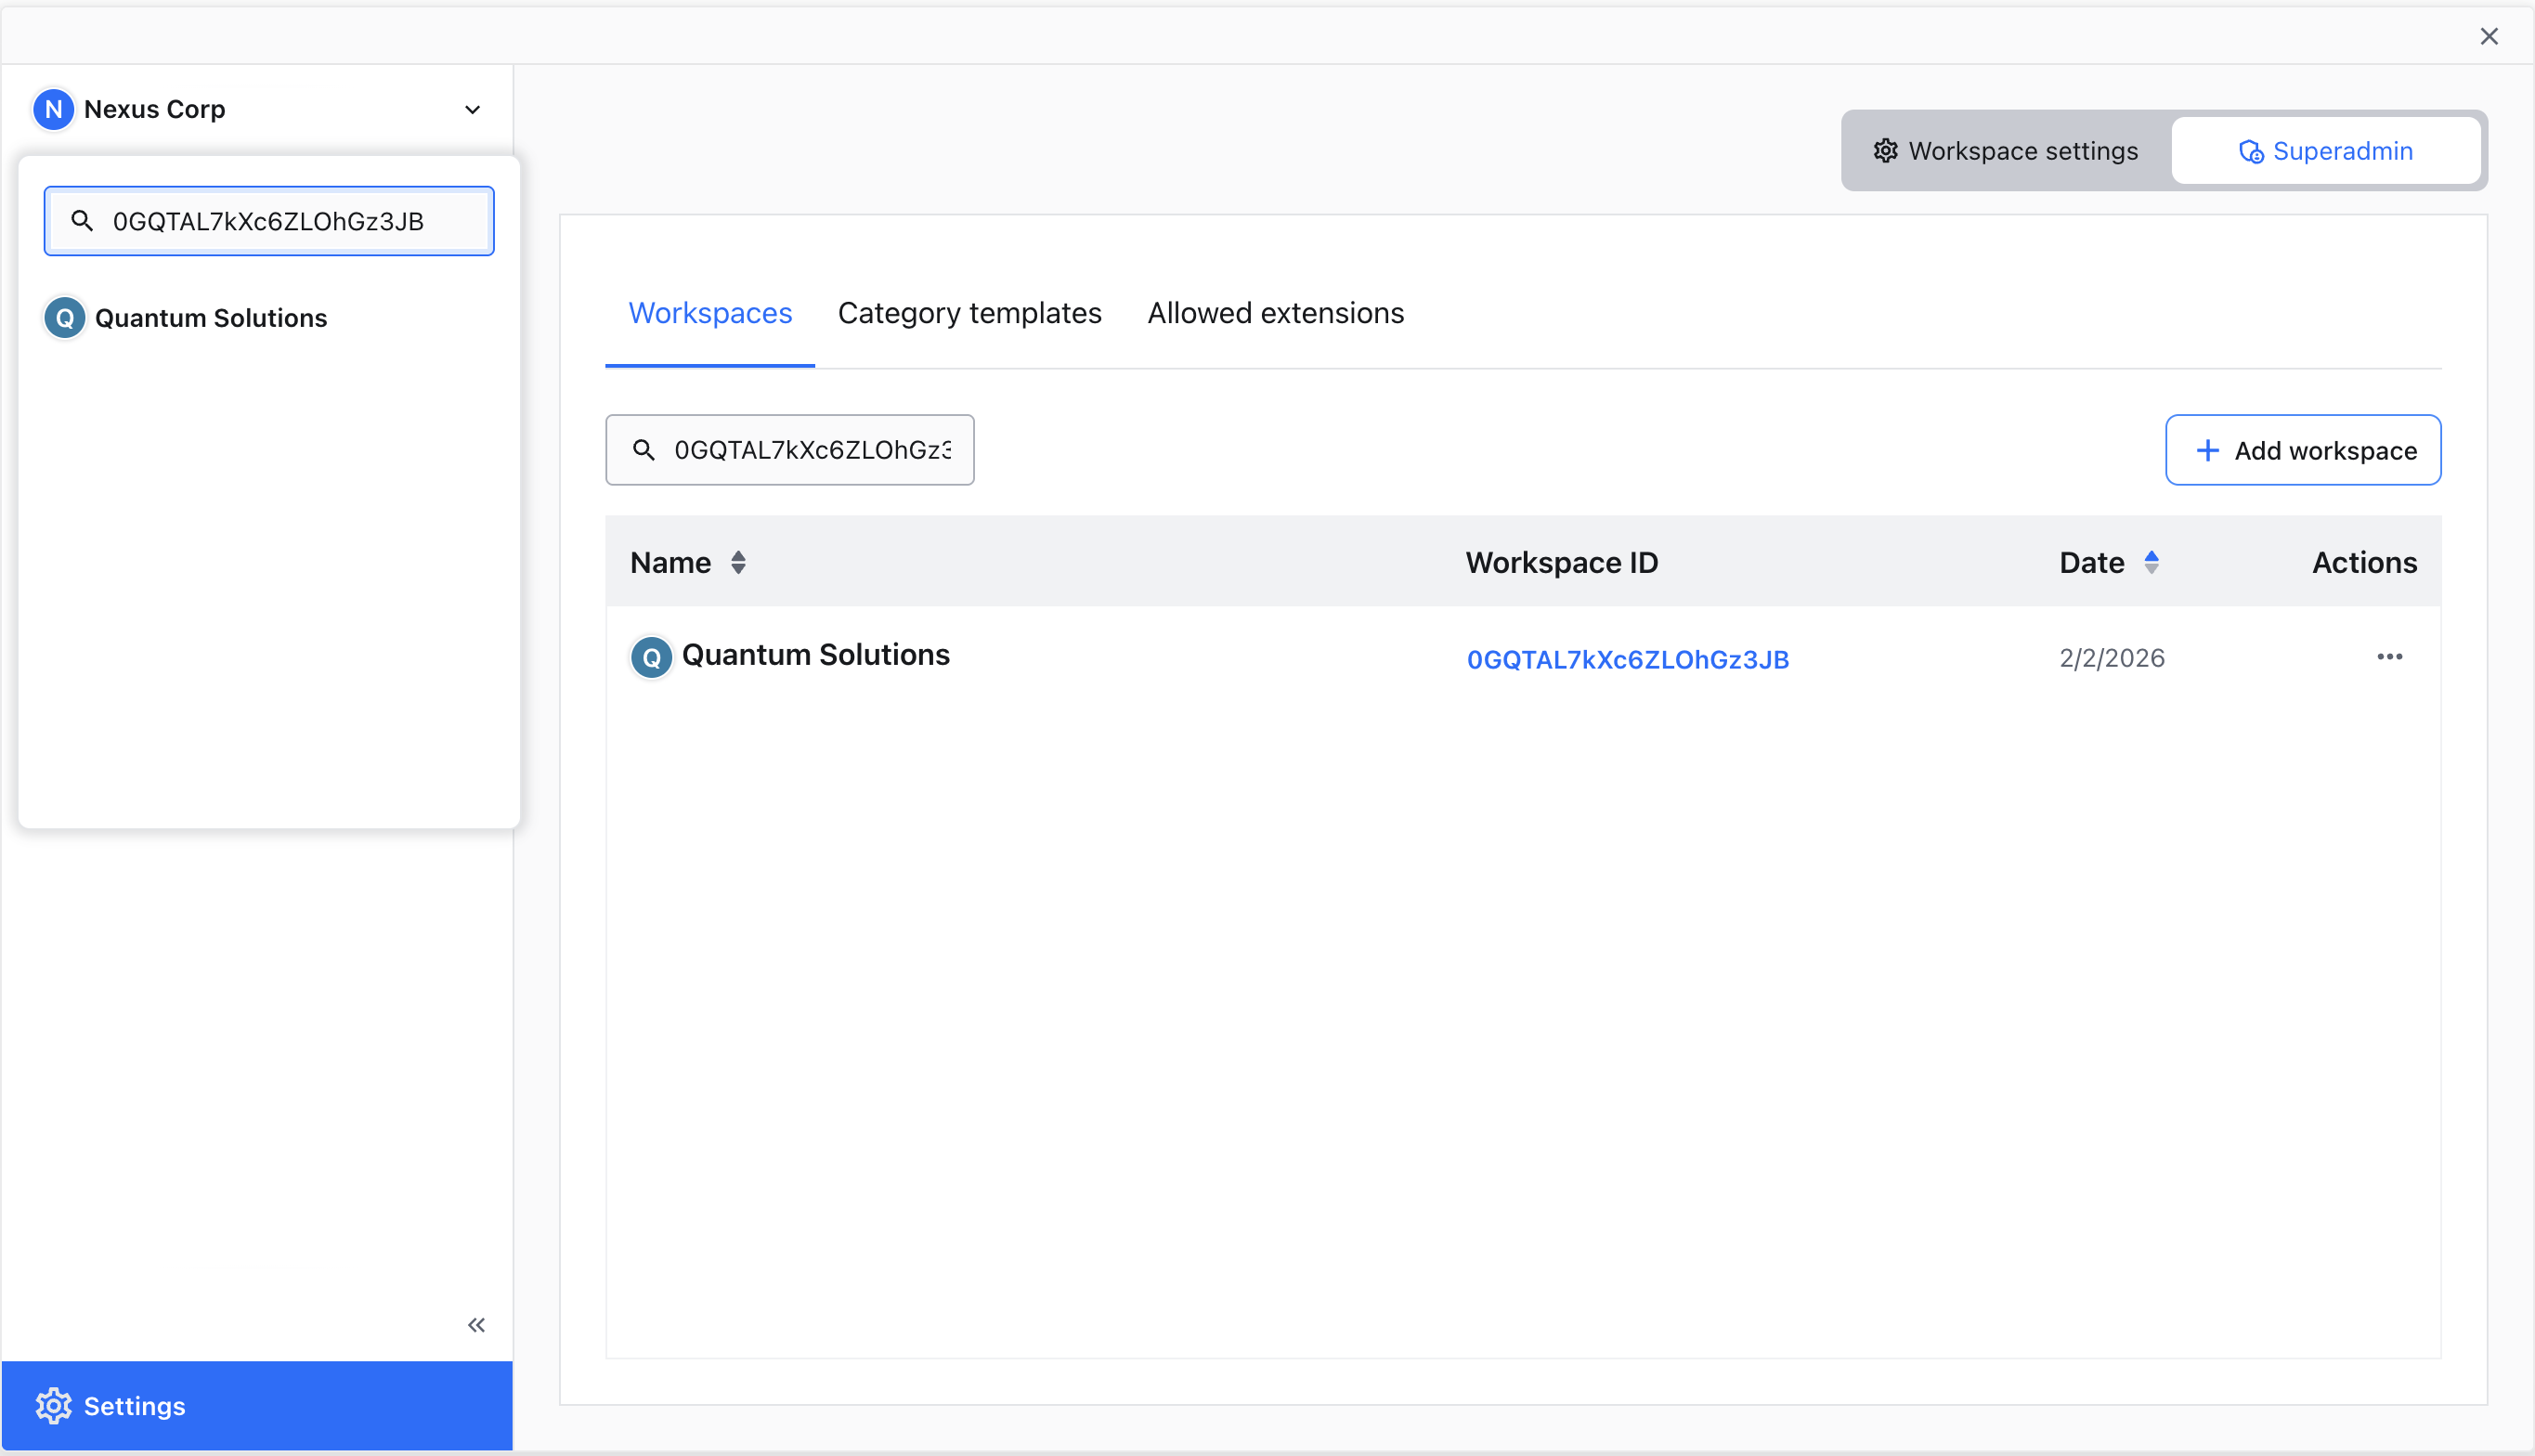
Paste a workspace ID directly into the search field to quickly locate a specific workspace.
Using the top-right Add workspace button will invoke the Add workspace dialog.
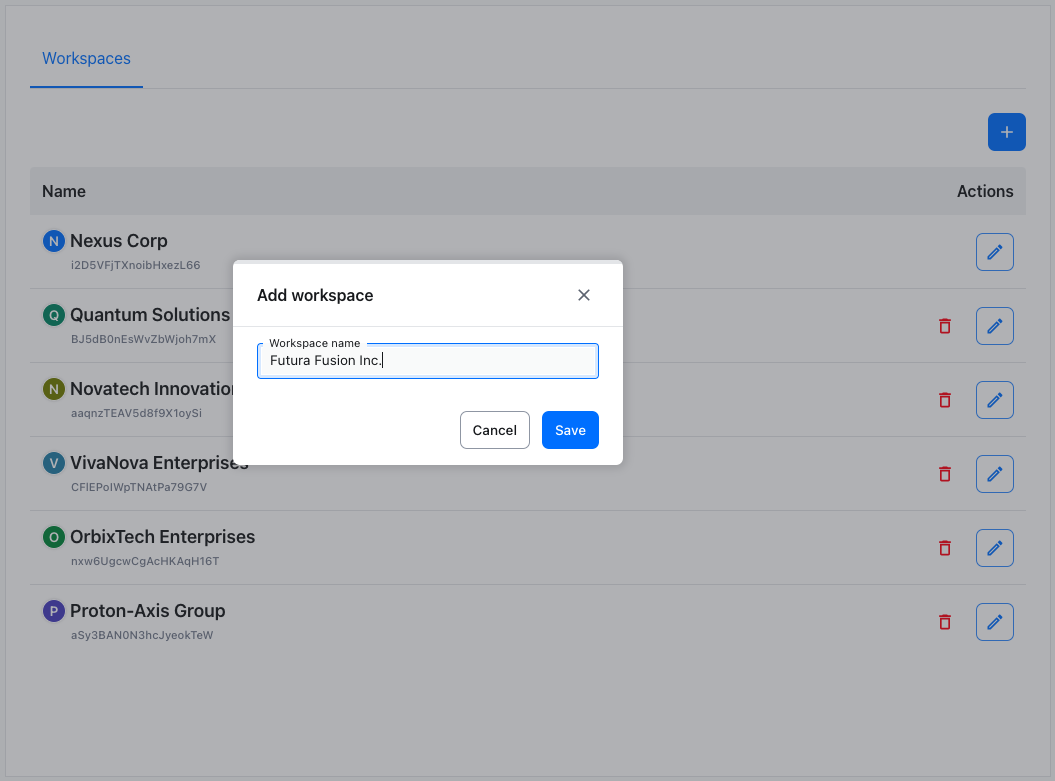
Enter the desired name for the new workspace and hit Save. The new workspace will appear at the top of the list when using default sorting by creation date.
Due to the fact, that every workspace has a unique workspace ID (displayed next to the workspace name) it is possible to name two or more workspaces the same. This, however, may cause confusion between users.
Using the context menu (accessed via the actions button right to the workspace’s name) and selecting Rename workspace will invoke a dialog.
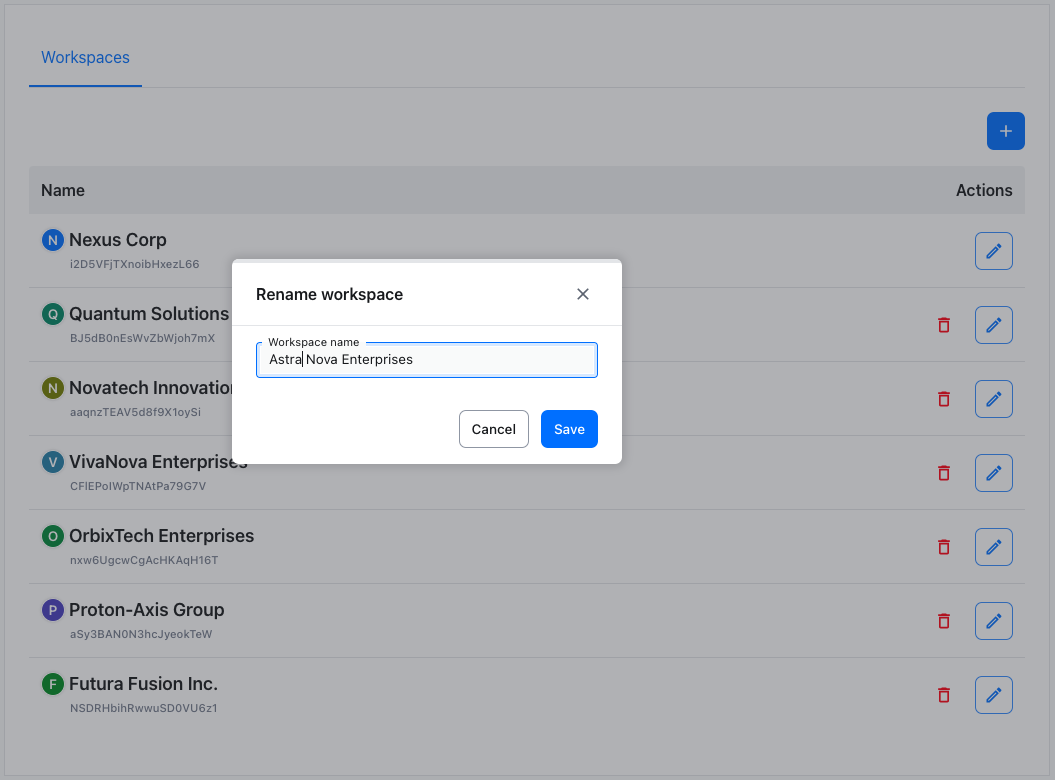
Enter the new name for the workspace and hit Save. The renamed workspace will replace the old name on the list.
If you want to remove a workspace, use the context menu (accessed via the actions button right to the workspace’s name) and select Delete workspace option. It will invoke the Delete workspace dialog.
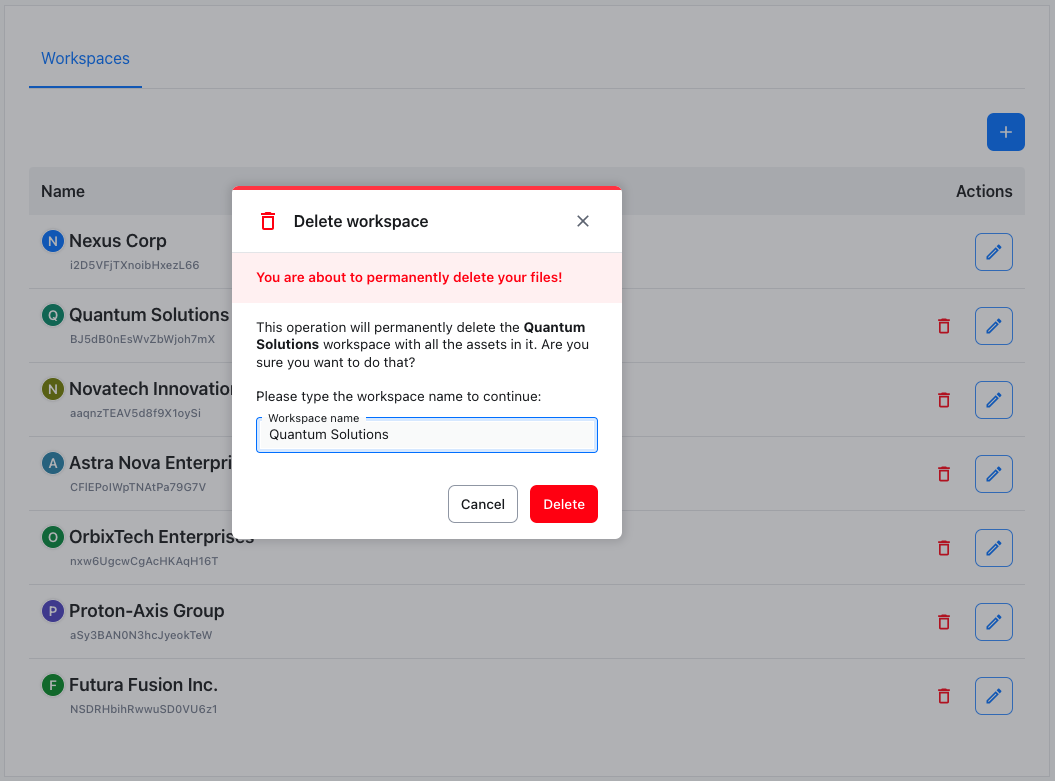
To complete deletion, you need to type the workspace’s name first and hit the Delete button. It is a safety measure to avoid accidental deletion, as deleted workspaces cannot be restored.
By deleting a workspace, you also delete all and any assets that were uploaded to that workspace. This operation is not reversible and all the assets are permanently lost.
You can automate the process of workspace management using the REST API.
CKBox REST API offers a couple of endpoints that allow for workspace management:
GET /v3/workspaces
This API endpoint returns the list of workspaces available to the user. For thesuperadminrole, it will return a list of all workspaces existing in the workspace environment.POST /superadmin/workspaces
You can create new workspaces using this endpoint. When the workspace is successfully created, the workspace ID will be returned in the response.PUT /superadmin/workspaces/{workspaceId}
This endpoint allows modifying an existing workspace, identified by the given workspace ID.DELETE /superadmin/workspaces/{workspaceId}
This endpoint deletes an existing workspace, identified by the given workspace ID. When the workspace is removed, all the assets stored in it are deleted.
Workspaces come with default storage categories which are Files, Documents and Images. With Category Templates, superadmin users can define the overall structure of a workspace and control the default set of categories for newly created workspaces automatically.
If you want, you can use Category Templates to define what categories should be created alongside new workspaces. You can access these settings using Category templates tab.
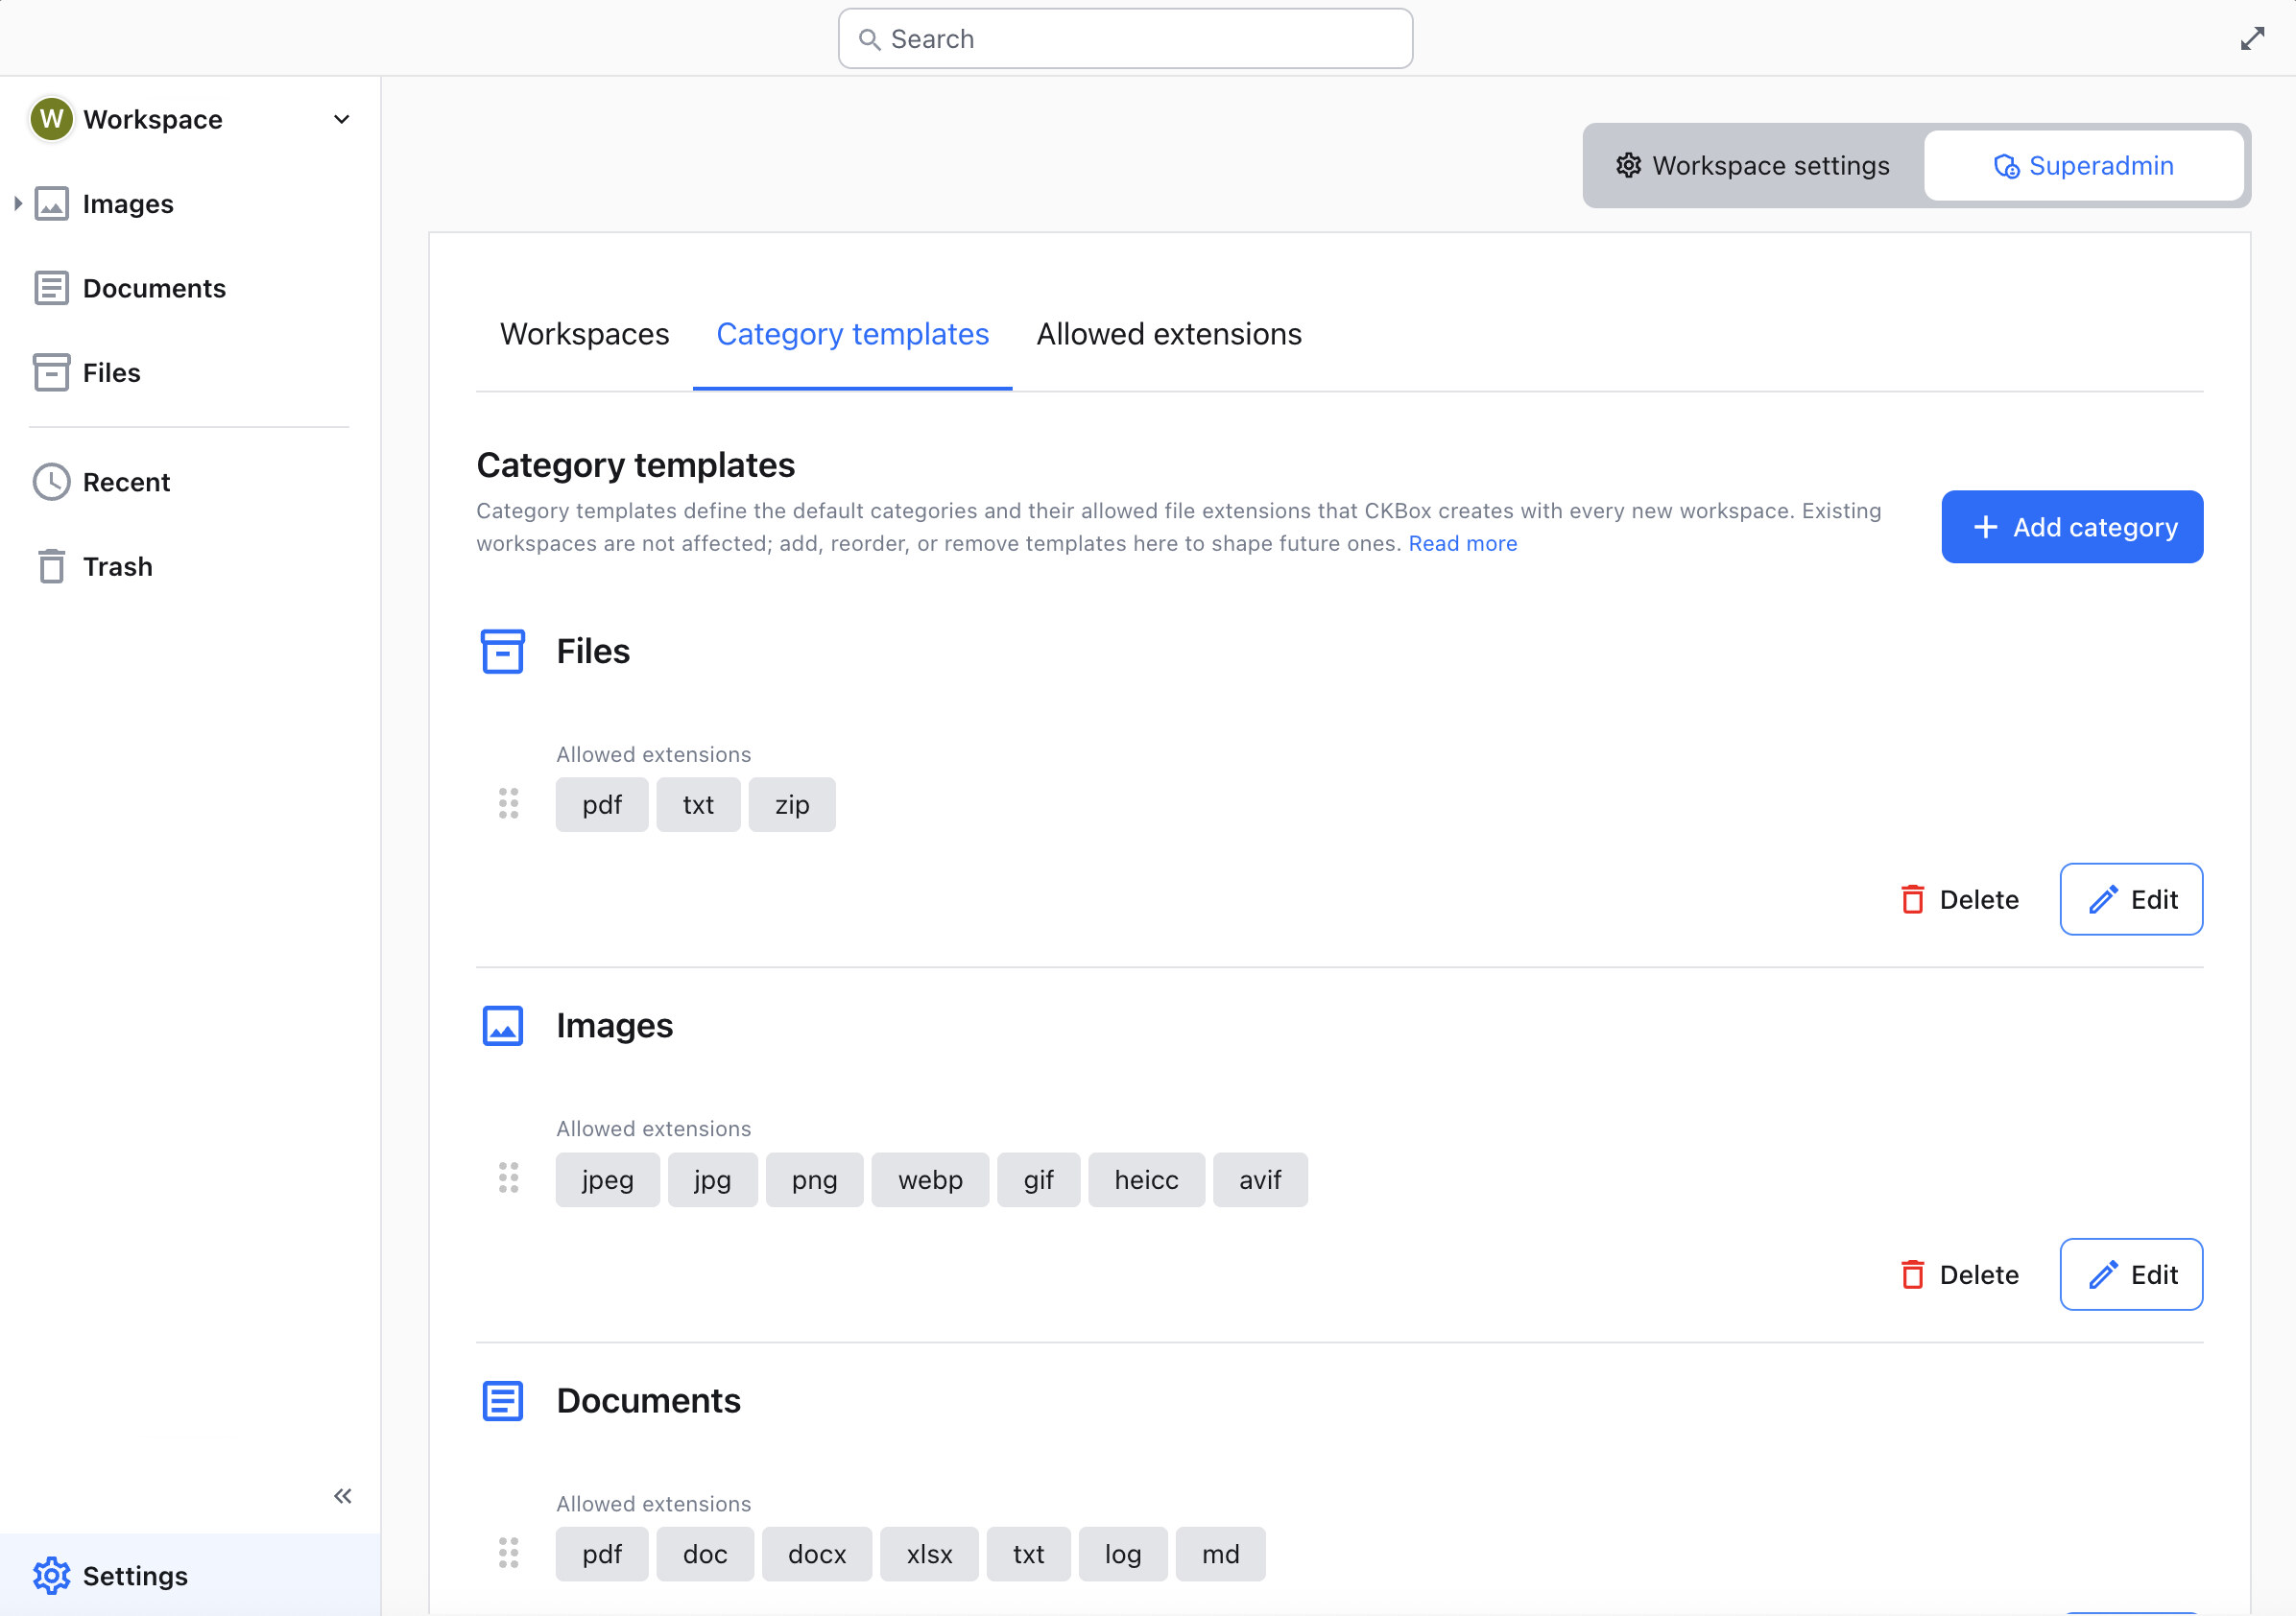
Using the top-right + button will create an empty placeholder for a new category template. You will be asked to define two things for the newly created category template:
- Category template name – A unique name for categories created by this template.
- Allowed extensions – The list of file extensions available in categories created using this category template.
If you change your mind at a later time, you can edit all this information by editing the category template
An existing category template can be edited at any time. You can change its name and the list of allowed file extensions.
The order of the category templates on the list in the Category templates section matches the order of categories that will be created with a new workspace. To change the category template position, click on the drag handle to the left, and move it to the target position.
To remove a category template, locate it on the list, and click the Delete button. A confirmation dialog will be displayed and you will be asked to confirm the operation.
In the Allowed extensions tab of the administration panel, you can limit what extensions are allowed to be used.
If the Globally limit extensions option is enabled, only files with extensions specified here will be allowed to be uploaded. In addition, Category settings will only permit extensions listed here, to be added as Allowed extensions.
To enforce limits on allowed extensions use the toggle next to Globally limit extensions option. Extensions initially allowed will consist of all currently defined allowed extensions from all existing categories in all workspaces.
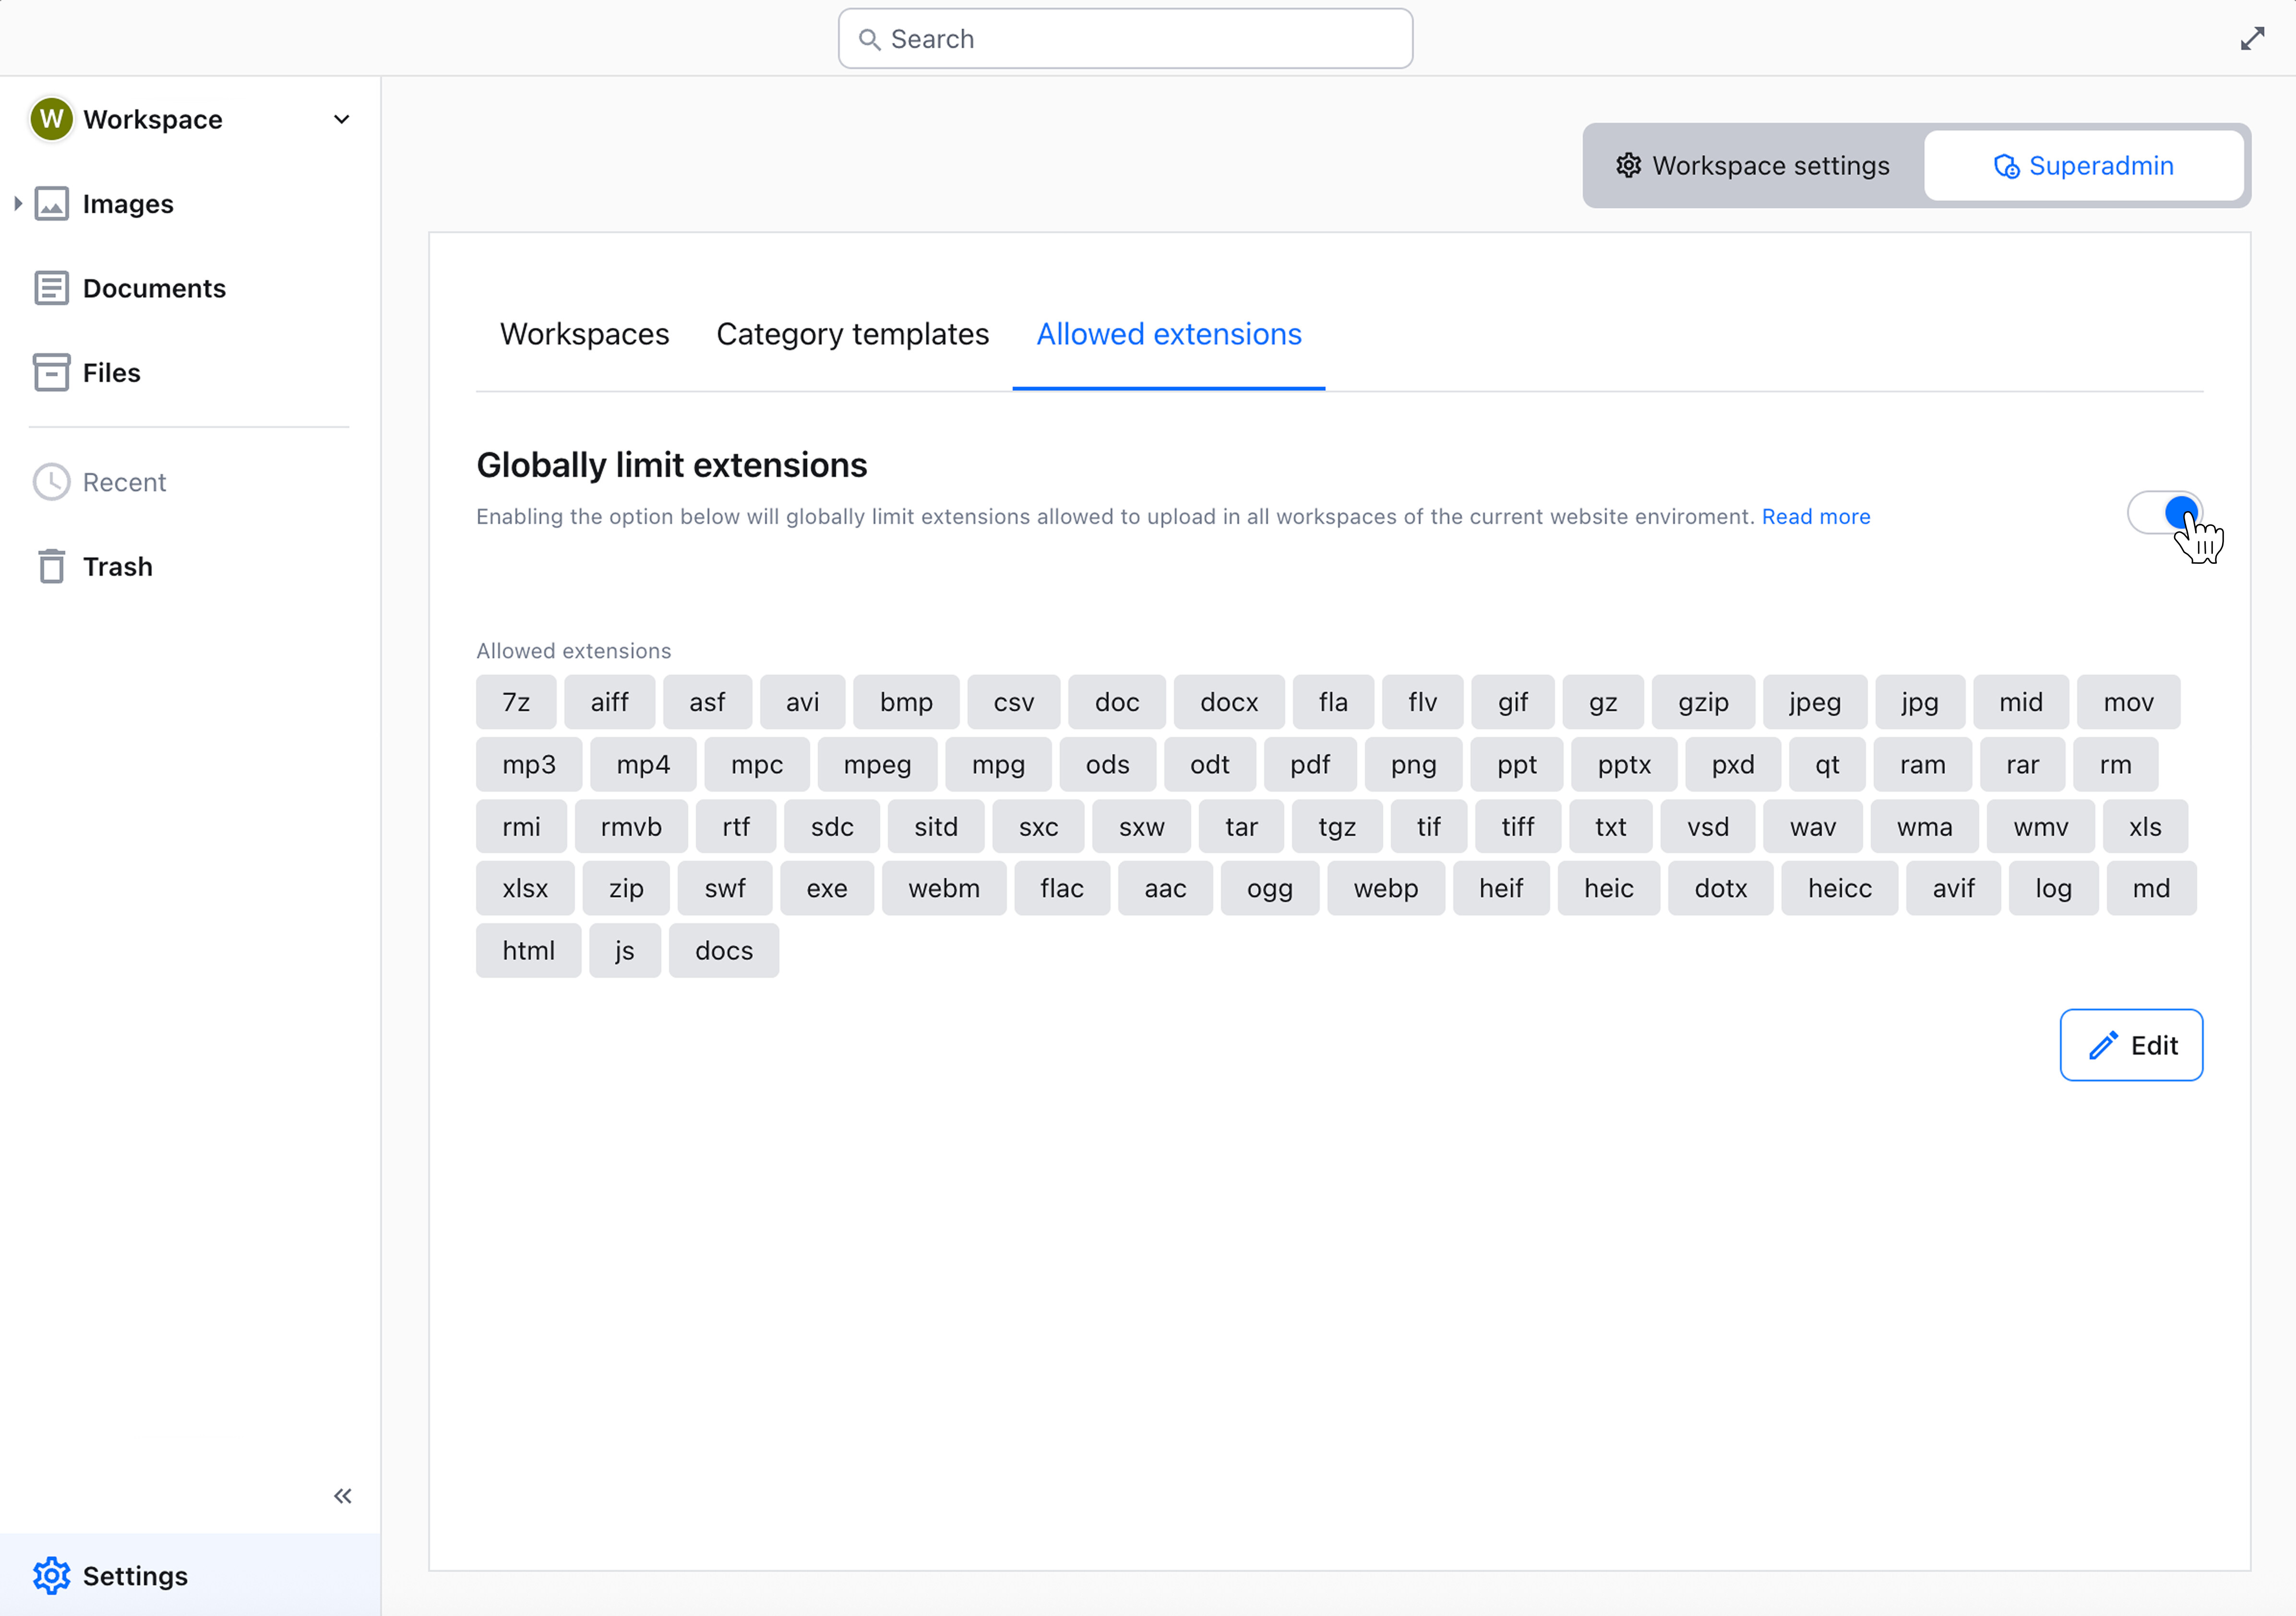
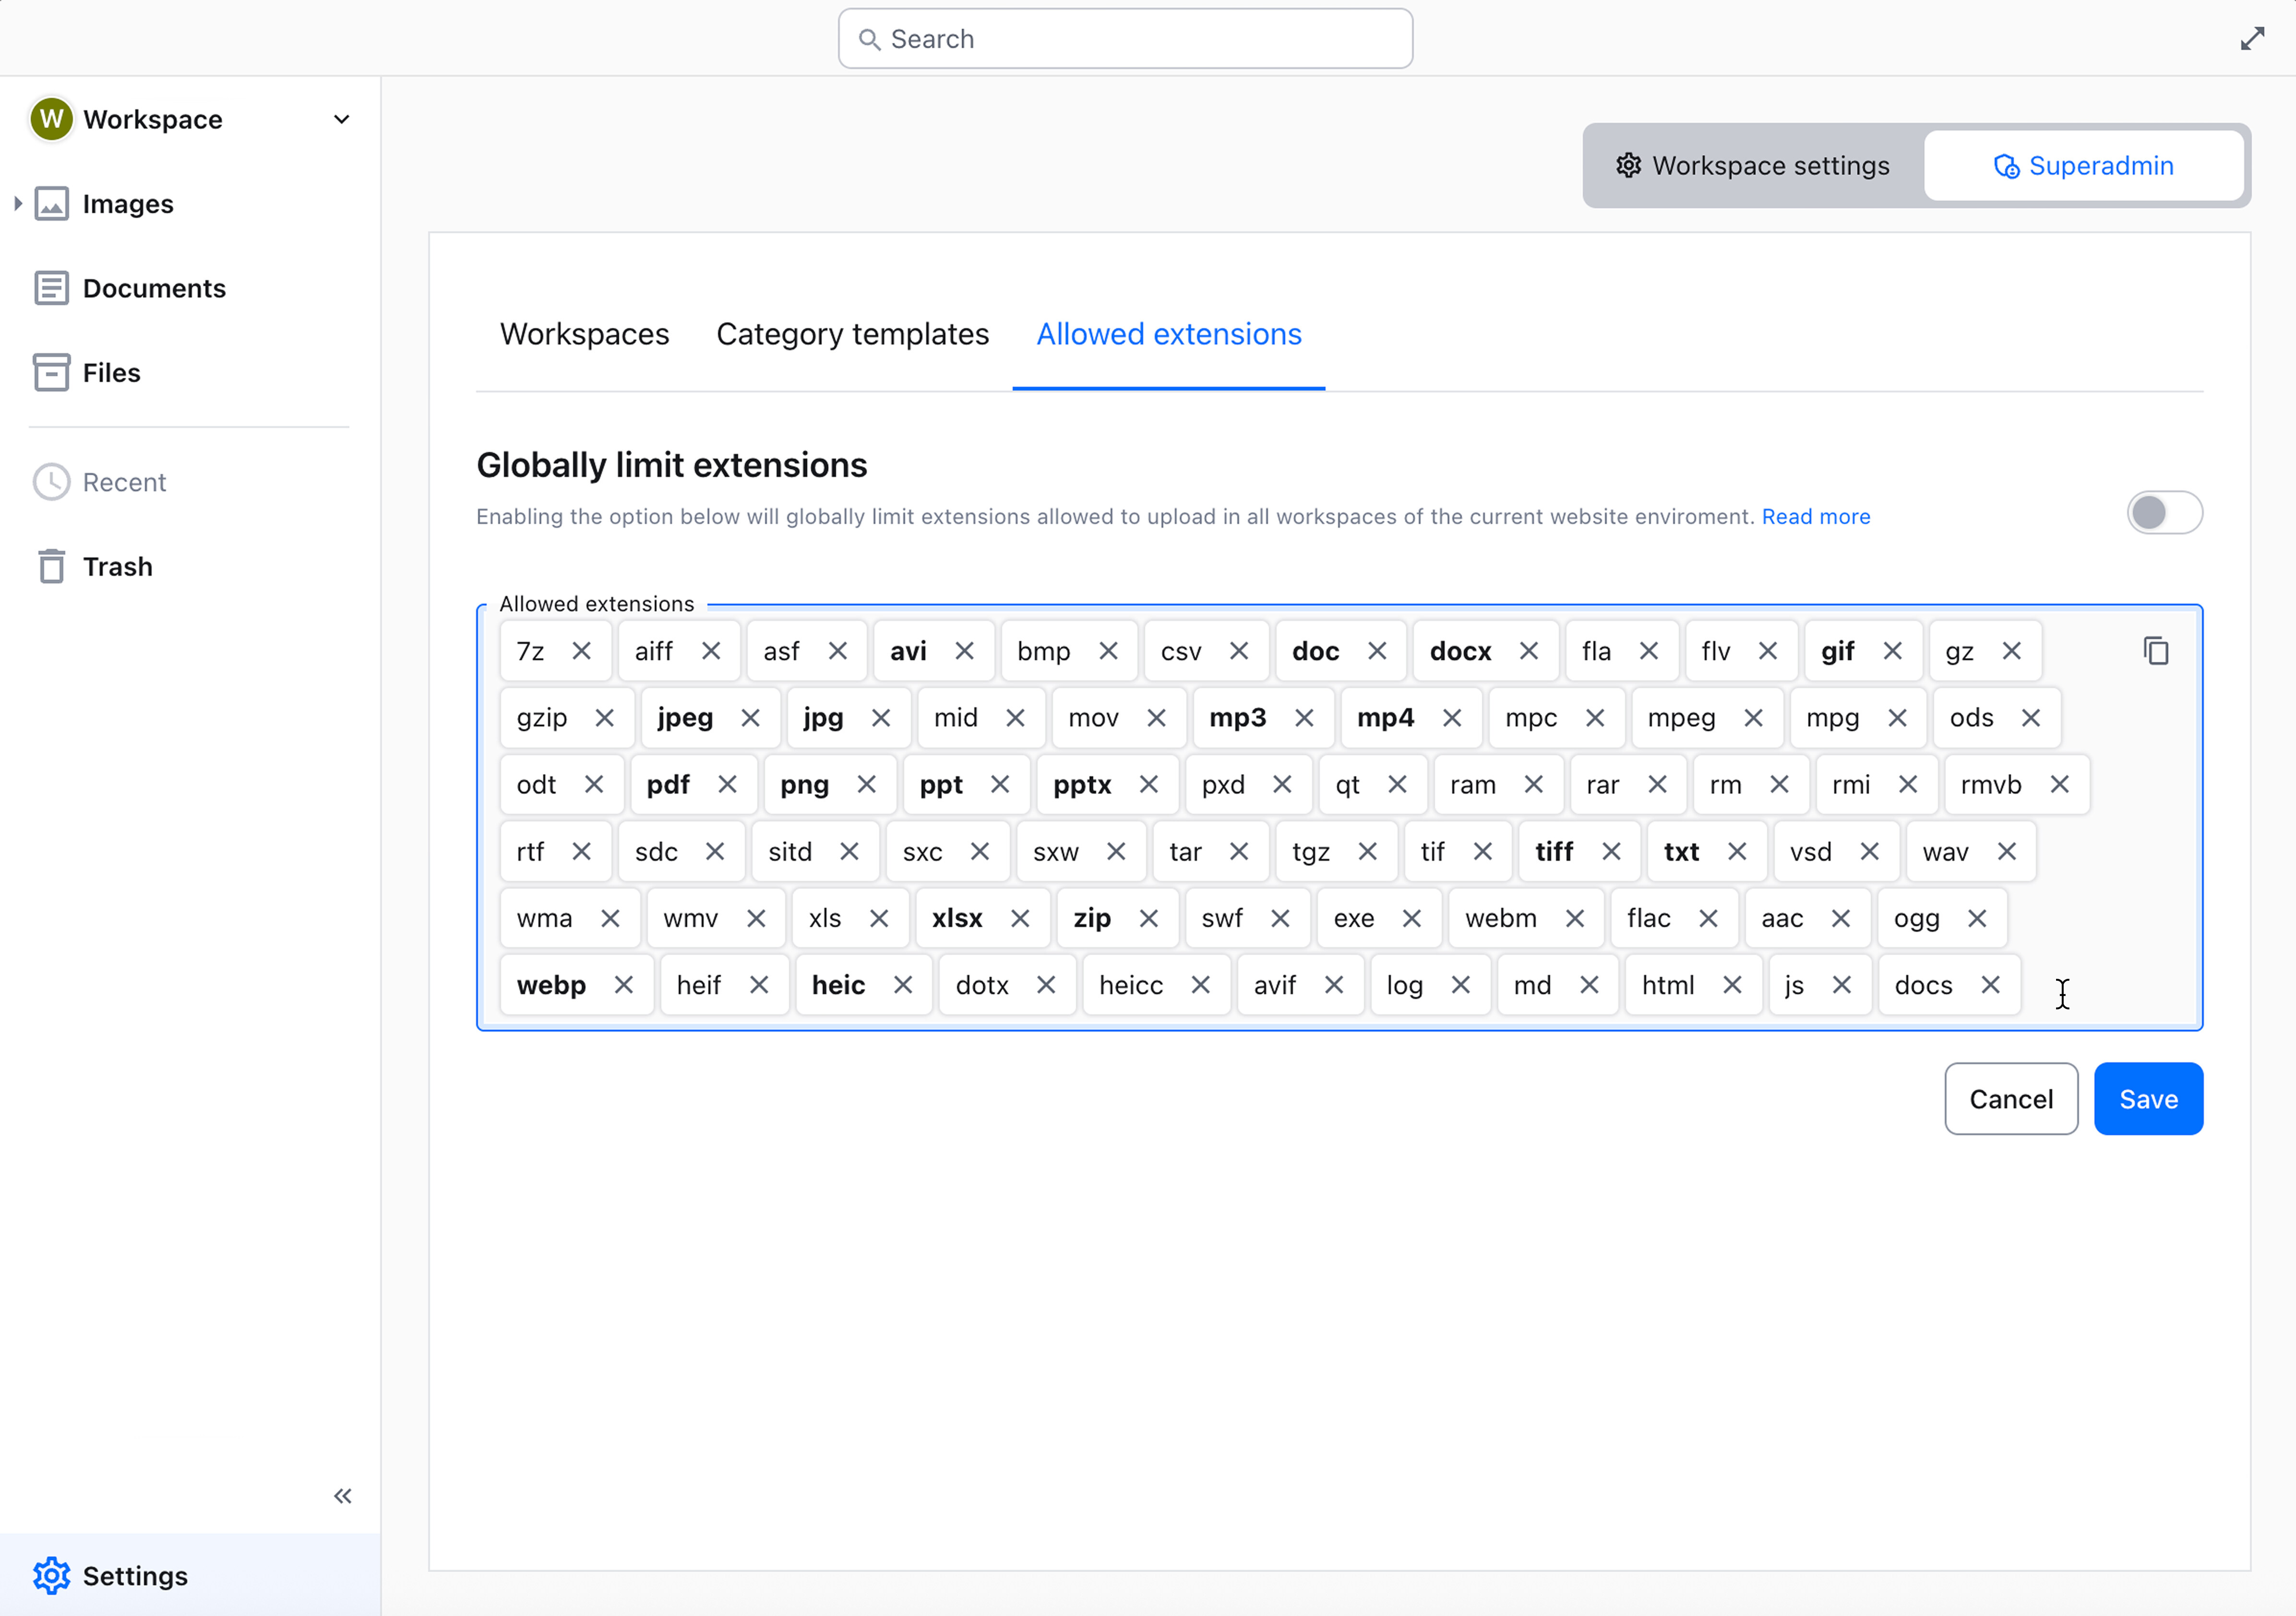
To edit the list of allowed extensions use the Edit button.
Extensions currently in use will be marked in bold on the list of allowed extensions. Removing extensions in use will permanently delete all the assets that use the removed extensions from all categories. To avoid accidental data removal, a confirmation dialog will be displayed.
Access to workspaces is controlled through the auth.ckbox.workspaces field of the user’s JWT token. As a value, auth.ckbox.workspaces takes an array of the workspaces the user should have access to:
{
    "aud": "NQoFK1NLVelFWOBQtQ8A",
    "sub": "example-user-id",
    "iat": 1511963669,
    "auth": {
        "ckbox": {
            "role": "superadmin",
            "workspaces": [ "workspace-id-1", "workspace-id-2" ]
        }
    }
}
In the above example, the user with ID example-user-id is assigned to two workspaces: workspace-id-1 and workspace-id-2.
If the user is assigned to more than one workspace, he will see a dropdown allowing to change the active workspace:

Please note that when a user is assigned to multiple workspaces, each workspace remains separate. As a result, it is not possible to, for instance, copy or move files between different workspaces.
Access to workspaces existing in the website environment depends on the user role and works like follows:
superadmin– users with thesuperadminrole set in the token have access to all the workspaces that exist in the given website environment. Please note that definingauth.ckbox.workspacesfor thesuperadminrole has no effect, and it will be ignored.admin,user– user with theadminoruserrole has access only to workspaces defined in theauth.ckbox.workspacesfield (or to the default workspace, if no explicit workspaces are defined)
Each website environment has automatically created a special workspace called the default workspace. If access to workspaces is not explicitly set in the user’s JWT token, the user will be automatically assigned to this default workspace.
Please note that if you explicitly define workspaces in the user’s JWT token, the user will not be able to access the default workspace unless its ID is explicitly defined on the list of allowed workspaces in the user’s JWT token defined in auth.ckbox.workspaces.
For backward compatibility, the identifier of the default workspace is the same as the identifier of the website environment.
The default workspace, unlike other workspaces, cannot be removed.
Below, you will find descriptions of popular use cases where workspaces can be effectively utilized. Please note that the list below is not exhaustive, as workspaces can also be utilized in various customized ways to meet specific requirements when integrating CKBox into your application.
An often required scenario in many types of applications is to separate data between different users. For example, you can have a CMS in which you want to provide private file storage to each user. In CKBox, you can create personal space for each user with built-in tools.
This can be achieved with the workspaces feature in two simple steps:
- Create the workspace – please refer to the Managing workspaces section.
- Assign the user to the workspace by setting the
auth.ckbox.workspacesfield of the user’s JWT token – please refer to the Assigning users to workspaces section.
All the users sharing the same workspace will have access to the same folders and files within it. To create private user spaces, you must ensure that each user is assigned only to his own workspace.
The complete token payload example in this case can look as follows:
{
    "aud": "NQoFK1NLVelFWOBQtQ8A",
    "iat": 1511963669,
    "sub": "example-user-id",
    "user": {
        "email": "example@example.com",
        "name": "A User",
        "avatar": "https://example.com/avatars/john.png"
    },
    "auth": {
        "ckbox": {
            "role": "user",
            "workspaces": [ "user-workspace-id" ]
        }
    }
}
Please note that users with the admin and user roles will be limited to the workspace defined in the auth.ckbox.workspaces field of the user’s JWT token, while users with the superadmin role have access to all the workspaces that exist in the current environment. For details, please refer to the Access to workspaces for different user roles section.
You can assign any number of users to a workspace. To assign multiple users to a shared workspace with ID shared-workspace-id, simply set the workspace ID in auth.ckbox.workspaces field of the token issued for chosen users.
The complete token payload example in this case can look as follows:
{
    "aud": "NQoFK1NLVelFWOBQtQ8A",
    "iat": 1511963669,
    "sub": "example-user-id",
    "user": {
        "email": "example@example.com",
        "name": "A User",
        "avatar": "https://example.com/avatars/john.png"
    },
    "auth": {
        "ckbox": {
            "role": "user",
            "workspaces": [ "shared-workspace-id" ]
        }
    }
}
A multi-tenant application is software that serves multiple clients or organizations simultaneously while keeping their data and operations separate and secure. Each tenant typically has its own isolated instance of the application, allowing them to customize their settings and access their own data.
For the purpose of this example let’s consider a multi-tenant CMS system hosting multiple websites, each managed by different groups of users. Tenant is a group of users who share common access with specific privileges to the software instance – in the case of our CMS, each tenant maintains its own website. The website data of each tenant is separated, and we aim to achieve the same data separation in CKBox. Additionally, for each tenant in the considered CMS there are two user groups:
- regular users - content creators
- administrators - users with administrative privileges, allowed to configure website settings
This too can be achieved with the CKBox workspaces feature. In this case, a separate workspace can be created for each tenant, and required users can be assigned to it through setting an appropriate auth.ckbox.workspaces property in the payload of the JWT token served to the user from the token endpoint. This way all the users sharing the same workspace will have access to the same folders and files.
In the example CMS system, only administrators are allowed to configure the application, and they will have the auth.ckbox.role set to admin, granting them access to the administration panel of CKBox.
As described in the Access to workspaces for different user roles section, admin and user roles in CKBox are associated with the workspace scope, while superadmin has access to all the workspaces existing in the current CKBox website environment. In our example CMS, superadmin could be the system administrator, who would have access to workspaces of all the tenants existing in the CMS system.
The complete token payload example for the CMS administrator user can look as follows:
{
    "aud": "NQoFK1NLVelFWOBQtQ8A",
    "iat": 1511963669,
    "sub": "admin-user-id",
    "user": {
        "email": "admin-user@example.com",
        "name": "An Admin User",
        "avatar": "https://example.com/avatars/john.png"
    },
    "auth": {
        "ckbox": {
            "role": "admin",
            "workspaces": [ "tenant-workspace-id" ]
        }
    }
}
The complete token payload example for the regular user of the CMS can look as follows:
{
    "aud": "NQoFK1NLVelFWOBQtQ8A",
    "iat": 1511963669,
    "sub": "regular-user-id",
    "user": {
        "email": "user@example.com",
        "name": "A User",
        "avatar": "https://example.com/avatars/john.png"
    },
    "auth": {
        "ckbox": {
            "role": "user",
            "workspaces": [ "tenant-workspace-id" ]
        }
    }
}