Permissions
Permissions enable fine-grained control over user access to specific features and actions. By assigning permissions, admins can restrict user access to selected resources and their interactions with assets, categories, and folders.
Users are assigned to groups with sets of permissions assigned.
Depending on the user’s permissions, UI elements may be hidden. For example, if the user does not have permission to create an asset the upload button will not be available to us and the drag and drop area will be disabled. Similarly, if the group to which the user is assigned does not have permission to delete folders, the Delete button will not be available and the Del shortcut will not be active either.
This is a premium feature and hence may not be available in all commercial plans.
Groups serve as an organizational unit for managing user access and permissions. User groups allow administrators to assign permissions to multiple users at once. Admins and Superadmins can create groups. Users are assigned to a particular group or groups via JWT. Each group can be assigned to a specific permissions set and category.
A default group is a special group that exists in each workspace. It serves as a fallback in the absence of a group defined in JWT. It is created together with the workspace and is not removable. By default, it has all permissions, but this can be changed manually.
Permissions introduce control over the following actions:
- Accessing a Category: Allows users to view the contents of a specific category. Users with this permission can browse and access assets stored within the designated category. Without this permission, the category will not be listed. Access to this category by its ID without permission would result in a
403status error. - Creating an Asset: Grants users the ability to upload new assets, and copy existing assets to a particular category.
- Deleting an Asset: Enables users to delete assets from the category or a folder.
- Modifying an Asset: Allows users to edit and make changes to existing assets. Users with this permission can update assets by overwriting their content (both using the REST API and image editor with the
Overwriteoption). - Modifying Asset Metadata: Provides users with the capability to edit and update metadata associated with assets. Metadata includes information such as titles, descriptions, and tags, but not the content.
- Modifying an Asset Revision: Allows users to set a historical revision as the current one, effectively restoring an older version of the asset’s content.
- Deleting an Asset Revision: Allows users to remove a historical from an asset’s revision history.
- Creating a Folder: Grants users the privilege to create new folders. This also includes creating a folder via the
Folder uploadfeature. - Modifying a Folder Metadata: Enables users to edit and update metadata associated with folders (
name). - Deleting a Folder: Allows users to delete folders.
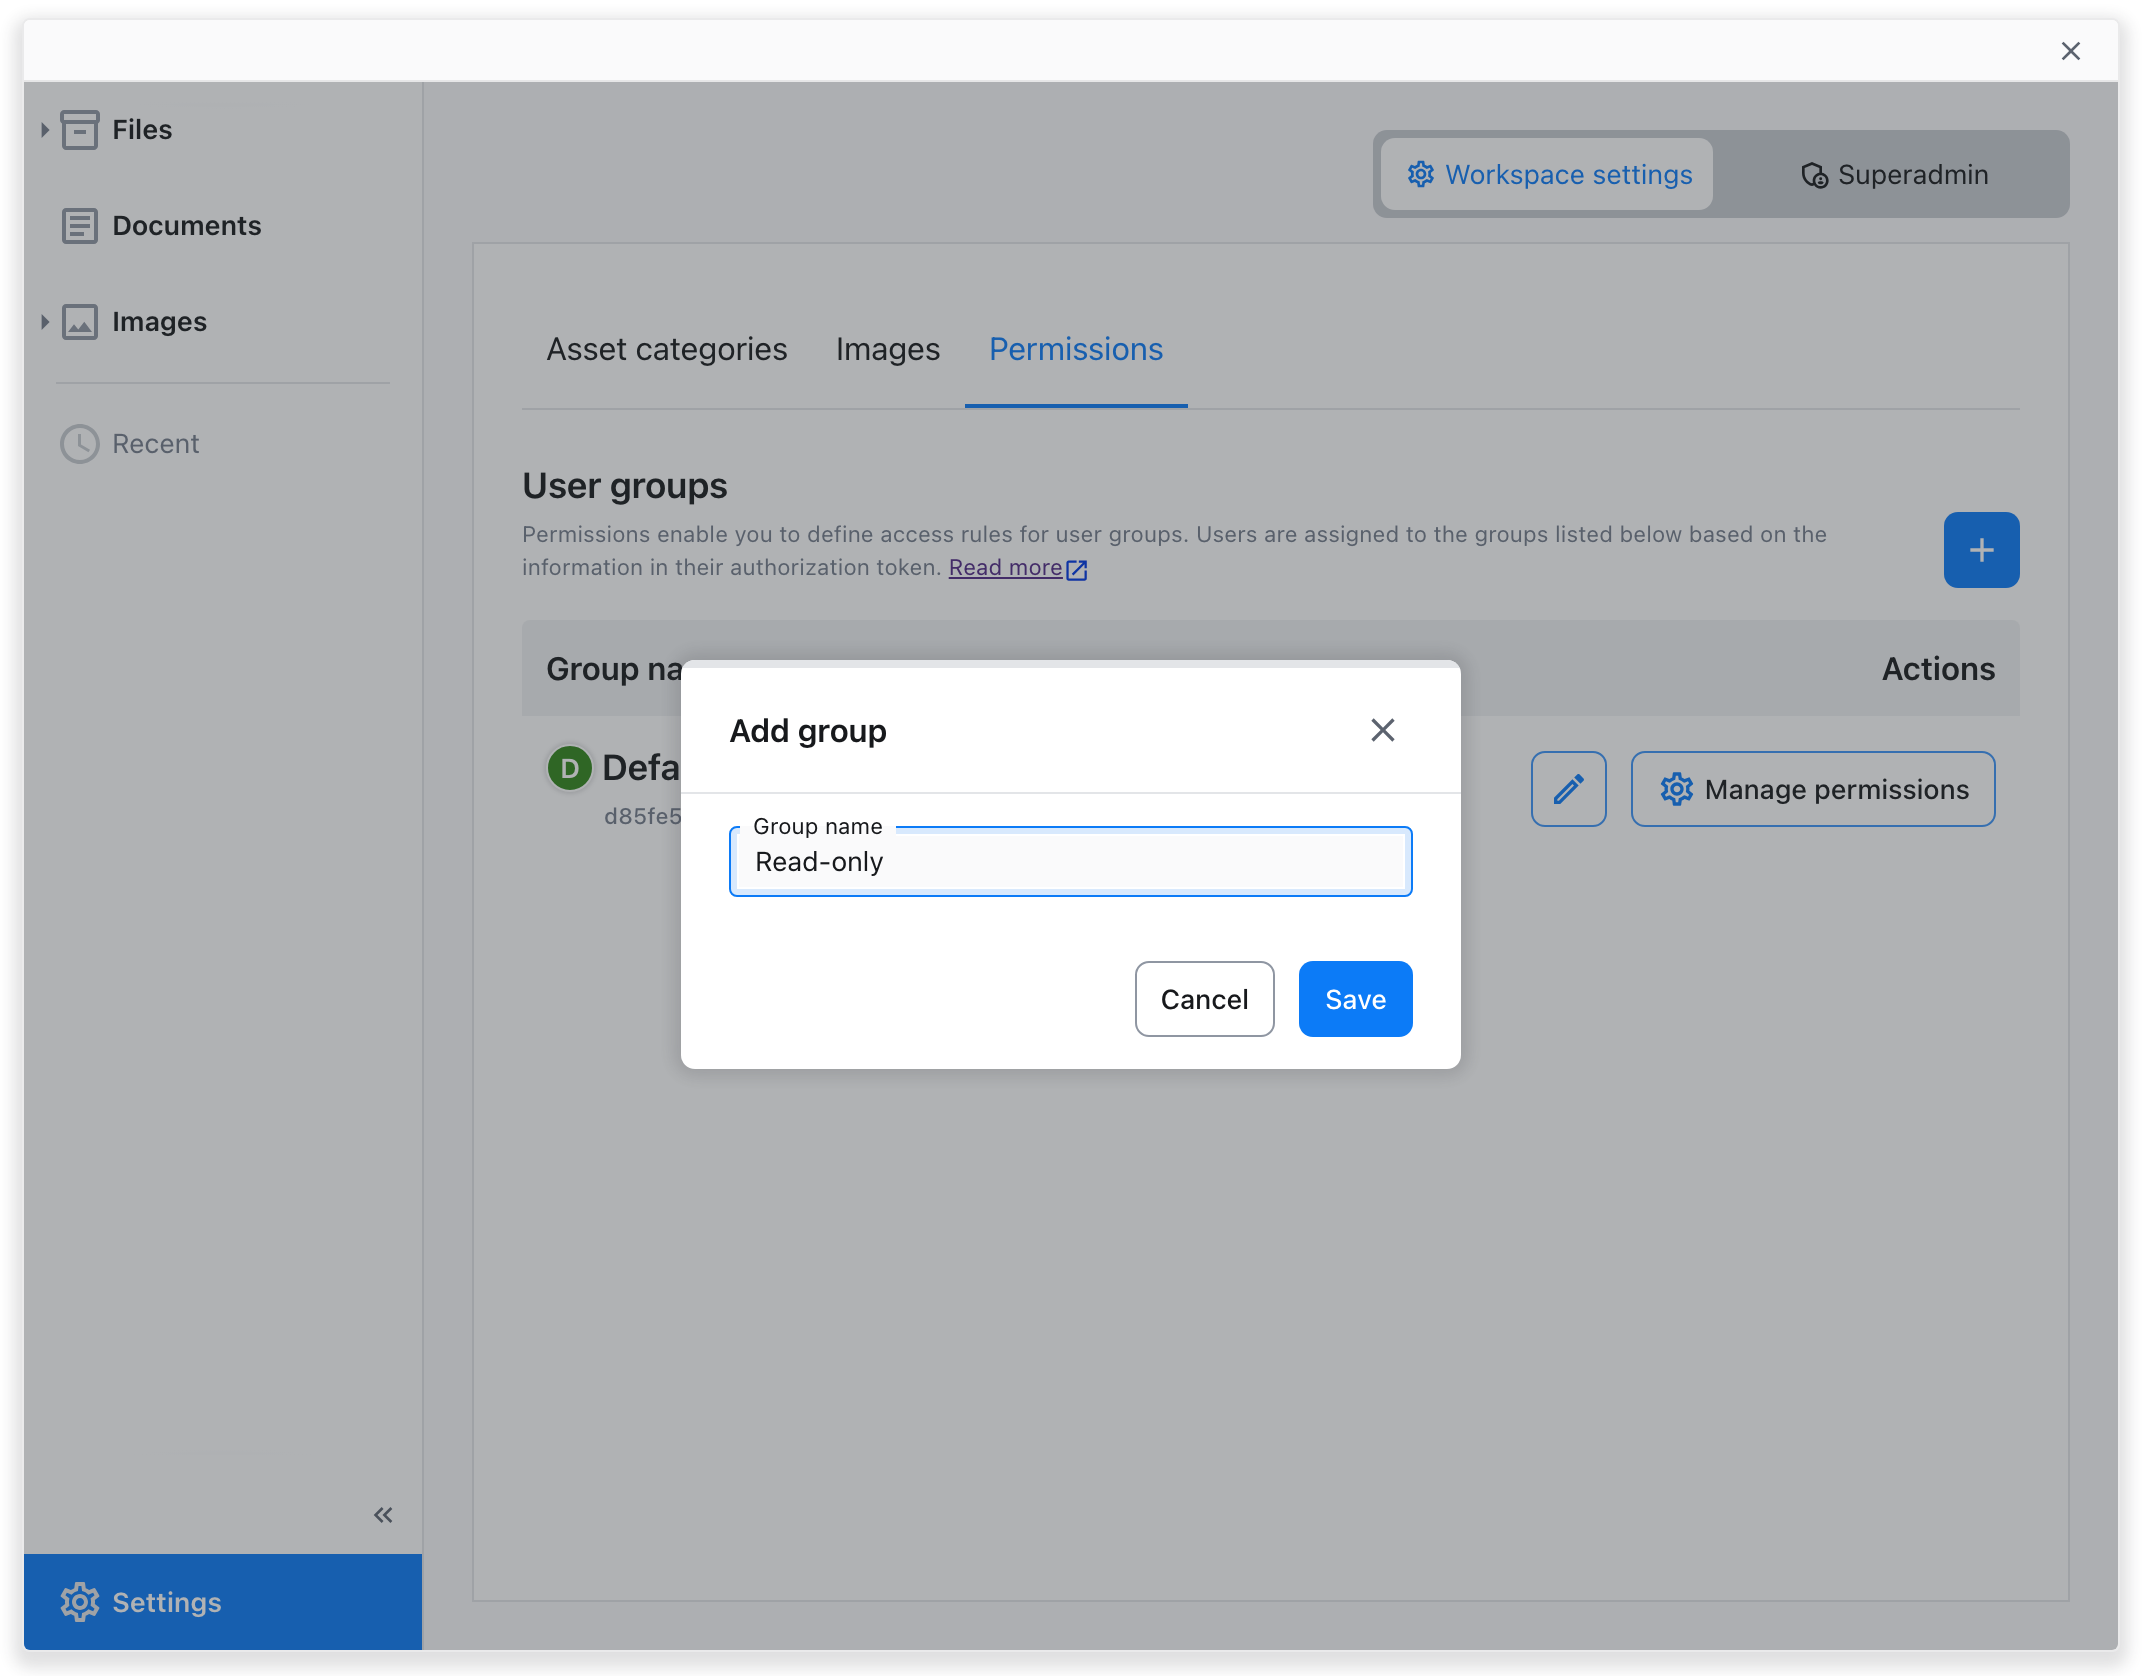
To create a new group, go to the “Settings” section of the CKBox administration panel. There, choose the “Permissions” tab. Use the + button to add a new group.

Type the desired group name in the pop-up dialog. Hit “Save” to confirm the creation of a new group.
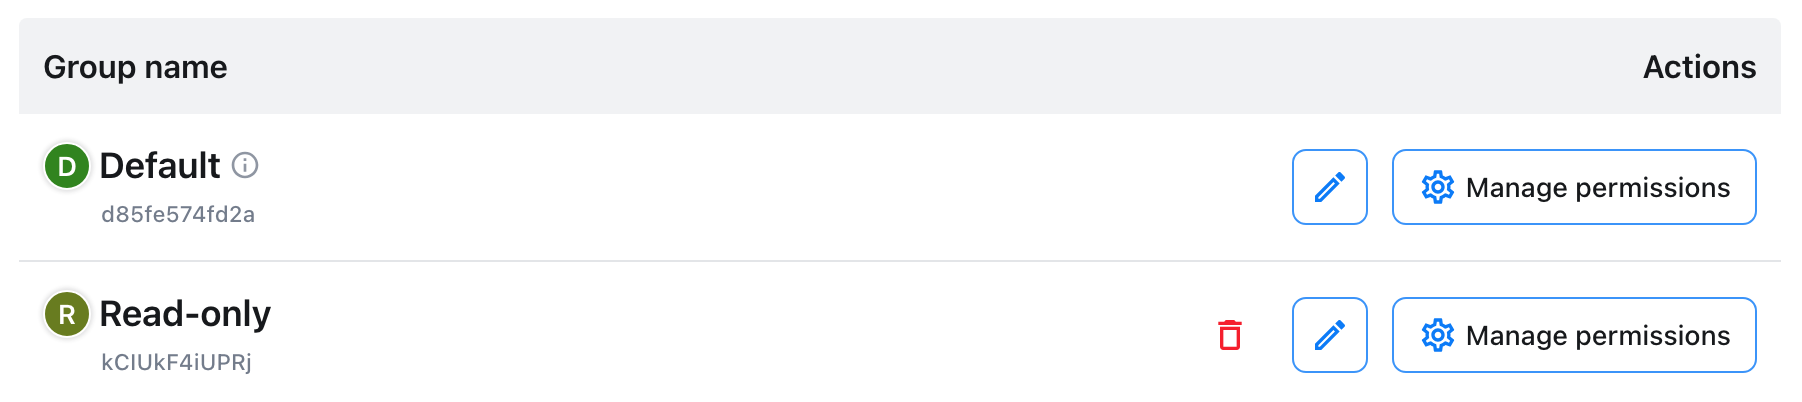
The newly-made user group is now accessible from the groups listing in the “Permissions” tab.
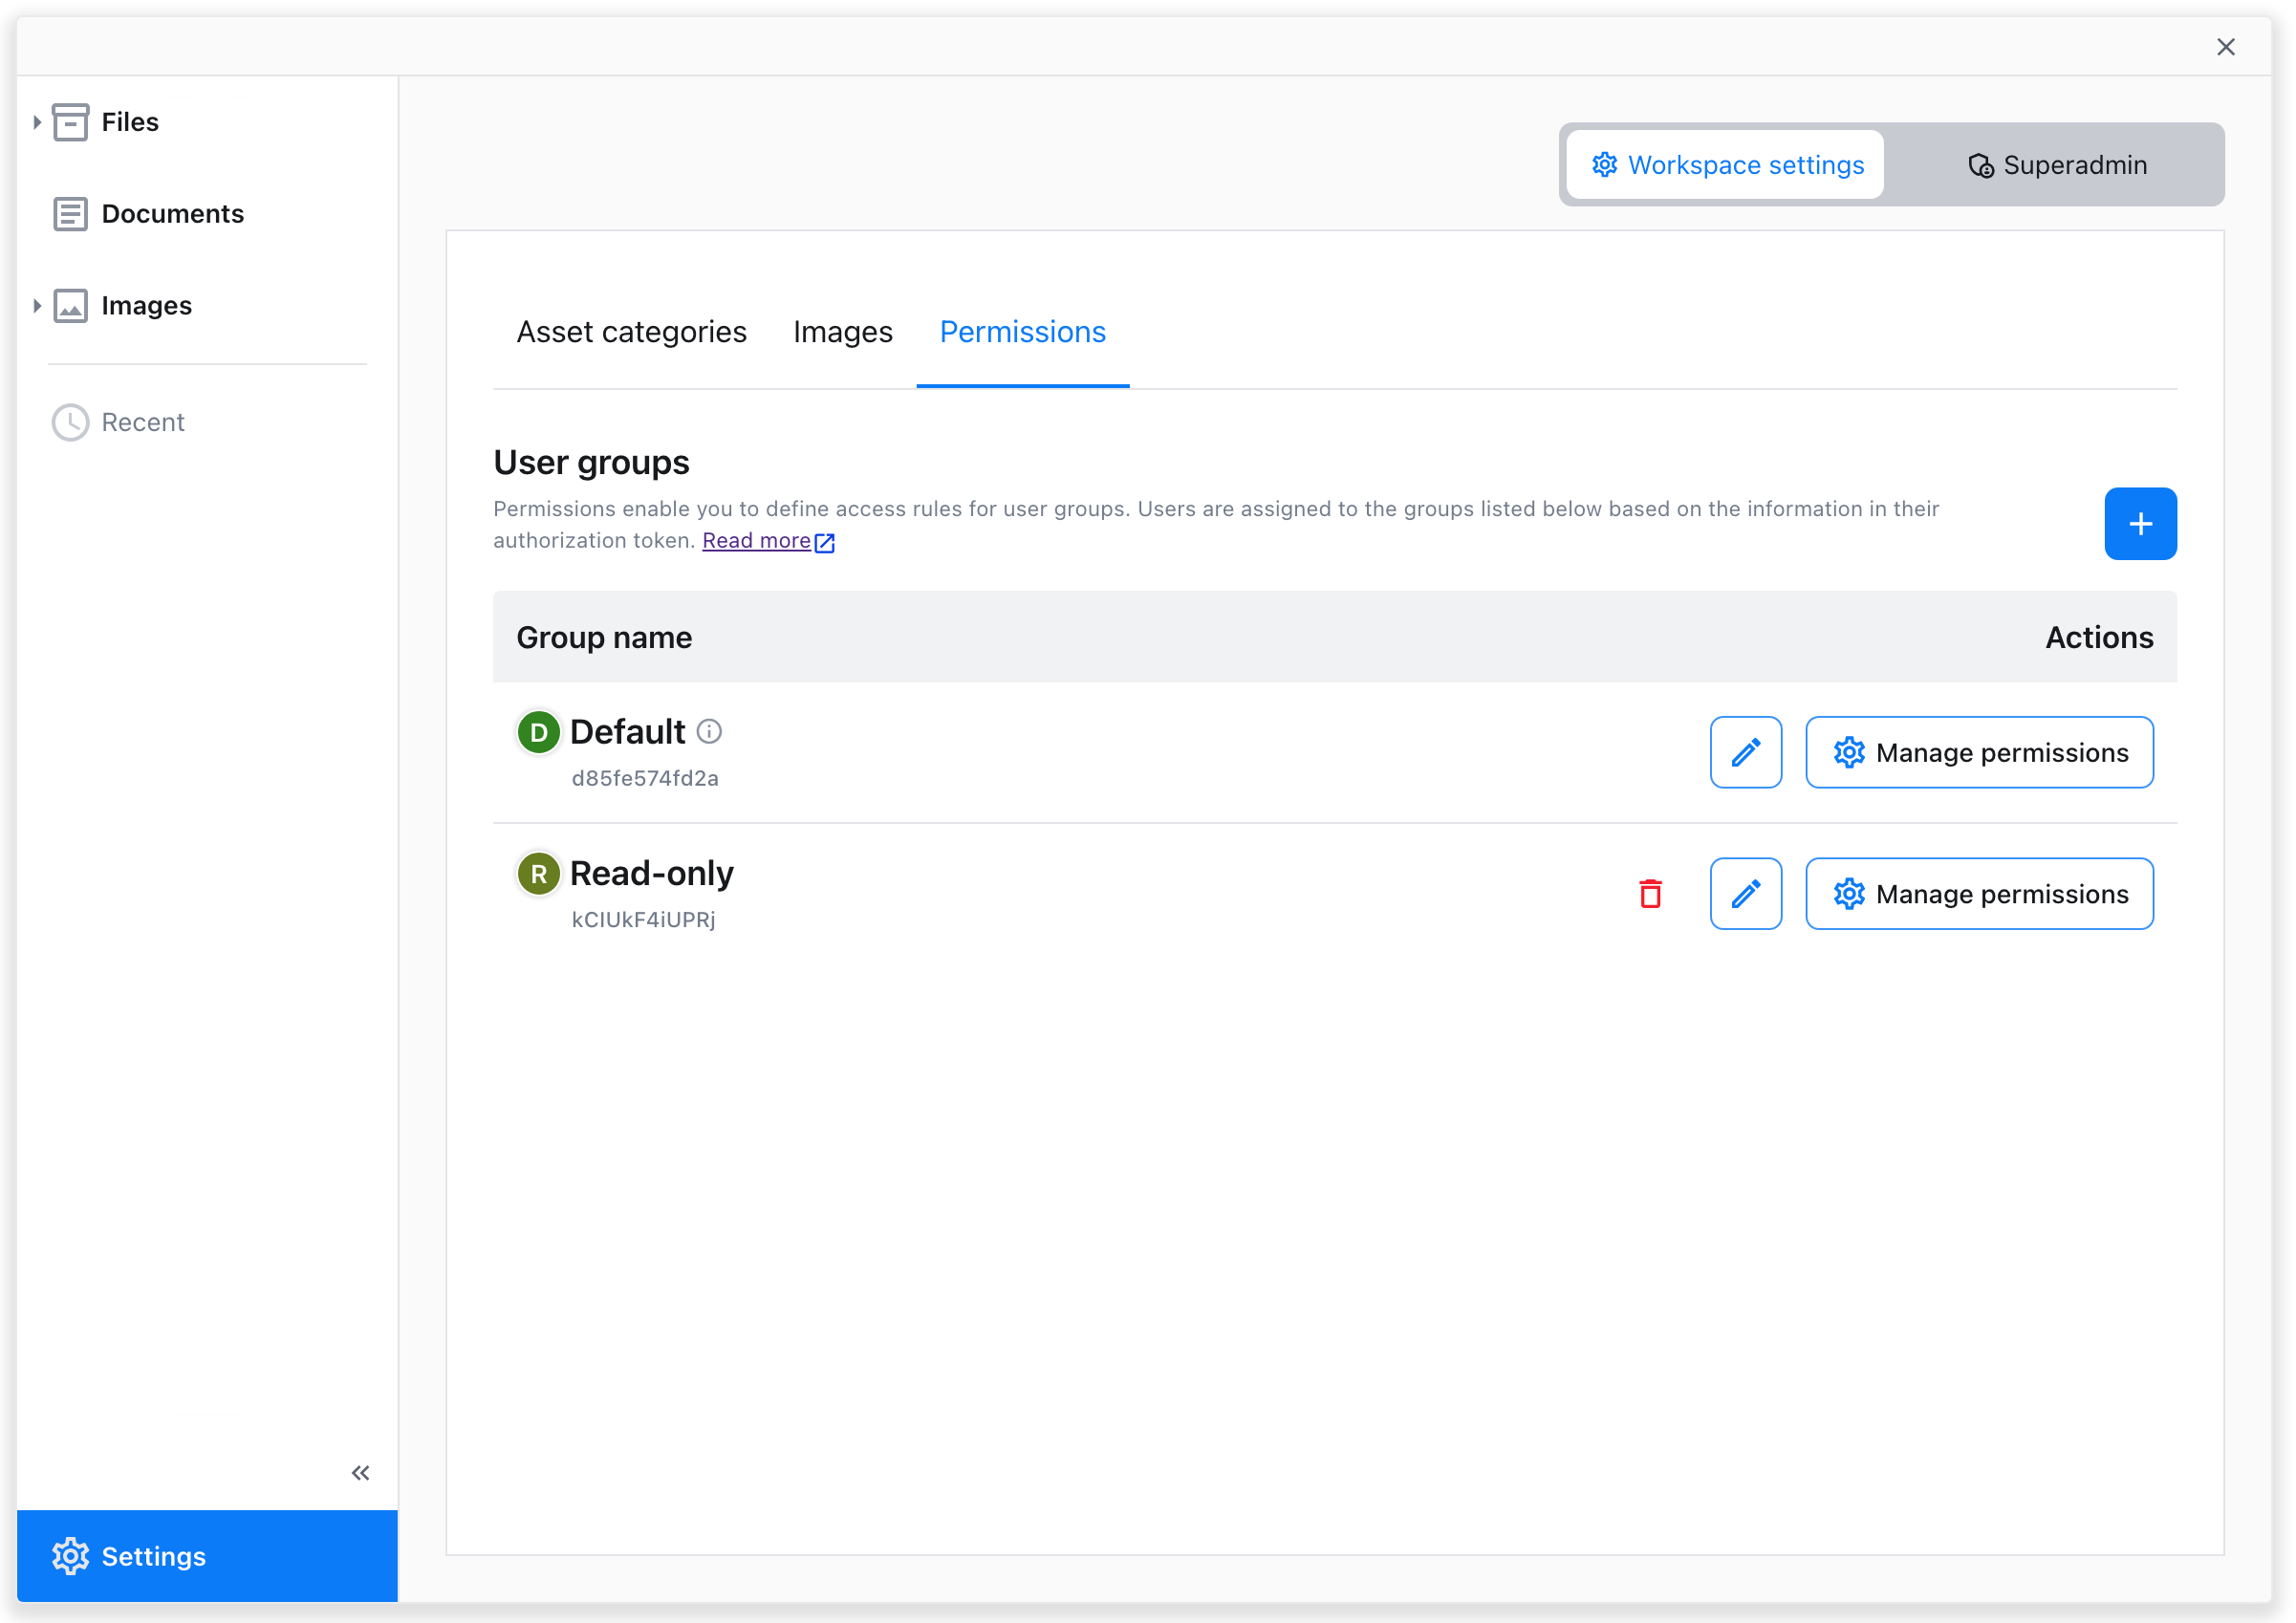
An ID is displayed below the group name. It will be later needed to assign users to groups. Adding permissions sets can be done via the “Manage permissions” option.
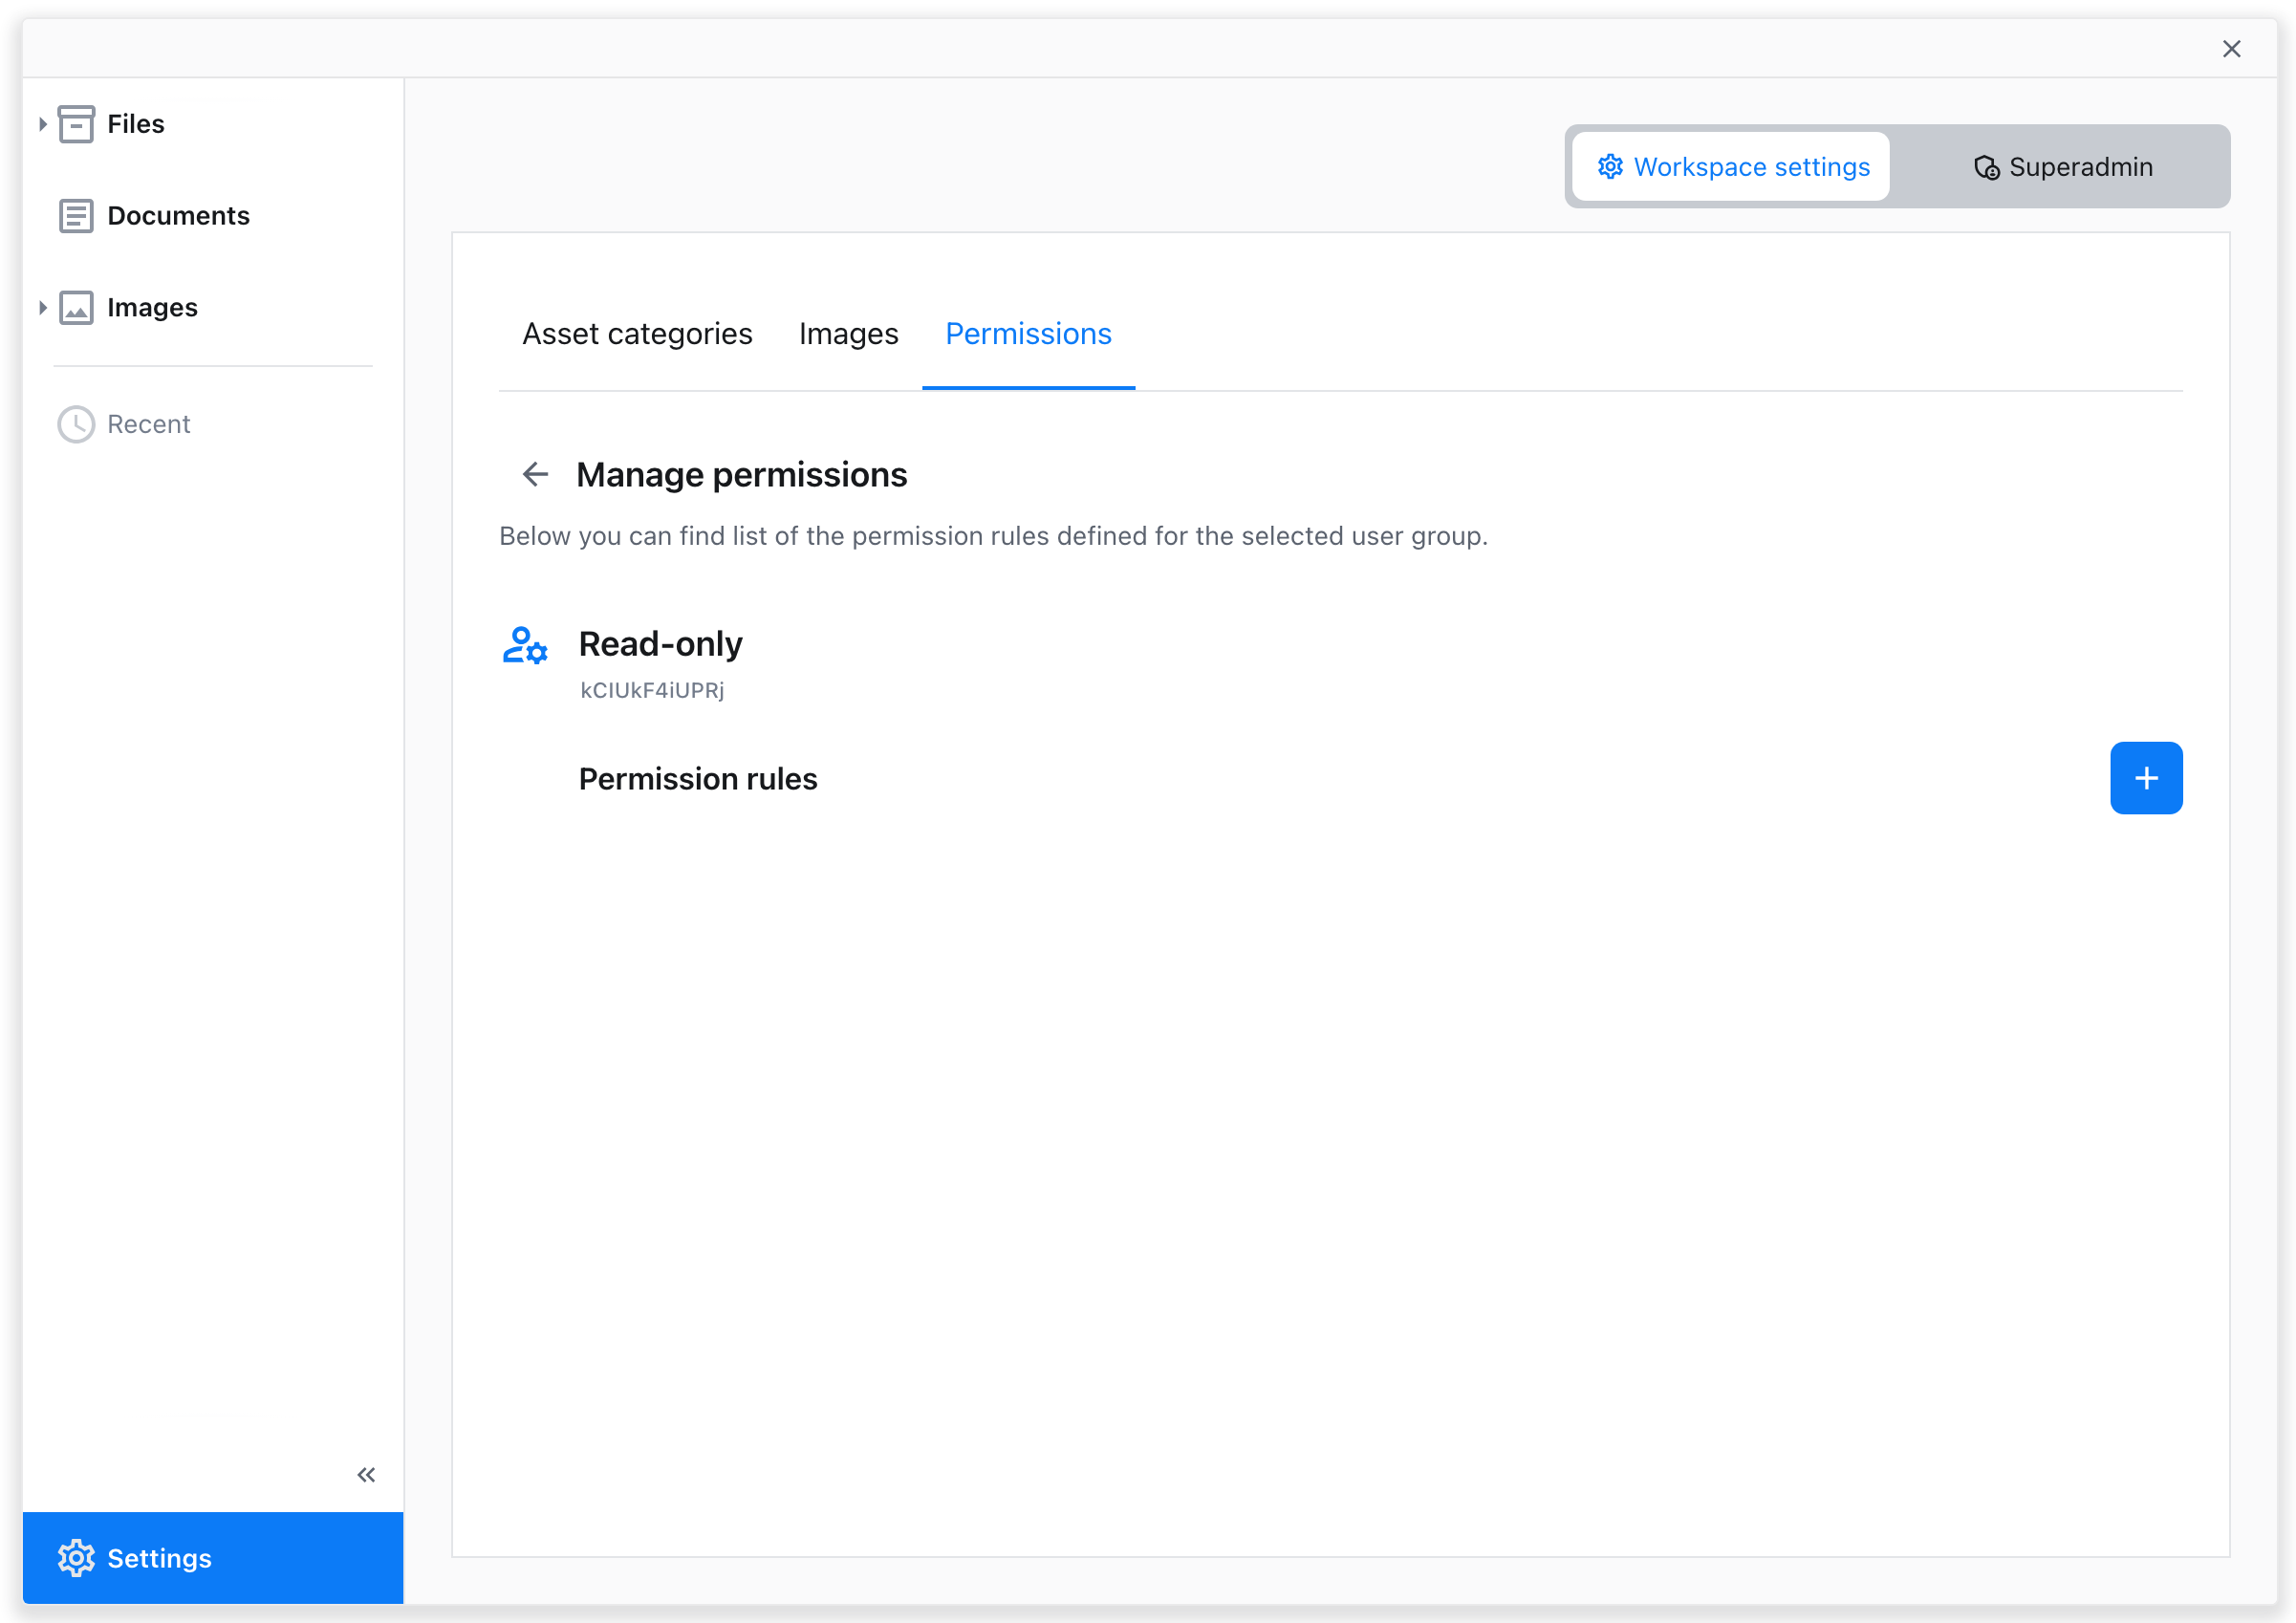
To assign a set of permissions to a new group, hit the “Manage permissions” button, right to the group you want to add the permissions to. Then, use the + button to add a new permission rule.
From the list, select the permissions you want to enable, using the toggle switches.
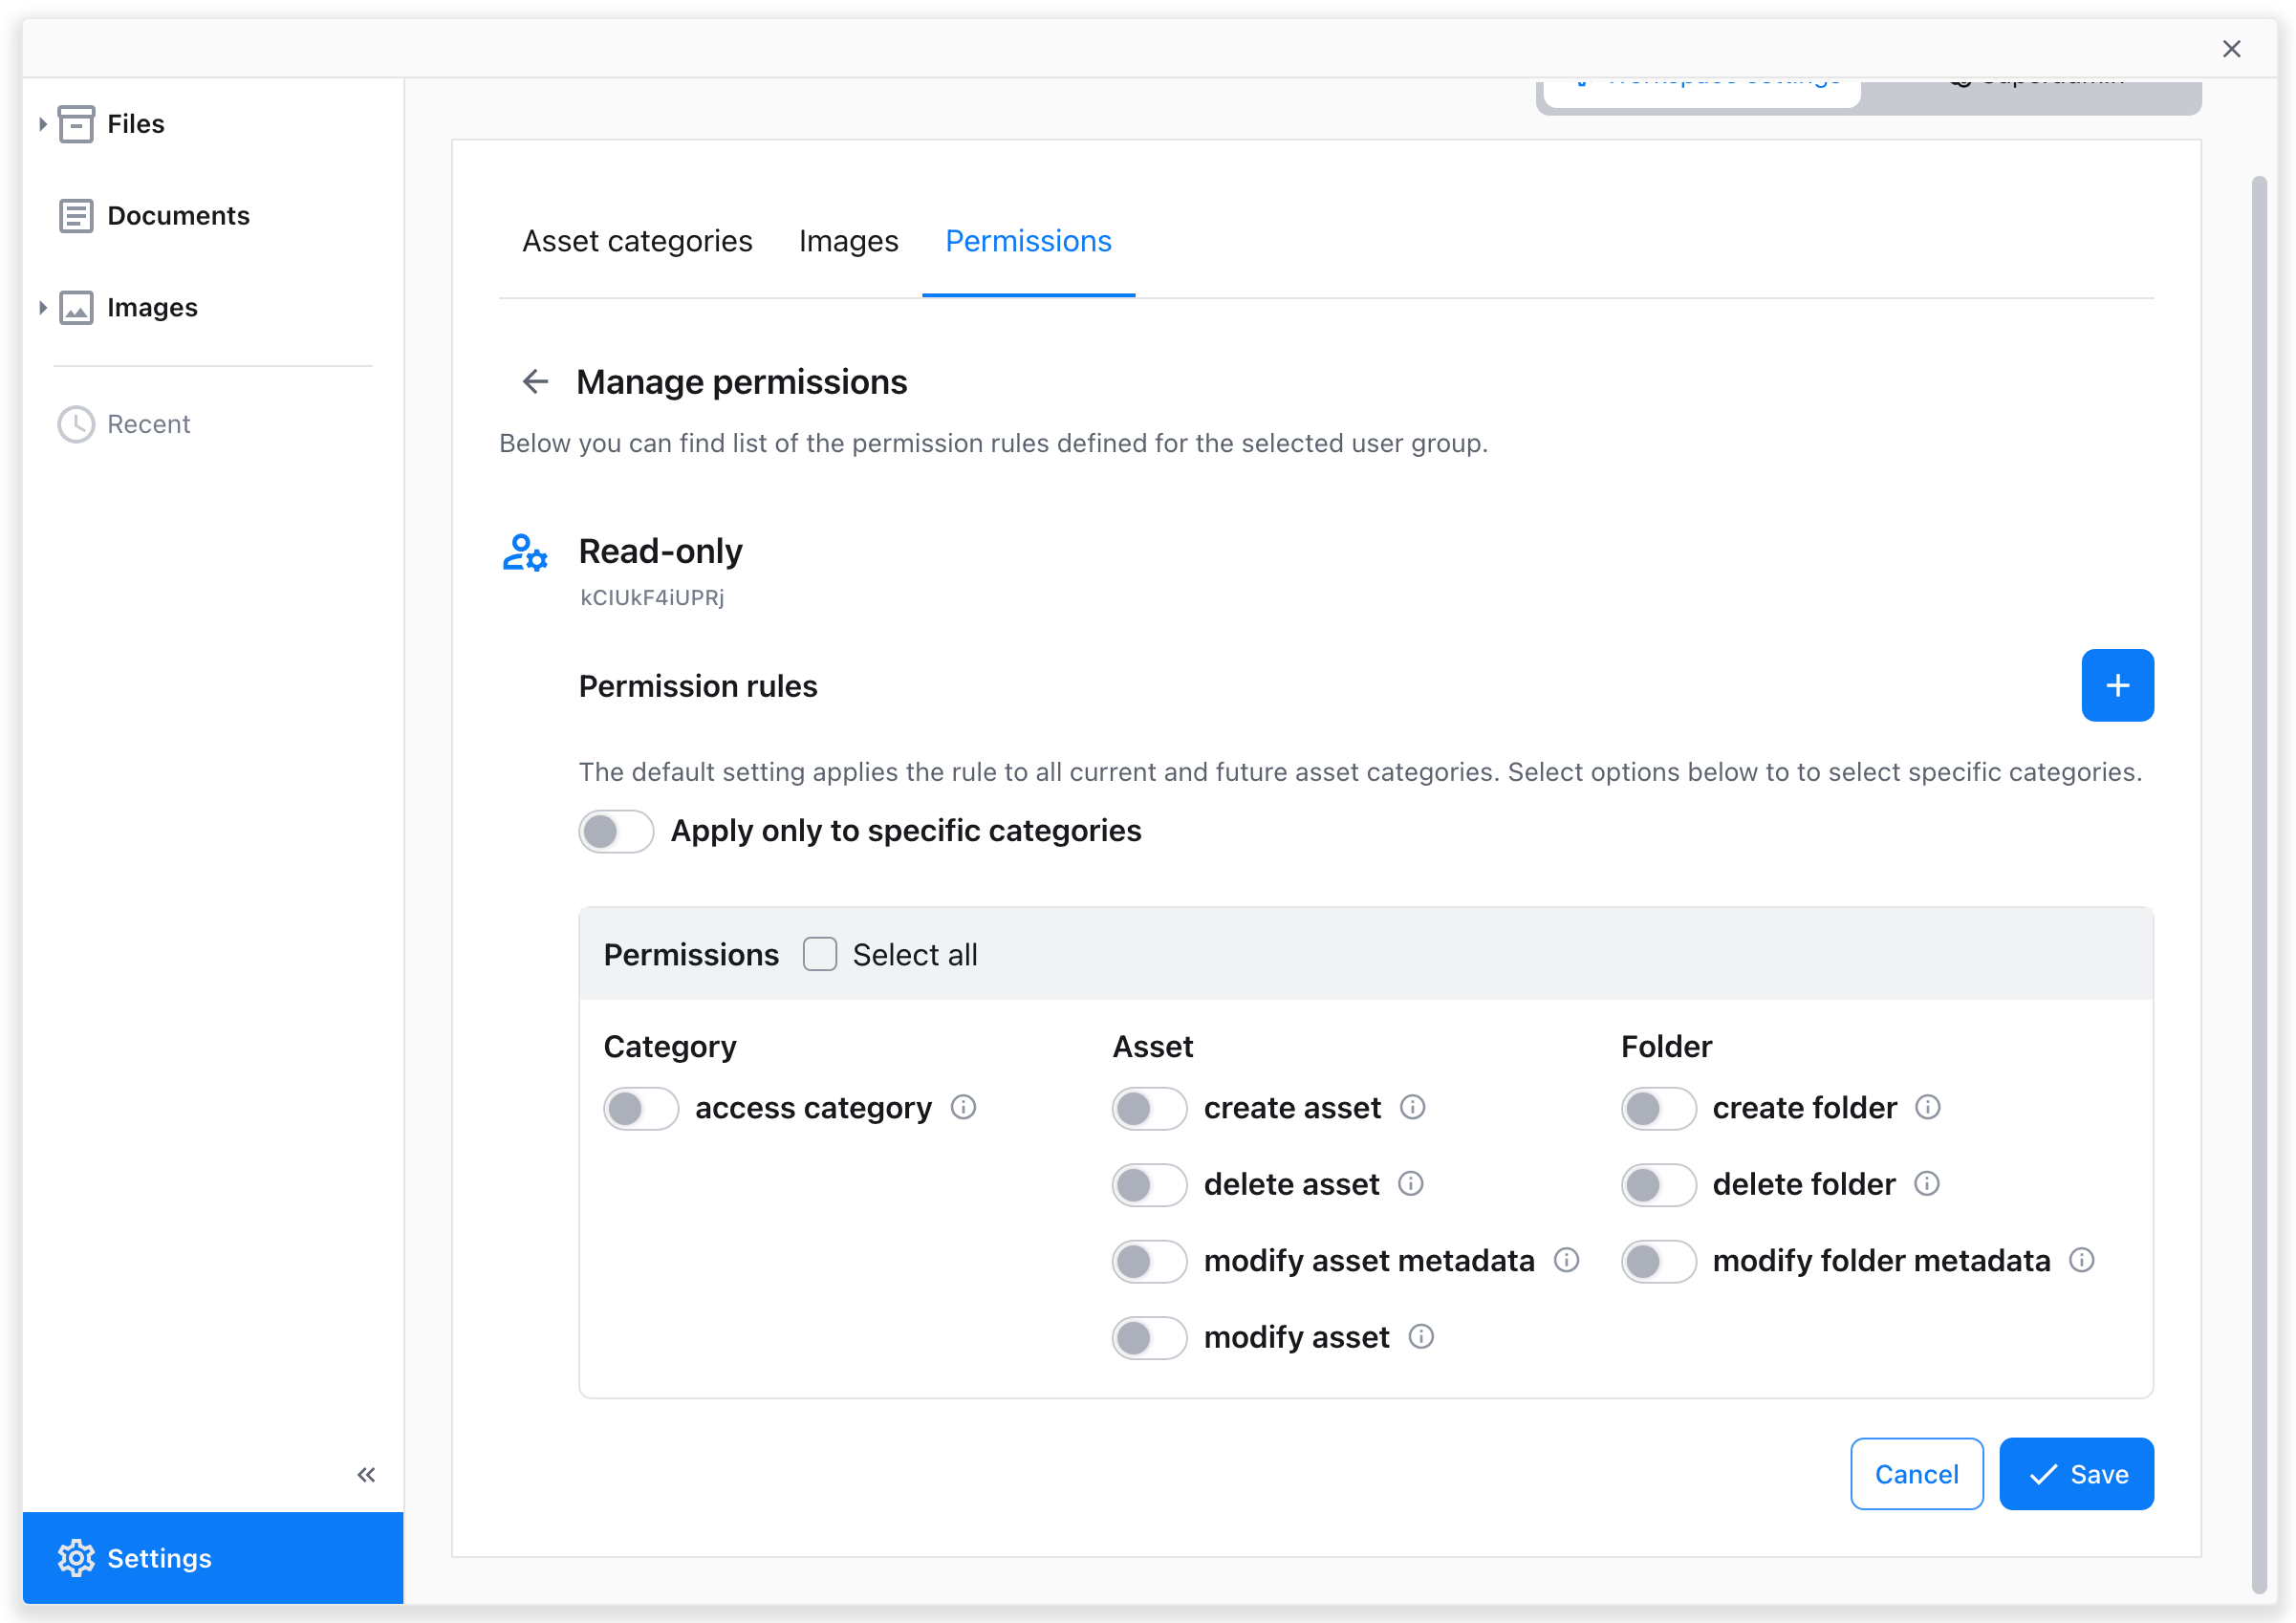
If desired, select specific categories the new permission rule should apply to with the toggle switch. If left off, it will apply to all CKBox categories.
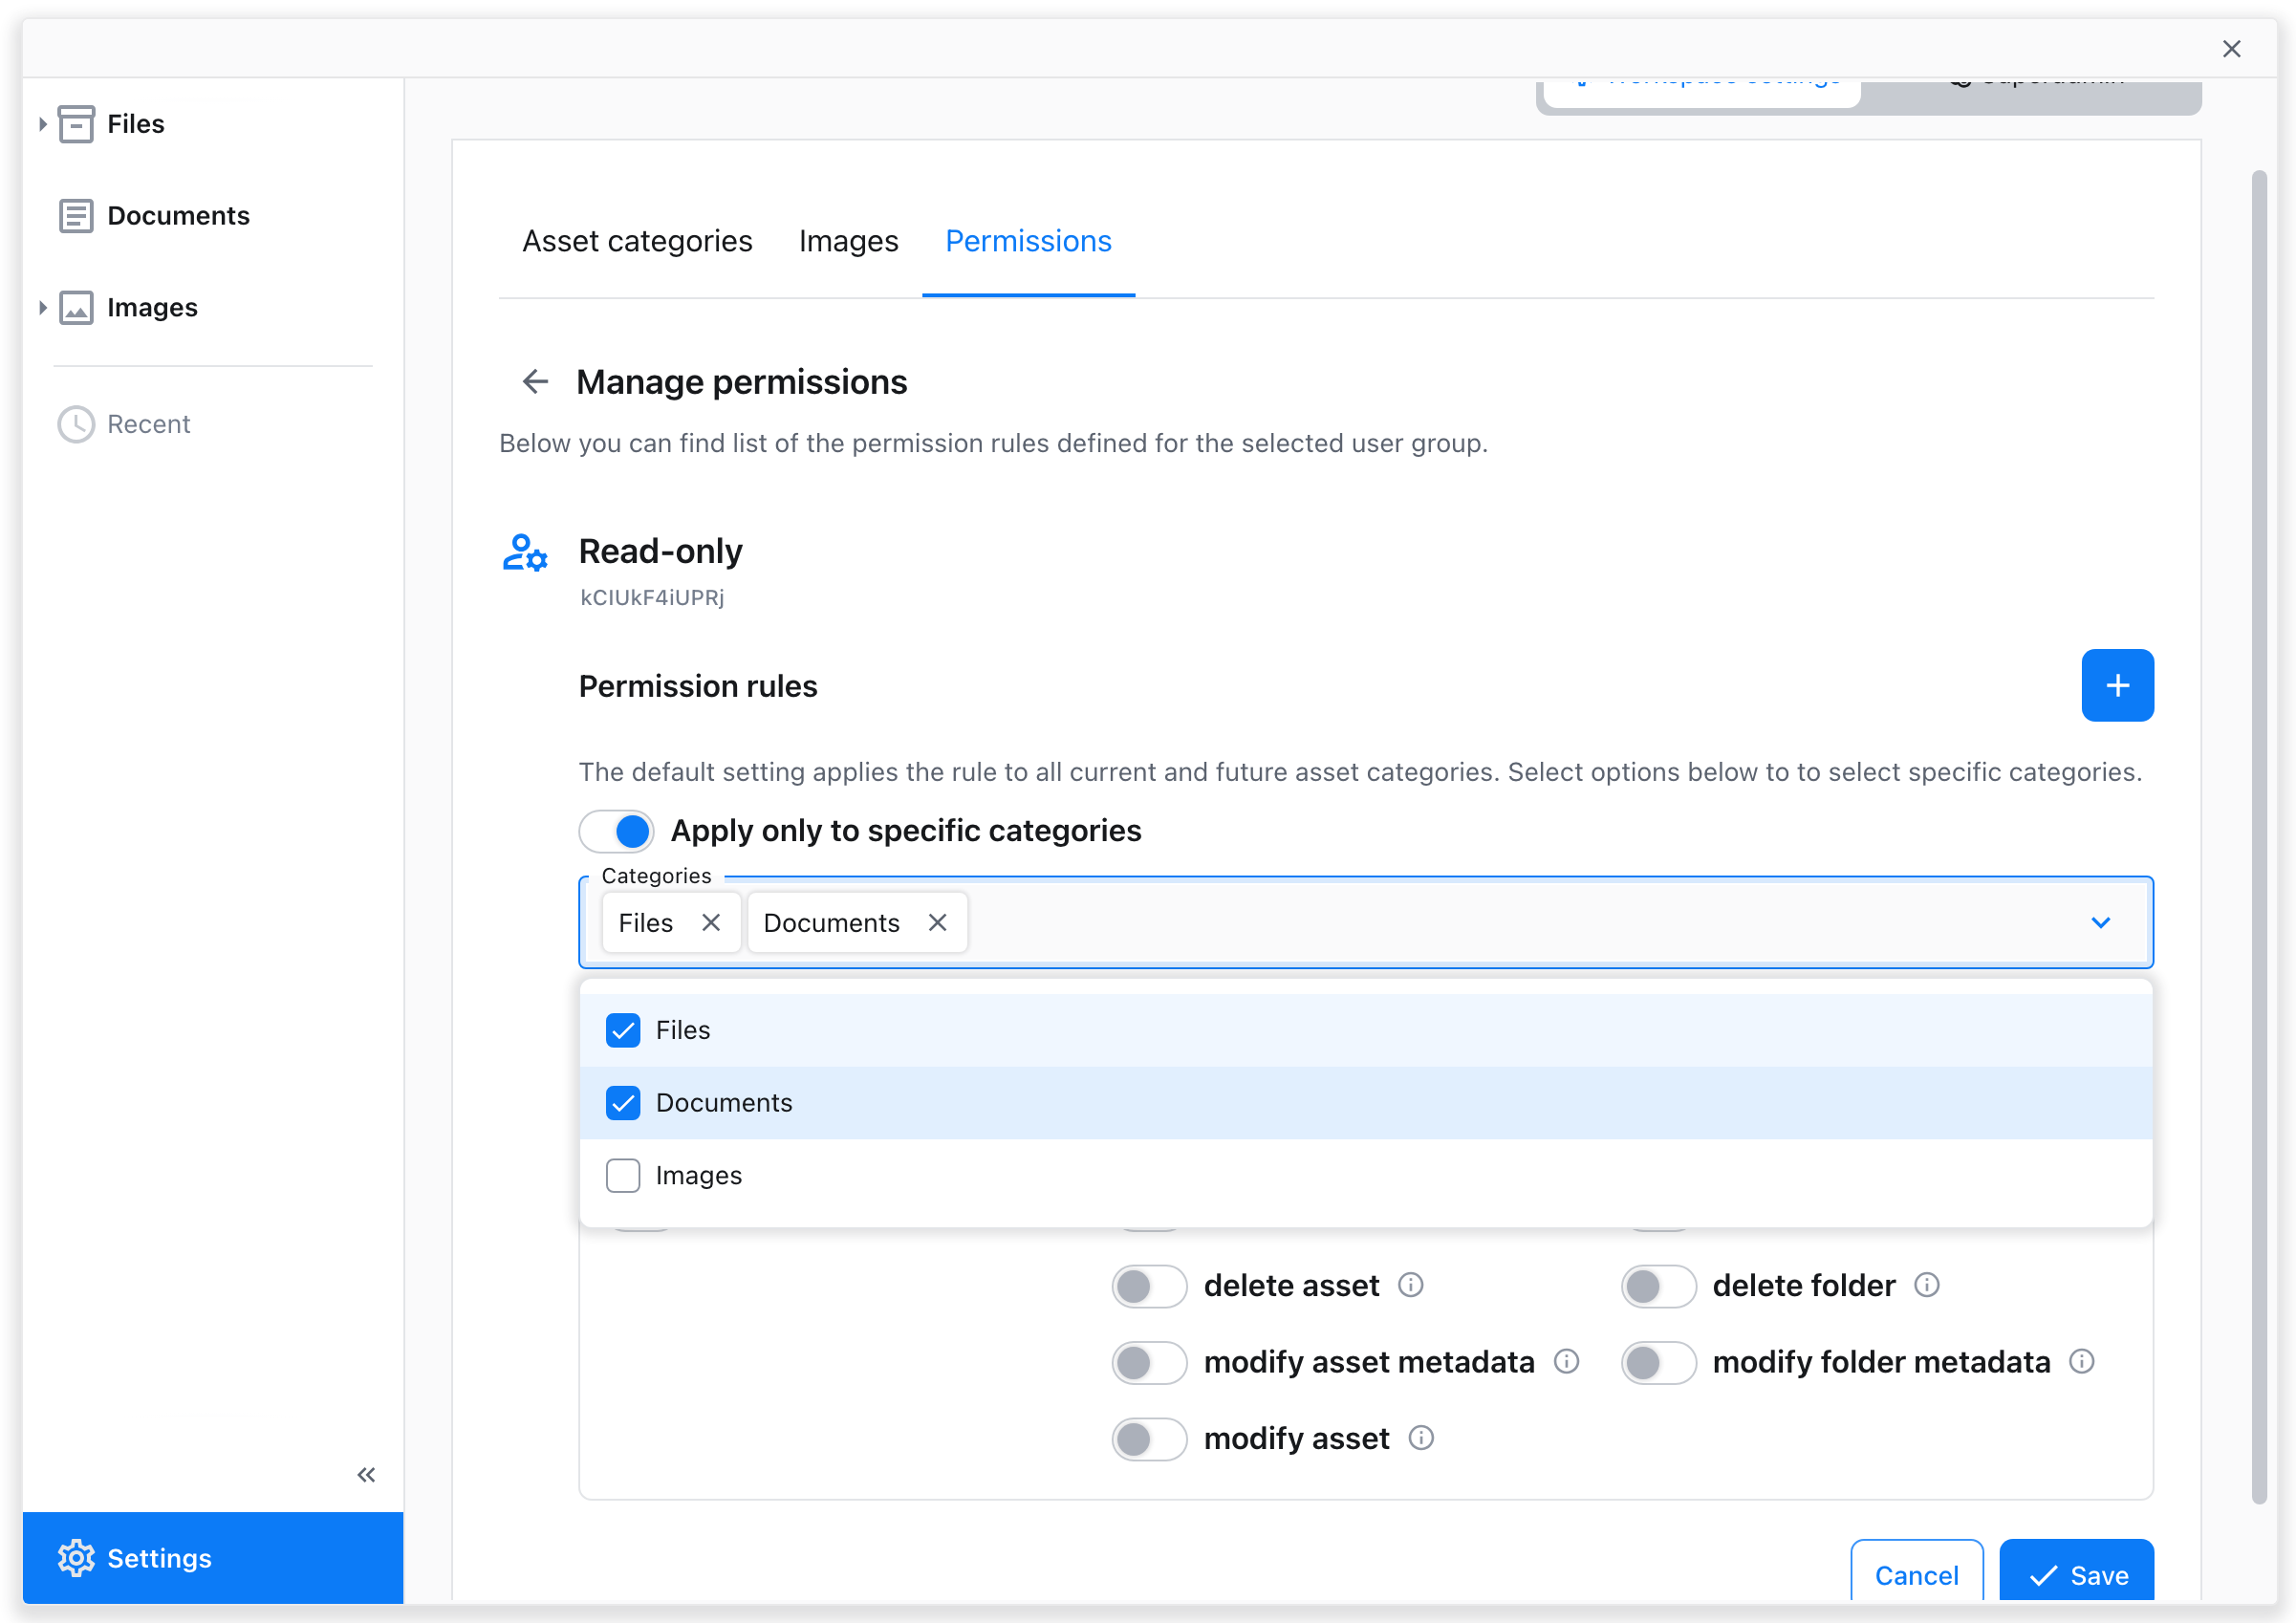
Hit “Save” when done with setting permissions.
Users can be assigned to groups in JWT in the auth.ckbox.groups configuration option. Groups must be listed as IDs. These can be found in the user groups listing in the Permissions management pane in the Setting console. Group ID is displayed below the group name, as shown below.
Below you can see a sample user assigned to two groups.
{
    "aud": "62476038ee047dca1a0b",
    "sub": "RamlmkVZBgG6BW2DeUi4d",
    "auth": {
        "ckbox": {
            "role": "user",
            "groups": ["d85fe574fd2a", "kCIUkF4iUPRj"]
        }
    },
    "iat": 1721311797,
    "exp": 1721315397
}
Permissions are only checked for regular users. Admins and superadmins have all access granted by default.
If JWT does not contain permission groups, the users fall back to the default group. It means, that if the default group permissions were not adjusted, they will have all permissions granted, as this is the rule set for the group.
In scenarios where a user is assigned to multiple groups with different permissions, such as being a member of both the Marketing Team with access to the Videos category and the Sales Team with access to the Documents category, the principle of clashing permissions comes into play. When permissions clash, CKBox defaults to an “Allow” resolution. This means the user’s effective permissions are the union of all their group assignments.
For example, suppose a user is part of the “Marketing Team” which allows access to the “Videos” category, and the “Sales Team” which allows access to the “Documents” category. In that case, the user will have access to both the “Videos” and “Documents” categories. This ensures that users have the broadest access possible based on their group memberships.
Additionally, if the “Marketing Team” has permission to create and modify assets while the “Sales Team” has permission to delete assets, the user will inherit both these permissions. The user will be able to create, modify, and delete assets within the categories they have access to. This approach simplifies permission management by ensuring that users do not encounter unexpected access denials due to overlapping group permissions.
As a result, users can perform any action permitted by any of their assigned groups. This mechanism is crucial in collaborative environments where users might need to access and interact with a wide range of resources to perform their roles effectively.