Export to Word - quick start
The aim of this article is to get you up and running with the Export to Word service.
Follow these steps:
- Subscribe to Export to Word on the Premium Features Free Trial website.
- Generate your access credentials in the Customer Portal.
- Configure CKEditor 5.
All the steps are explained in detail below.
This is a premium feature and you need a subscription to use it. You can purchase it here for your open-source CKEditor implementation. Contact us if:
- A CKEditor 5 commercial license is needed for your application.
- You need an on-premises (self-hosted) version of the service.
- You have other licensing questions.
You can also sign up for the CKEditor Premium Features 14-day free trial.
Create an account in CKEditor Cloud Services by signing up to Export to Word. After signing up, you will receive access to the customer dashboard (Customer Portal).
Log in to the Customer Portal and navigate to “Your products > Cloud Services”.
From the list of available subscriptions in the dashboard choose the Export to Word subscription that you want to manage and press the “Manage” link.

The Export to Word service may be used to convert the HTML data into DOCX files. In order to use it, authorization is needed in the form of an authorization token.
The authorization token needs to be passed as a value of the Authorization header.
{
    'Authorization': 'Your generated authorization token'
}
The authorization token can be generated in two ways:
- As a value returned from the security token endpoint.
- Locally created token.
From the list of environments select the one that you want to manage.

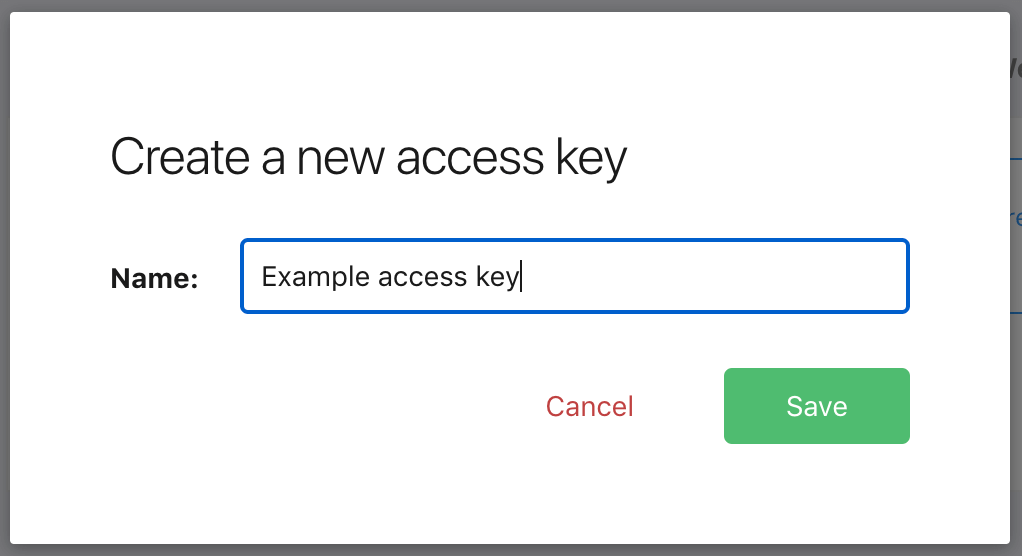
Go to the “Access credentials” tab and click the “Create a new access key” button.

The modal will show up and will prompt for a name for the new access key. Provide the name and click the “Save” button.
The newly created access key will be present on the list of access keys.
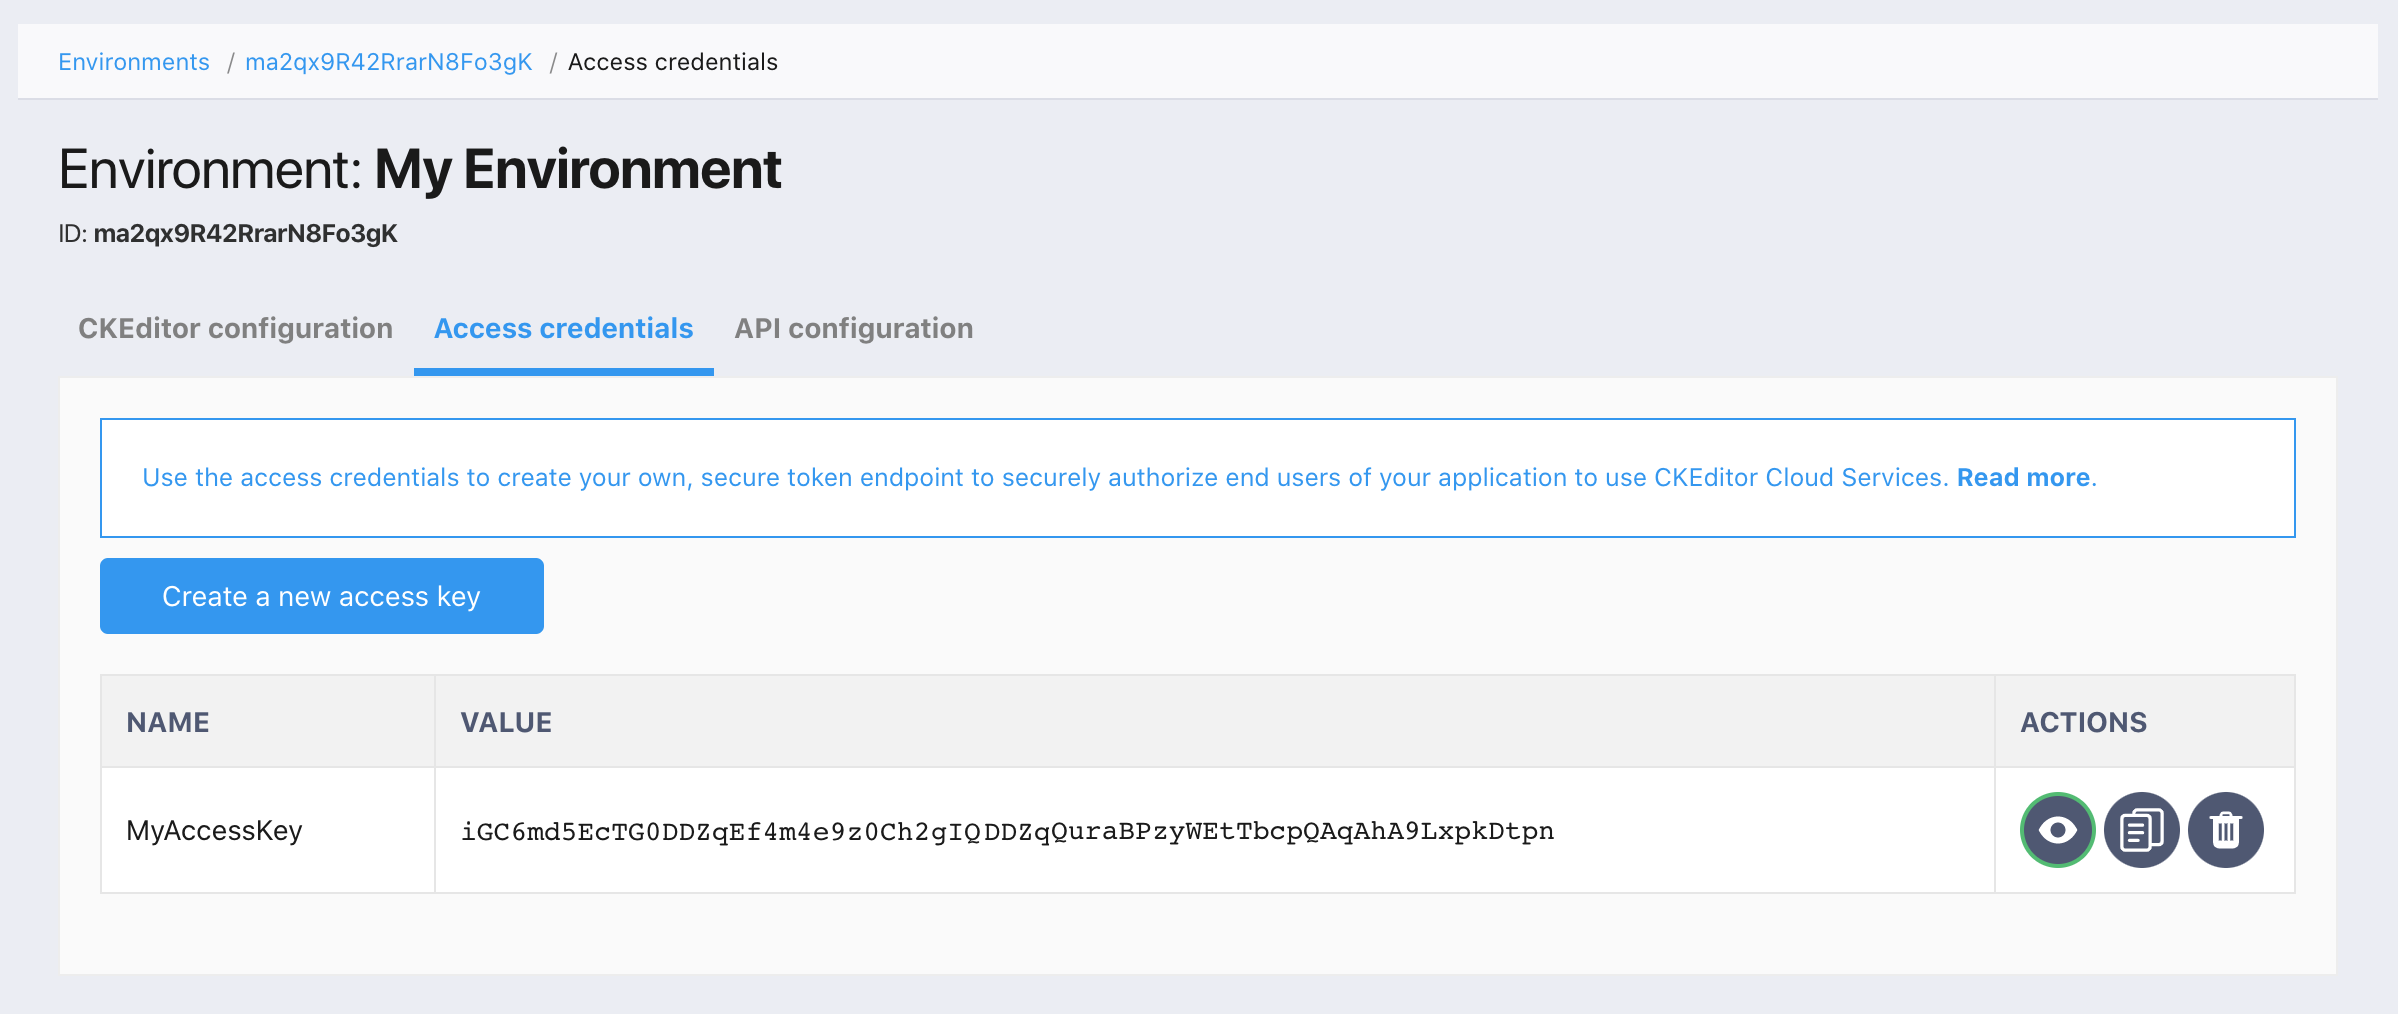
For your safety, the access key value will disappear in a few seconds. You will be able to display it again by clicking the “Show” button. Make sure to keep the access credentials in a safe place.
Read more about dealing with the credentials in the Managing access credentials section of the Environments management guide.
Tokens for the HTML to DOCX converter service require passing a payload with the aud parameter:
aud– The environment ID.
The accessKey value needs to be replaced with your own access key generated before.
The following example presents a request that contains the required Authorization header for the HTML to DOCX converter:
const fs = require( 'fs' );
const jwt = require( 'jsonwebtoken' );
const axios = require( 'axios' );

const accessKey = 'iGC6md5EcTG0DDZqEf4m4eytr679z0Ch2gIQuraBPzyWEtTbcpQAqAhA9LxpkDtpn';
const environmentId = 'DO3zekDU3LiJX8GOL2xt';

const token = jwt.sign( { aud: environmentId }, accessKey, { algorithm: 'HS256' } );

const data = {
 html: "<p>I am a teapot</p>",
 css: "p { color: red; }",
 config: {
  headers: {
   default: {
    html: "<h1>Hi! I'm header!</h1>",
    css: "h1 { color: pink; }"
   }
  }
 }
};

const config = {
   headers: {
      'Authorization': token
   },
   responseType: 'arraybuffer'
};

axios.post( 'https://docx-converter.cke-cs.com/v2/convert/html-docx', data, config )
   .then( response => {
      fs.writeFileSync('./file.docx', response.data, 'binary')
   } ).catch( error => {
      console.log( error );
   } );
Please refer to the converter documentation to start using the service.
In order to use the export to Word feature in your CKEditor 5 build, a token URL is needed for authorization.
Before you can use the feature, you first need to create a security token endpoint in your application. The role of this endpoint is to securely authorize end users of your application to use CKEditor Cloud Services only if they should have access to the content or action they are requesting.
The development token endpoint is a special endpoint to help you get started with CKEditor Cloud Services. It offers unrestricted, full access to the service and will expire 30 days after being used for the first time. You should not use it on production. Anyone knowing this URL will have full access to the associated environment.
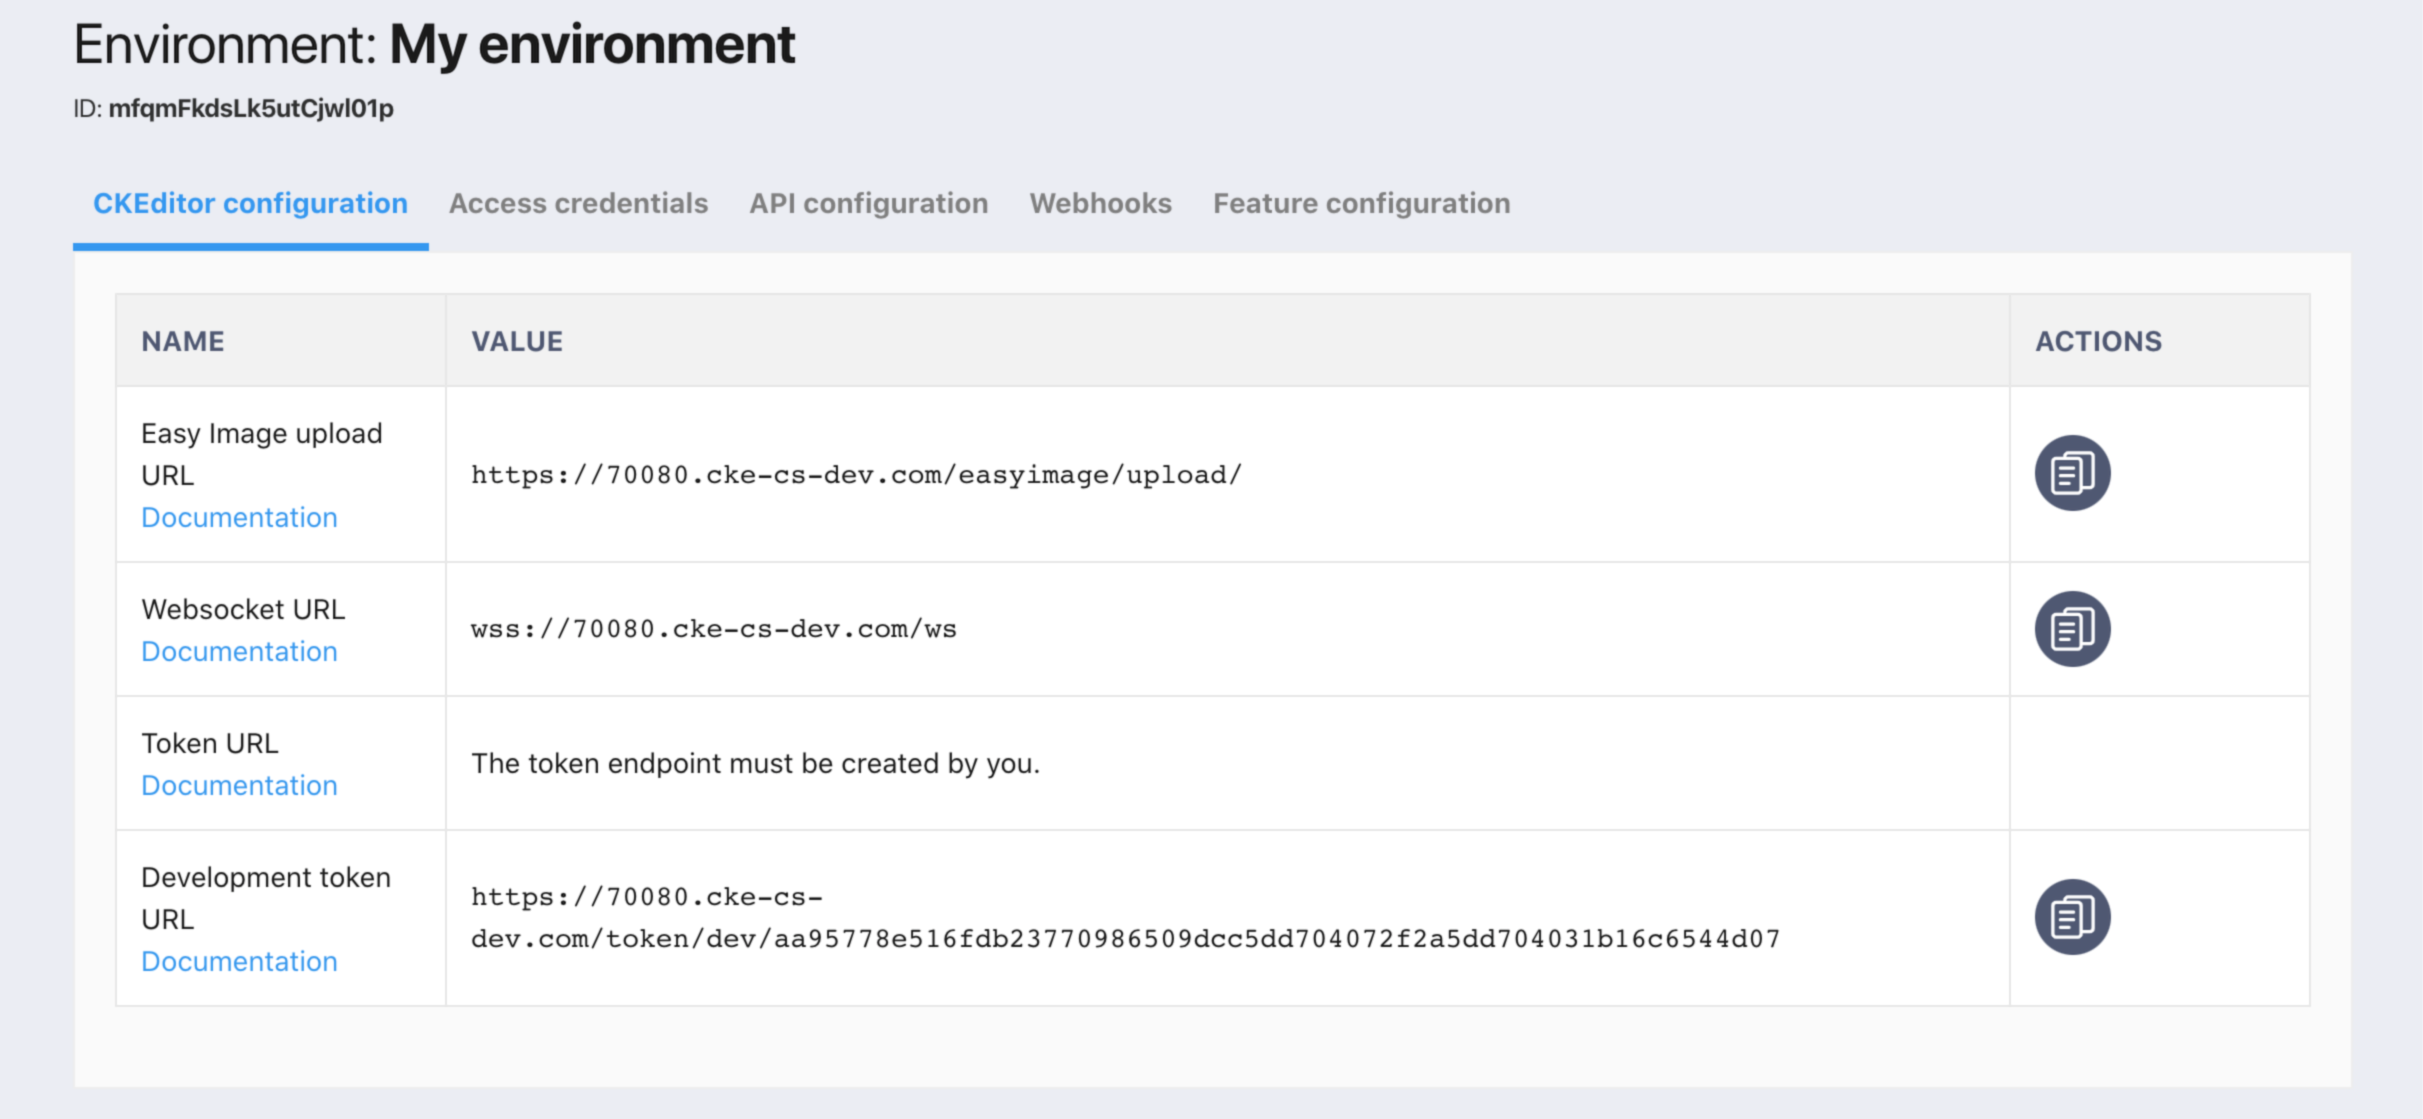
If you are just starting, you may use the development token endpoint URL which is available out of the box and requires no coding on your side. The URL of the development token endpoint can be obtained easily in three simple steps:
- To work with CKEditor premium features like real-time collaboration, exports or import, you need to create an environment. Environments allow you to create access credentials, manage webhooks, configure features and connect to CKEditor Cloud Services. You may have more than one to serve separate instances or integrations. From the list the environments choose the one that you want to manage.
Please refer to the the environment management guide if needed.
- The development token URL will show up in the “Development token URL” section:
To write your own security token endpoint, you need to create access credentials for the selected environment by going to the “Access credentials” tab and clicking the “Create a new access key” button.
Read more in the Creating access credentials section of the Environments management guide.
To install the plugin into your WYSIWYG editor, use the online builder to generate a custom CKEditor 5 build with the plugin enabled. Alternatively, refer to the installation guide in the plugin documentation to do it on your own.
Configure the plugin using the token generated earlier, pasting the link in the configuration (see CloudServicesConfig):
ClassicEditor
    .create( {
        // ...
        exportWord: {
            tokenUrl: 'https://example.com/cs-token-endpoint',
        }
    } )
    .then( ... )
    .catch( ... );
This is all. At this point, the export to Word feature will be automatically enabled in your application.
Refer to the CKEditor 5 export to Word guide if you need more information on integrating Export to Word with your WYSIWYG editor!