How to integrate ChatGPT with CKEditor 5
6min read
|Enhancing productivity with AI tools is no longer optional — it’s essential. For content creators, toggling between multiple tabs to access AI functionalities can be inefficient and distracting. The solution? Embedding AI directly within your tools, particularly your rich-text editor, to simplify content creation and editing.
Imagine leveraging advanced AI models, such as OpenAI GPT-4, that are seamlessly integrated into your environment. This approach increases productivity and significantly enhances the user experience by eliminating interruptions.
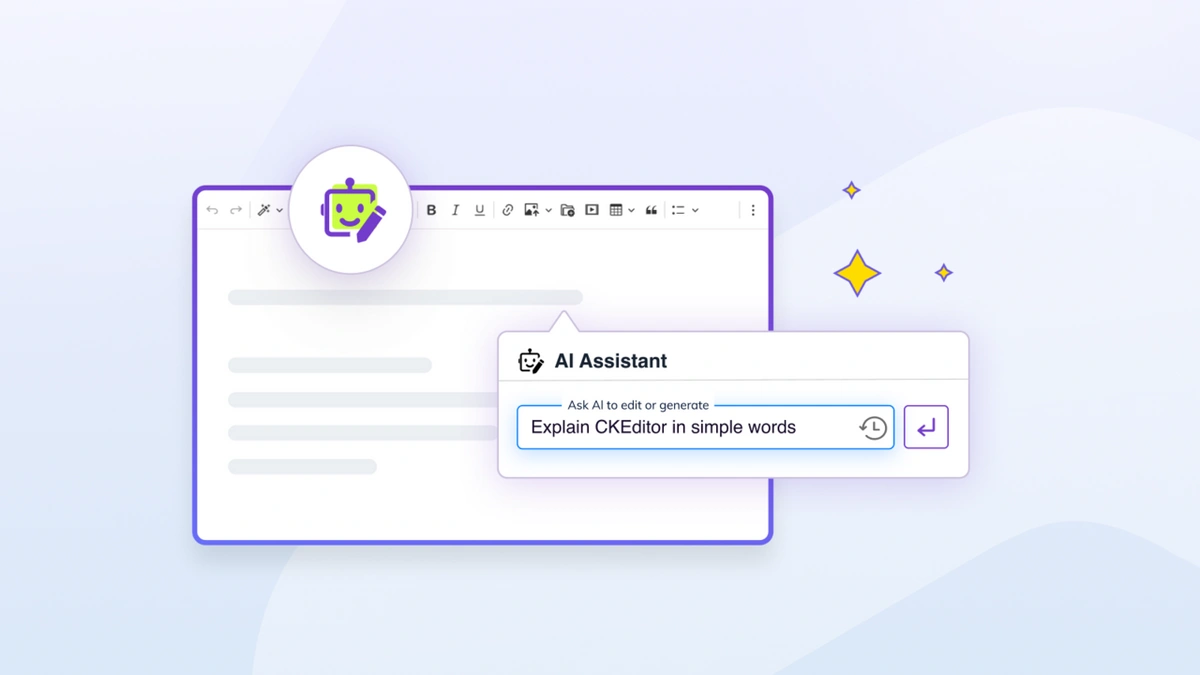
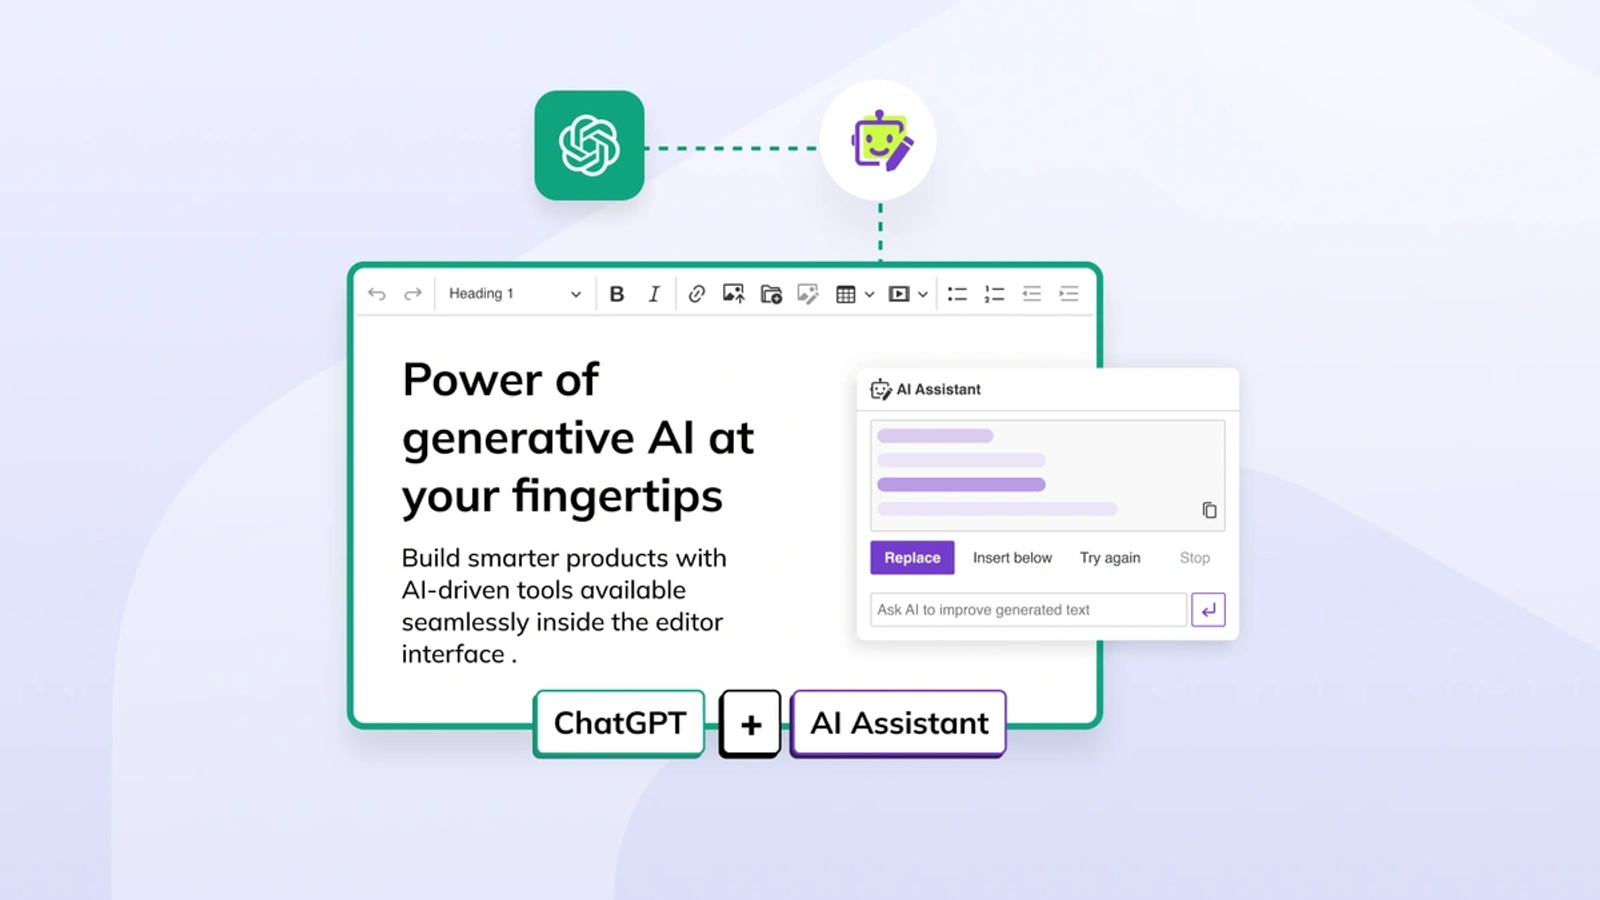
With CKEditor 5, the AI Assistant plugin brings powerful AI capabilities directly into your editor. This plugin offers a chat interface and tailored, pre-configured prompts to supercharge your workflow. You can accomplish everything without leaving your editor, including text editing, grammar correction, tone adjustments, or content summarization.
By integrating AI directly into CKEditor 5, you are able to improve your content creation process, complete with advanced data processing and content generation — all with a single plugin.
Understanding AI and ChatGPT
What Is AI and Generative AI?
In general Artificial Intelligence simulates human intelligence, enabling systems to perform tasks such as visual perception, speech recognition, decision-making, and language translation.
Generative AI is a subset of AI that focuses on creating new content. It generates original text, images, music, and more by leveraging complex algorithms to produce content indistinguishable from human-created material.
What Is OpenAI and ChatGPT?
OpenAI is an AI research company known for developing advanced AI models and ensuring Artificial General Intelligence (AGI) benefits humanity.
GPT-4 is a language model, created by OpenAI, fine-tuned for generating human-like text. It powers various applications, enabling conversational interactions, answering questions, and generating content like essays and emails. OpenAI provides an API that software can use to integrate ChatGPT’s capabilities.
Prerequisites for Integrating ChatGPT with CKEditor 5
Before you can start using ChatGPT in CKEditor 5, you’ll need an OpenAI API key and a CKEditor Commercial License. Here’s how to get them:
OpenAI API Key: Required to access AI models via OpenAI's API. Obtain it from the OpenAI API page.
CKEditor 5 Commercial License: The AI Assistant plugin is available for free as part of the CKEditor free trial. To obtain a license key to use for the next part of this article, sign up for a free trial.
Once your free trial has ended, the AI Assistant will be available as a premium feature with a paid subscription.
Setting Up the AI Assistant in CKEditor 5
Using the CKEditor 5 Builder
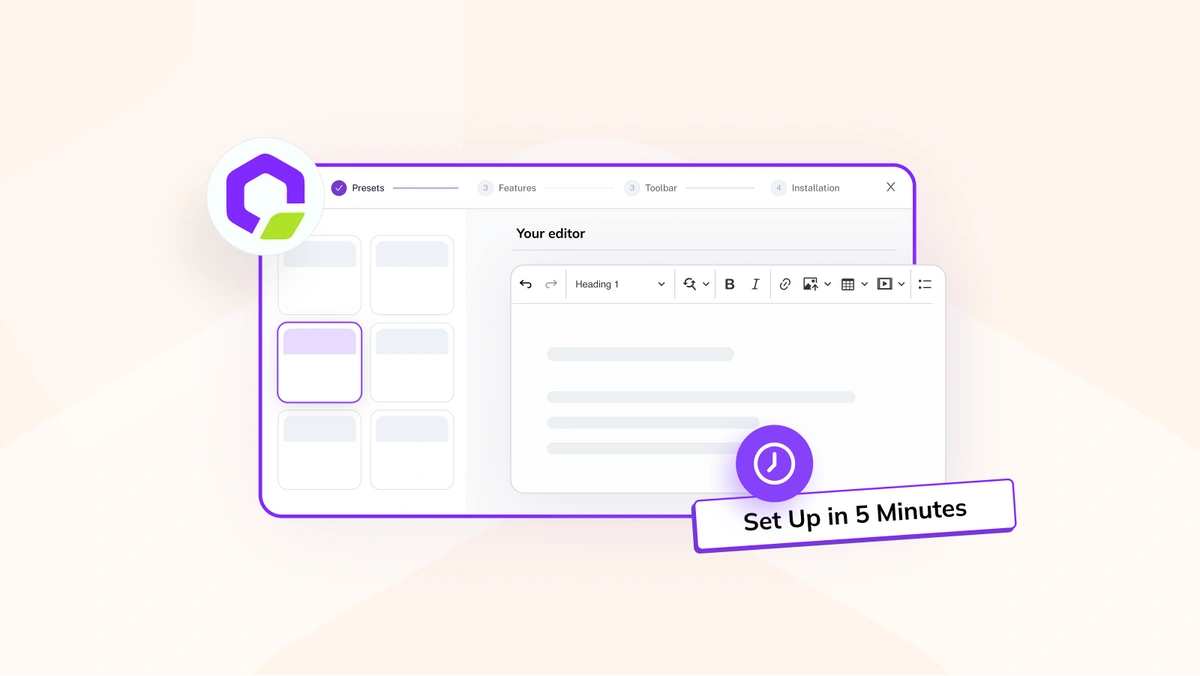
The simplest way to integrate the AI Assistant plugin is by using the CKEditor 5 Builder. This tool lets you easily create a custom CKEditor 5 build with all required plugins.
Step-by-Step Installation
Visit the CKEditor 5 Builder: Access the Builder to create a custom build.
Select a Preset: Choose a preset like Classic Editor or select one where the AI Assistant plugin is pre-configured, such as:
Collaborative Document Editor
Collaborative Article Editor
Notion-like Editor
Microeditor
Choose Plugins: If your preset doesn’t include the AI Assistant plugin, manually add it. Search for "AI Assistant" to verify if it’s selected. If not, mark the checkbox next to the search result.
Configure the Toolbar: Select a toolbar configuration suitable for your project.
Generate the Build: After selecting plugins, generate the project. During this last step of the process, you can obtain your CKEditor license key by clicking the Sign up for trial button, which allows easy authentication. Once authenticated, Builder will propagate the trial keys for you. Choose your framework and download the self-hosted project or copy code snippets for integration.
Configure Your API Key and License
The CKEditor Builder generates the necessary code. The first thing to look for is the import of the required plugins. By default, Builder generates the code for OpenAI as the provider.
import { AIAssistant, OpenAITextAdapter } from 'ckeditor5-premium-features';CKEditor provides integrations for other providers as well. See documentation below:
The next important part is the set of constant variables for plugins to function.
const LICENSE_KEY = '<YOUR_LICENSE_KEY>';
const AI_API_KEY = '<YOUR_AI_API_URL>';
Let’s review what are these for:
-
License key - since the AI plugin is a premium CKEditor feature, you need to add your valid CKEditor license key.
-
AI API key - this key can be found in your OpenAI dashboard and is essential to perform API requests to the AI provider.
The last part of the code that is important for the AI plugin is the configuration of the plugin:
ai: {
	openAI: {
		requestHeaders: {
			Authorization: 'Bearer ' + AI_API_KEY
		}
	}
},
Here, we configure a couple of things:
-
Declaring that we are using the OpenAI integration using the
openAIobject. -
Passing the
AI_API_KEYto theAuthorizationproperty which exists within therequestHeadersobject. -
Review the AI Assistant integration documentation for additional options.
If you want to test the plugin locally without using it in production, using the API key directly in the editor config is safe. In that scenario, you only need to pass the token and specify optional request parameters. However, this approach is not recommended for production-ready applications. We will cover how to improve your setup in the next section of this article.
Common request parameters are:
-
model- the LLM you want to use -
max_completion_tokens- each model has a corresponding token amount. That value can be found in the OpenAI documentation and specified for each model
Additional parameters can be added as well. For example, streaming. You can modify the output behavior, whether you want to see a partially completed response or receive the response only when the complete response is generated. You can configure that using the stream property that accepts the boolean value like so:
ai: {
	openAI: {
		requestHeaders: {
			Authorization: 'Bearer ' + AI_API_KEY
		},
		requestParameters: {
			model: 'chatgpt-4o-latest',
			max_tokens: 4000,
			stream: false
		}
	},
},
See the OpenAI reference to learn what parameters you can use and how they affect the responses.
Adding Custom Commands
With the plugin, you get not only the chat interface that we are used to but also AI commands. AI commands are pre-defined prompts that could be used to perform repetitive actions and reduce the amount of manual effort for tasks like improving writing or changing the tone of voice. All of the available commands are organized into the following logical groups:
-
Edit or review
-
Generate from selection
-
Change tone
-
Change style
-
Translate
The complete list of the commands that are available out of the box can be found in the documentation.
However, you are not limited to these commands and groups, and you can include your custom commands in the list. First you need to define the group. Let’s extend our existing configuration to include our custom group:
ai: {
	openAI: {
		requestHeaders: {
			Authorization: 'Bearer ' + AI_API_KEY
		},
		requestParameters: {
			model: 'chatgpt-4o-latest',
			max_tokens: 4000,
		}
	},
	aiAssistant: {
		extraCommandGroups: [
			groupId: 'contentEnhancements',
			groupLabel: 'Content Enhancements',
			commands: [

			]
	    ]
	}
},
We introduce an entirely new group of AI commands by specifying groupId and groupLabel. Now we can list new commands within this group:
ai: {
	openAI: {
		requestHeaders: {
			Authorization: 'Bearer ' + AI_API_KEY
		},
		requestParameters: {
			model: 'chatgpt-4o-latest',
			max_tokens: 4000,
		}
	},
	aiAssistant: {
		extraCommandGroups: [
			{
				groupId: 'contentEnhancements',
				groupLabel: 'Content Enhancements',
				commands: [
					{
						id: 'generateFAQs',
						label: 'Generate FAQs',
						prompt: 'Analyze the provided text and generate a list of potential frequently asked questions (FAQs) with concise and informative answers based on the content.'
					}
				]
			}
	    ]
	}
},
Now, we have introduced a new custom command to our newly created group, which generates FAQs based on the selected text.
It’s important to mention that you are not limited by the amount of commands or groups in your setup. You can also remove the predefined commands, if you wish to do so.
Secure Configuration for Production
For production-ready applications, as mentioned earlier, you shouldn’t use the AI API key on the front-end side of your application. That’s why creating a back-end endpoint that will communicate with OpenAI is recommended instead of connecting directly from your application’s client and exposing your OpenAI API key.
You can implement the endpoint as a proxy service. The service will get the requests from the editor, add authorization headers, and pass them to the AI service. Then, you should pass all responses back to the editor.
Follow these steps for secure API configuration, as outlined in this guide:
Set up a Proxy Server: Create a simple server-side application (e.g., using Node.js or Python) to handle requests to the OpenAI API. The API key will be securely stored on the server.
Route Requests: Configure your CKEditor instance to send requests to your back-end endpoint.
Secure Environment Variables: Store sensitive data, such as the API key, in environment variables on your server. This ensures the API key is not exposed in client-side code.
Using a proxy ensures that your API key remains safe and your application is less vulnerable to security breaches.
Here’s the final snippet including the changes discussed above:
ai: {
	openAI: {
        apiUrl: 'https://url.to.your.application/ai'
		requestParameters: {
			model: 'chatgpt-4o-latest',
			max_tokens: 4000,
		}
	},
	aiAssistant: {
		extraCommandGroups: [
			{
				groupId: 'contentEnhancements',
				groupLabel: 'Content Enhancements',
				commands: [
					{
						id: 'generateFAQs',
						label: 'Generate FAQs',
						prompt: 'Analyze the provided text and generate a list of potential frequently asked questions (FAQs) with concise and informative answers based on the content.'
					}
				]
			}
	    ]
	}
},What’s Next?
We’re continuously improving the AI Assistant. We value your feedback, so feel free to share your thoughts with us. Stay tuned for more updates that will further enhance your content creation process using CKEditor!
Tags: