
Real-time collaboration features - quick start
This article aims to get you up and running with the real-time collaboration with tracks changes and comments service in your CKEditor Premium Features free trial.
Follow the steps below:
- Subscribe to the CKEditor Premium Features 30-day free trial.
- Generate the development token endpoint in the CKEditor Ecosystem customer dashboard.
- Configure CKEditor 5.
# Subscribe to the CKEditor Premium Features free trial
Create an account by signing up for CKEditor Premium Features free trial. After signing up, you will receive access to the customer dashboard (CKEditor Ecosystem dashboard).
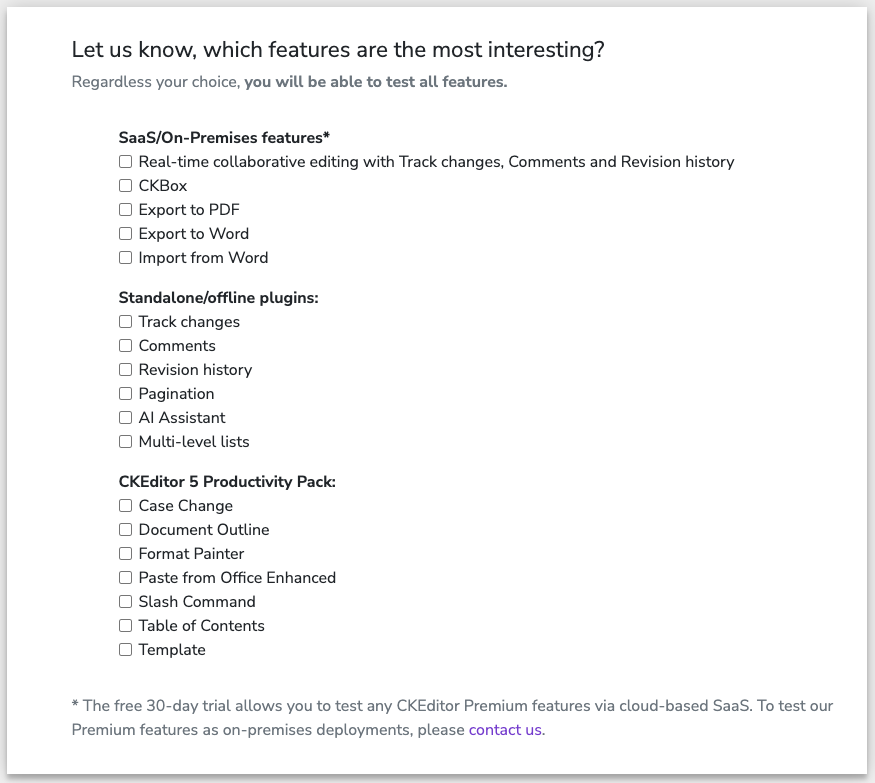
You will be asked to check the features you are most interested in.
Checking these features does not affect the trial bundle contents — all the features will be available regardless of the choice. We just want to know your needs better.
# Log in to the CKEditor Ecosystem dashboard
Log in to the CKEditor Ecosystem dashboard. You will receive a confirmation email and will be asked to create a password for your account. Keep it safe.
# Account dashboard
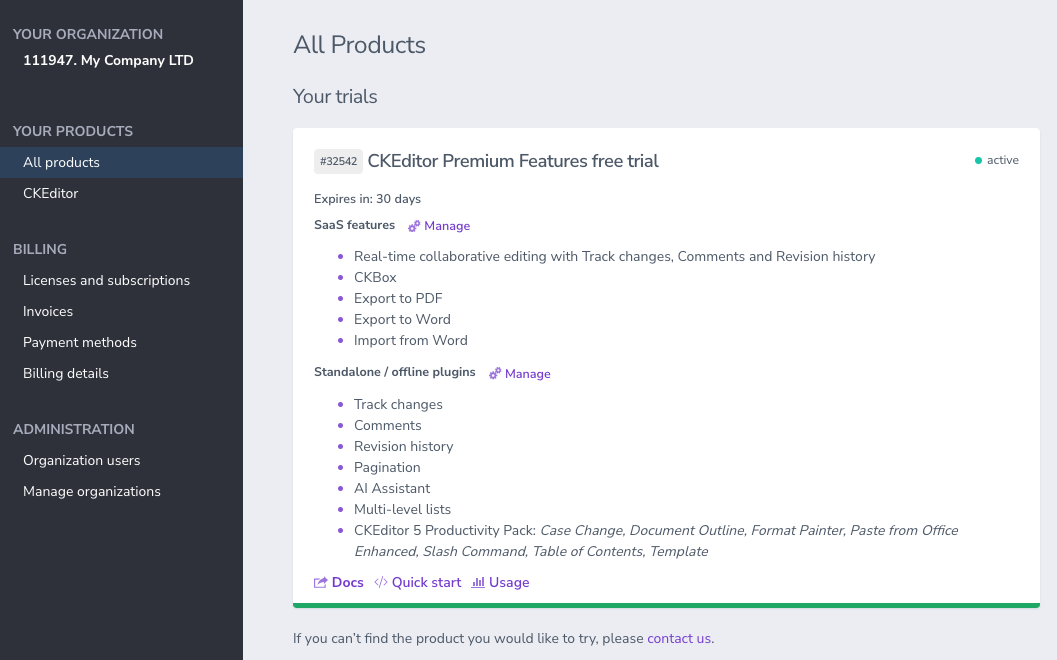
After logging in, click “CKEditor” under the “Your products” header on the left. You will see the subscription parameters overview together with the management area below.
# Creating token endpoint
Before you can use your newly activated CKEditor Premium Features free trials bundle, you first need to create a security token endpoint in your application. The role of this endpoint is to securely authorize end users of your application to use CKEditor Cloud Services only if they should have access to the content or action they are requesting.
# Development token endpoint (fast and easy)
If you are just starting, you may use the development token endpoint URL which is available out of the box and requires no coding on your side. The URL of the development token endpoint can be obtained easily in three simple steps:
-
To work with CKEditor Premium Features like real-time collaboration, you need to create an environment. Environments allow you to create access credentials, manage webhooks, configure features and connect to CKEditor Cloud Services. You may have more than one environment to serve separate instances or integrations. From the list of environments choose the one that you want to manage.
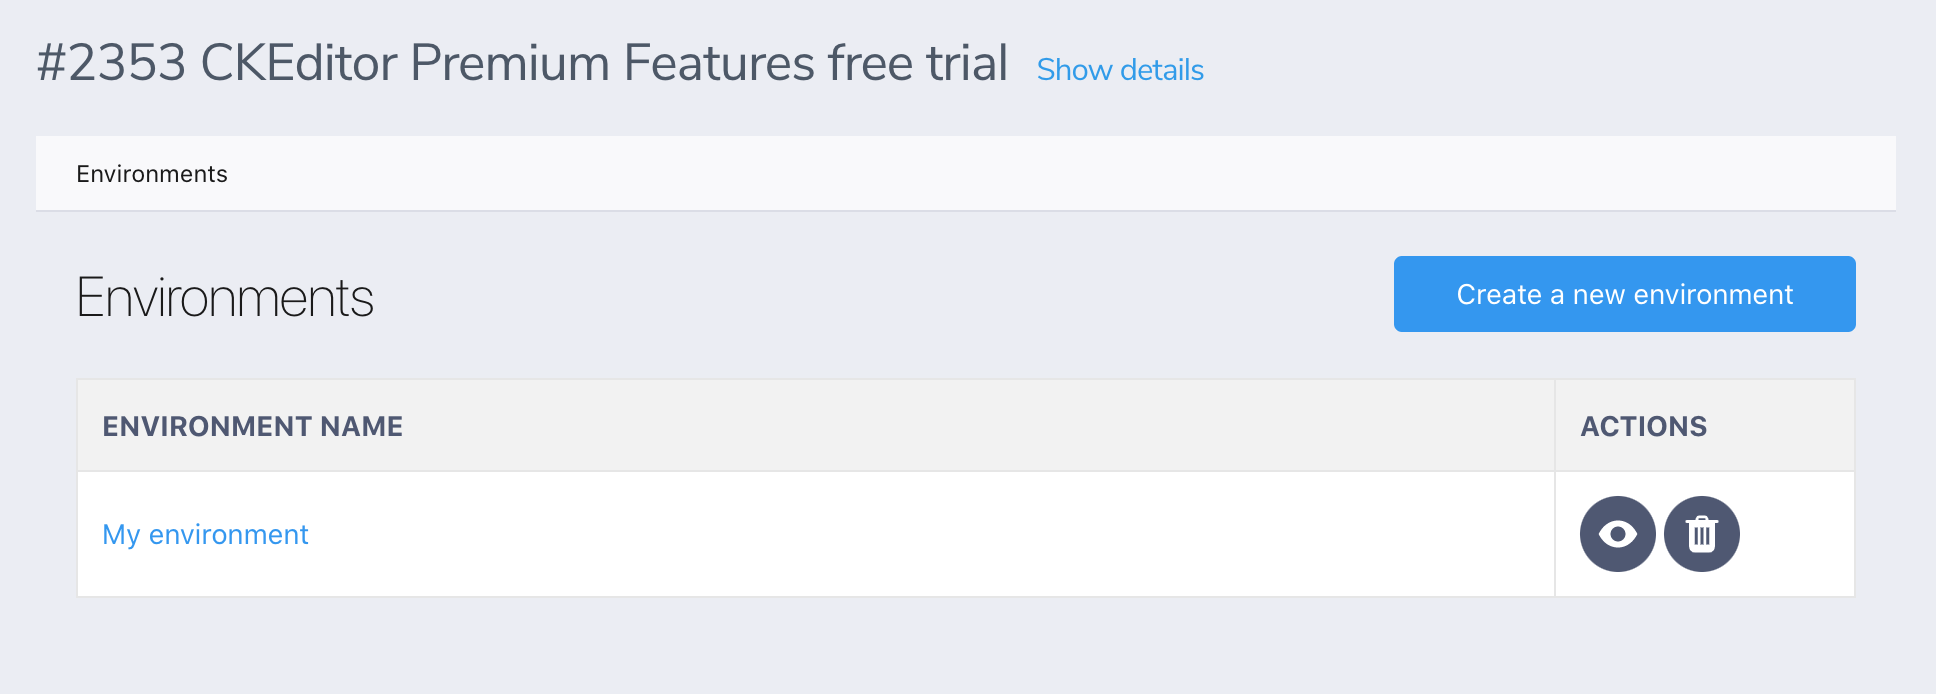
Please refer to the the environment management guide if needed.
-
After choosing the environment, press the “Generate” button in the “Development token URL” section of the “CKEditor configuration” tab:

The development token URL will show up in the “Development token URL” section:
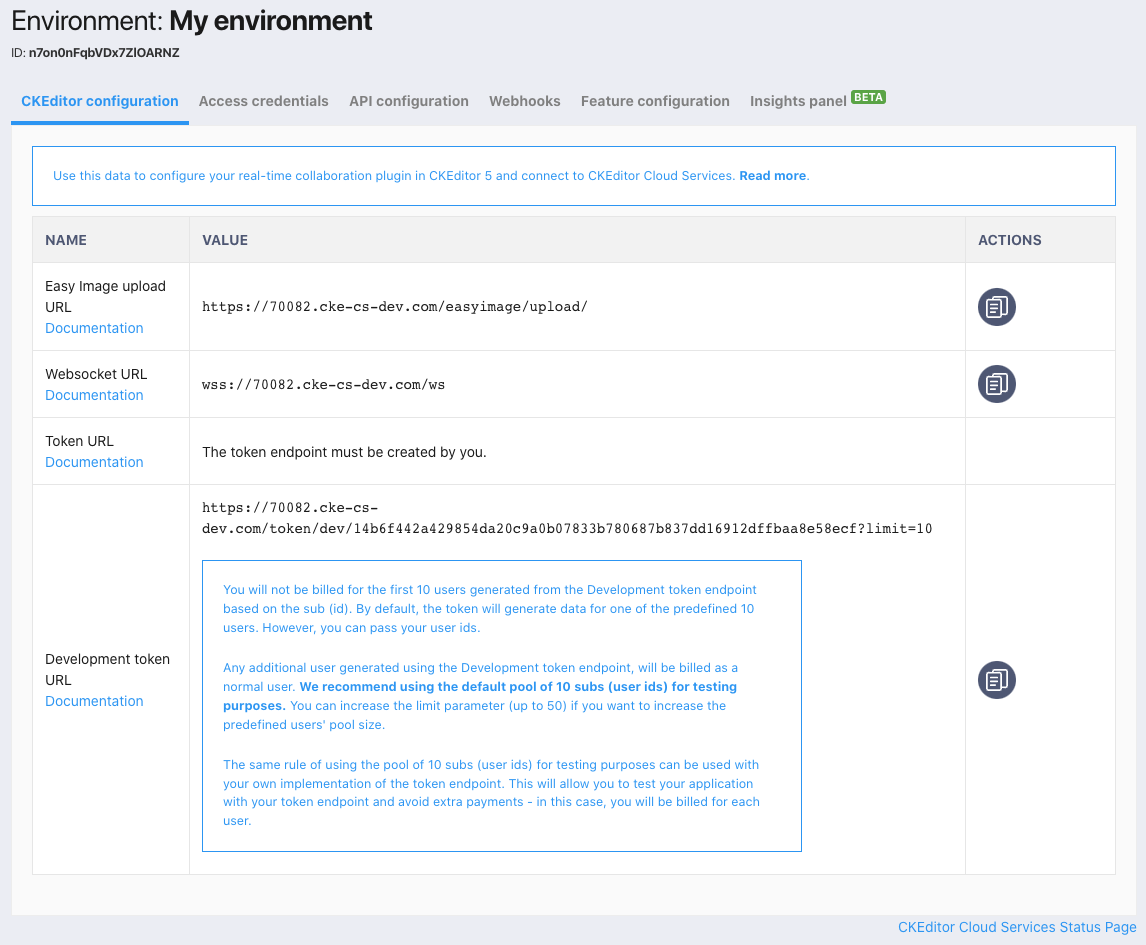
The development token endpoint is a special endpoint to help you in getting started with CKEditor Cloud Services. It offers unrestricted, full access to the service and will expire 30 days after being used for the first time. You should not use it on production. Anyone knowing this URL will have full access to the associated environment.
# Simulating random users
The development token URL will generate random user names by default. If you would like to specify user details, you may pass them in the query string using:
user.name– The full name.user.id– The unique ID of the user in your system.user.email(Optional) – The email address.user.avatar(Optional) – The URL to an avatar.
So if your token URL is https://17717-dev.cke-cs-dev.com/token/dev/XXX then you may connect to CKEditor Cloud Services as user Jane Doe with the ID 13 using the customized development token URL: https://17717-dev.cke-cs-dev.com/token/dev/XXX?user.name=Jane%20Doe&user.id=13
# Writing your token endpoint (advanced users)
Skip this step if you use the development token endpoint.
To write your own security token endpoint, you need to create access credentials for the selected environment by going to the “Access credentials” tab and clicking the “Create a new access key” button.
Read more in the Creating access credentials section of the Environments management guide.
# Enabling the feature in the editor
To configure your CKEditor installation to use real-time collaboration, you need to provide the security token endpoint (token URL) of your choice.
If you want to use the Easy Image feature, which is one of the possible options for image management, you need to utilize the upload URL, too. Setting this option now will make the Easy Image feature work instantly without the need for further configuration on its part, making it easy to start working.
These values are both found in the dashboard in the environment configuration section.
The following configuration options need to be set in your CKEditor 5 configuration:
Note: Apart from setting the configuration options above, make sure that your CKEditor 5 build has the real-time collaboration feature plugins enabled. See the Real-time collaboration feature integration guide for more details.
# Customizing your collaborative WYSIWYG editor experience
The real-time collaboration feature comes with a variety of customization options and approaches on how to present user interaction.
The following documentation sections will help you create a custom user experience that will match the needs of your users:
- Users in real-time collaboration – Explains the user roles, user presence list, and theme customization.
- Annotations display mode – Explains how to set up the narrow or wide sidebar for comments and suggestions or show the annotations inline.
- Customization of annotations – Explains how to change the look of comments, suggestions, and threads by customizing the theme, creating a custom template, or a custom view.