

 Users in real-time collaboration
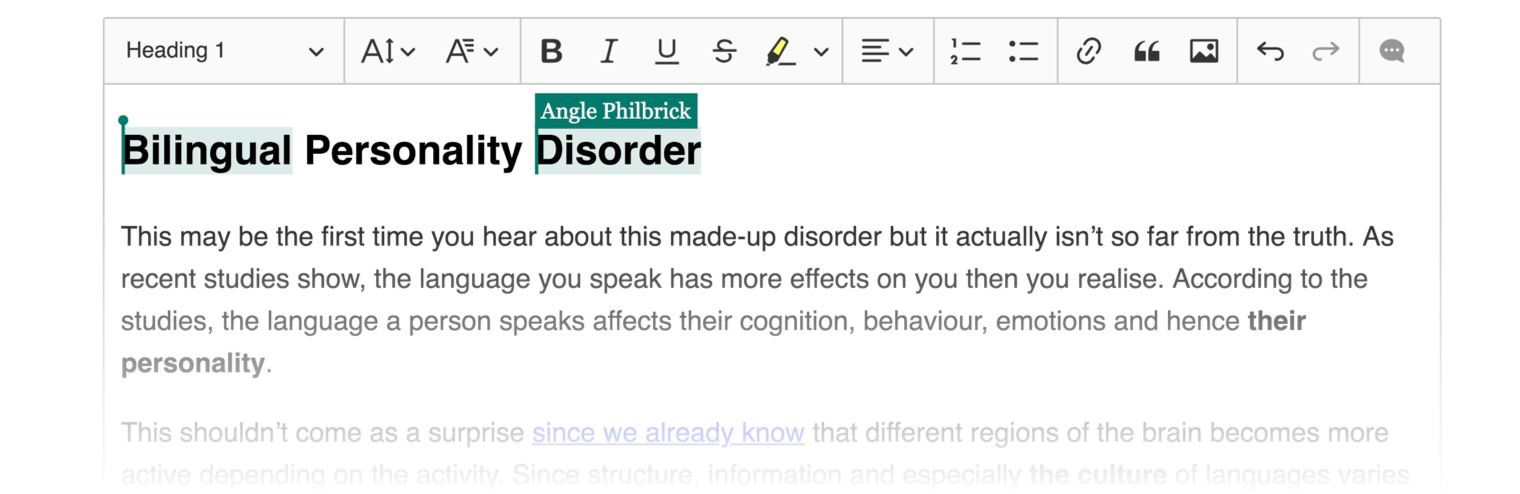
When you enable the real-time collaborative editing plugin, the selections that collaborating users make should automatically be displayed to all of them. No additional configuration is needed.

However, there are even more user features that can be enabled in real-time collaboration. The package contains an easy-to-install plugin to show the list of connected users and the sessions API to observe this collection.
# User presence list
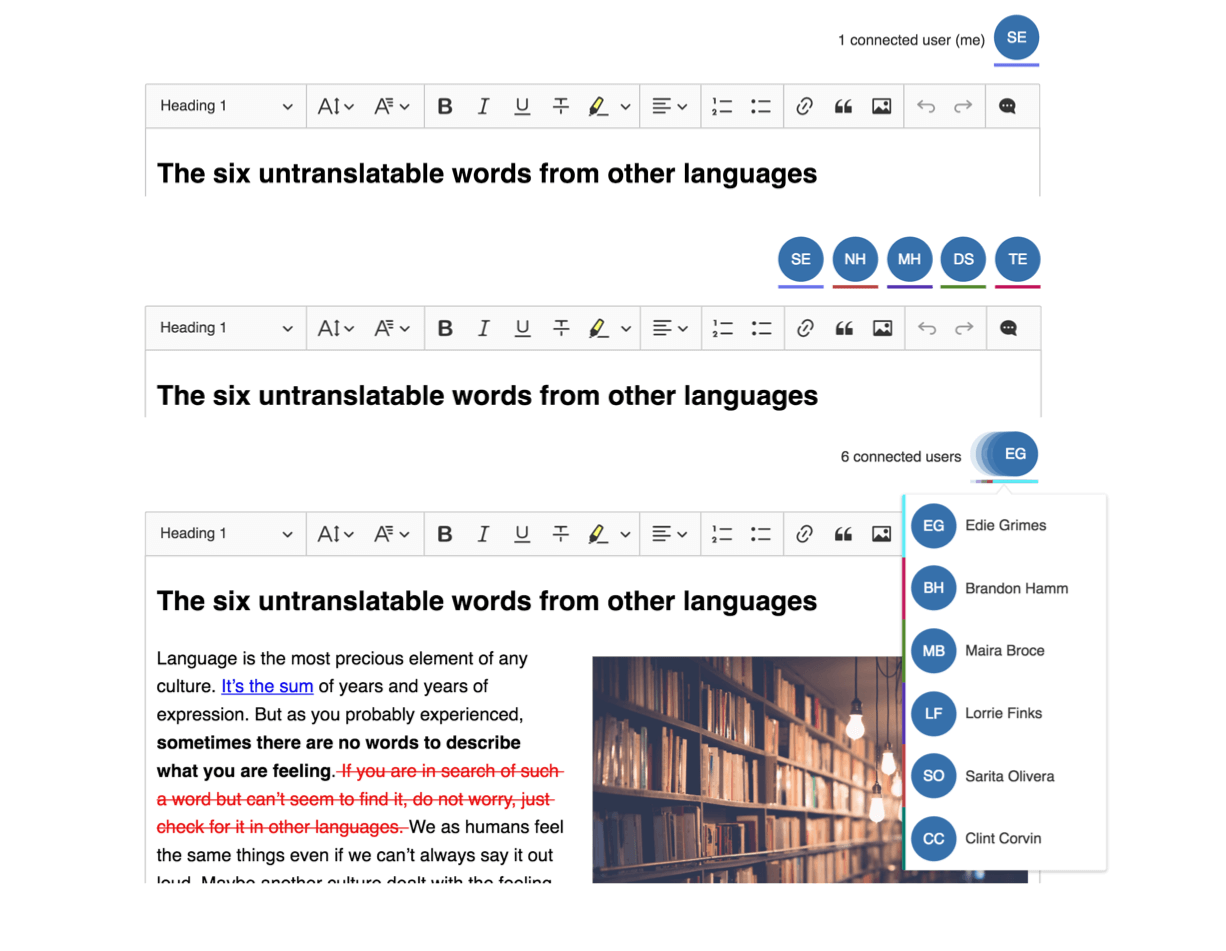
The PresenceList plugin provides a UI which displays all users that are currently connected to the edited document. The users are displayed as a row of avatars. The information about the users is provided by CKEditor Cloud Services.
The presence list UI collapses to a dropdown if six or more users are connected.
# Installation and configuration
The presence list feature requires the RealTimeCollaborativeEditing plugin to work.
This tutorial starts where the Real-time collaborative editing guide ends, so if you do not have a working collaboration setup ready yet, go there first.
The presence list feature also needs the PresenceList plugin to be included in your build. If you are using the build from the quick start guide, it is already included but if you are creating your custom build in any other way, you need to include it manually now.
When you have the PresenceList plugin included in your custom build, you can add the HTML structure and initialize the editor.
Note that you do not need to manually import the RealTimeCollaborativeEditing plugin anymore. The presence list plugin requires it and will enable it automatically. All you need to do is add the PresenceList plugin to the list of included plugins.
The plugin configuration consists of just one, required option: container. It is a DOM element that will hold the feature’s UI.
This is what the updated sample from the Real-time collaborative editing tutorial with presence list added looks like:
<!DOCTYPE html>
<html>
    <head>
        <meta charset="utf-8">
        <title>CKEditor 5 Collaboration – Hello World!</title>
    </head>

    <div id="presence-list-container"></div>

    <div id="editor">
        <p>Let's edit this together!</p>
    </div>

    <script src="../build/ckeditor.js"></script>
    <script>
        ClassicEditor.create( document.querySelector( '#editor' ), {
            toolbar: [ 'bold', 'italic', 'imageUpload' ],
            plugins: [ 'Essentials', 'Paragraph', 'Bold', 'Italic', 'EasyImage', 'RealTimeCollaborativeEditing', 'PresenceList' ],
            cloudServices: {
                // PROVIDE CORRECT VALUES HERE:
                tokenUrl: 'https://example.com/cs-token-endpoint',
                uploadUrl: 'https://your-organization-id.cke-cs.com/easyimage/upload/',
                webSocketUrl: 'your-organization-id.cke-cs.com/ws/',
                documentId: 'collaboration'
            },
            presenceList: {
                container: document.querySelector( '#presence-list-container' )
            }
        } );
    </script>
</html>
This is all. You should now see the user presence list above the rich-text editor.
# Theme customization
Like in the whole CKEditor 5 Ecosystem PostCSS is used to handle styles with the power of CSS Variables. The user presence list feature also uses it to make it possible to easily customize its appearance.
By default a presence list has two states with a dedicated design:
- Avatars displayed inline in the container (with fewer than 5 users).
- A dropdown panel for more than 5 users connected.
# Example of presence list customization with CSS Variables
With Inheritance of CSS Variables you can change the default values of variables. Adding these properties to your .css file or into the <head> section of the web page will override this feature’s design.
/* Change the user presence list hue to greenish. */
.ck.ck-presence-list {
    --ck-user-avatar-background: #215a11;
}

.ck.ck-presence-list__balloon {
    /* Make a smaller user avatar in the dropdown list. */
    --ck-user-avatar-size: 25px;

    --ck-user-avatar-background: #215a11;
    --ck-color-presence-list-dropdown-background: #d0ecd2;
    --ck-color-presence-list-dropdown-arrow-border: #d0ecd2;
}

.ck.ck-presence-list__balloon .ck.ck-presence-list__dropdown-list-wrapper {
    /* Reduce the minimum and maximum width of the dropdown. */
    --ck-presence-list-dropdown-list-min-width: 100px;
    --ck-presence-list-dropdown-list-max-width: 150px;
}
Check out the color sheet for the full list of customizable colors. You can also browse other files with CSS Variables in CKEditor 5.
If you want to change the color assigned to users, refer to the Real-time collaborative editing guide.
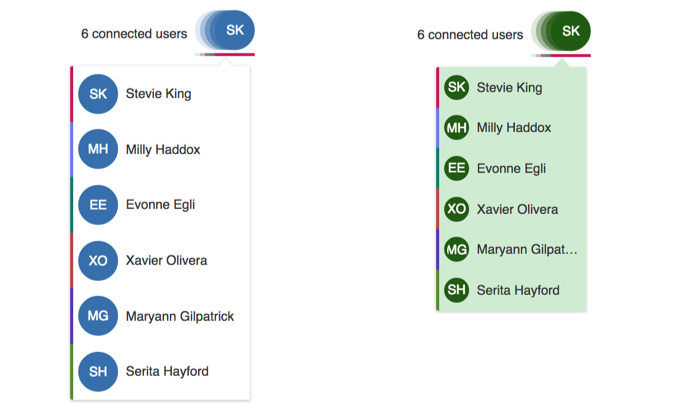
The examples above will generate the following presence list designs:
# Sessions
The presence list is a visualization of user sessions. This plugins stores the information about users and session connected to the rich-text editor. This distinguishes it from the users plugin which may also keep information about the users who are not connected to the editor at the moment, for instance the comment authors.
The Sessions plugin provides two collections: currently connected users and their sessions. It also contains a few methods for getting individual users and sessions.
The sessions collection is very similar to the users collection, and the difference between them can be easily explained with an example. If a single user (with the same user ID) opens the same document in two browsers or two browser tabs, they will create two sessions but only one user will be connected. You will be able to see two selections on the same document, both in the same color, but only a single user in the user presence list.
Note that there might be multiple references to the same user in the sessions collection. If you connect the same user to the same document in another tab, add will be fired on the sessions collection, but not on the connectedUsers collection.
If the CollaborativeEditing plugin is loaded, the Sessions plugin is loaded, too, and is available as:
const sessionsPlugin = editor.plugins.get( 'Sessions' );
The API of this plugin looks as follows:
/**
 * The list of all sessions connected to the document.
 * A session is represented by an object with the
 * following properties:
 * * `id` - A unique session ID.
 * * `user` - A reference to the user.
 *
 * @type {Collection}
 */
get sessions() {}

/**
 * The list of all collaborating users connected to the document.
 *
 * @type {Collection}
 */
get connectedUsers() {}

/**
 * A property with the local user's session ID.
 *
 * @type {String}
 */
get mySessionId() {}

/**
 * Returns a reference to the user that created a session with
 * the given ID.
 *
 * @param {String} sessionId The session ID for which the
 * user should be returned.
 * @returns {Object}
 */
getUserBySessionId( sessionId ) {}

/**
 * Returns all sessions created by the given user.
 *
 * @param {Object} user The user object.
 * @returns {Array.<Object>} Returns the list of user sessions.
 */
getUserSessions( user ) {}
Check the Collection API to see how to use the #sessions and #connectedUsers collections.